Patients
The Patient workspace is used to handle patients.
Current Patient Alerts
This screen is displayed if you press the View All button on the patient information panel to display the patient's current alerts.
The left hand side of the window displays the alert names.
Selecting an alert displays its details on the right.
For an explanation of the alert fields, see Create/Edit Alerts.
Click:
- Close to close the window
- Edit to edit the selected alert
Information
This screen displays information about the current patient - or if there is no current patient, a Select button allowing you to select a patient, and a New button to create one.
With a current patient, the screen is as follows:

The screen areas are as follows:
(1) the patient information panel - the fields here are as follows:
name/sex - this provides a link back to the patient's medical records, ie pressing it on the Information screen, takes you to the Medical Records screen
species - the patient's species
breed - the patient's breed
Reminders - this is present if there are active reminders or estimates. See Administration|Types|Reminder for an explanation of how the colours are set
Age - the patient's age
Birth Date - the patient's date of birth
Weight - the patient's last reported weight
Microchip - this is present if the patient has a microchip. Note that this example shows a 15 digit ISO number in 99999999 9999999 format. Note also that if the patient has multiple microchips, then only the last one added will be shown. (However, the description area - see (2) below, will show all the microchips.)
Referral Vet - the referral vet and, if applicable, their practice. This display is controlled by the Show Referrals setting for the Practice.
Patient Alerts - if there are any, these are shown - you can click on the alert to display its details, or if there are more than 4 and 'More...' is displayed, press the View All button to display all the alerts
(2) the select area - this shows the patient's name, sex, colour, breed, and if there are any, the microchip numbers, and one button:
Select - pressing this brings up the Select screen to let you select another patient
(3) the header area - for the descriptions of these fields, click here
(4) the tabs area. The tabs are as follows:
- Customers - displays the customer relationships
- Identities - displays any identities (microchips, aliases, rabies tags etc) that the patient has
- Referrals - displays who the patient was referred from and to
- Discounts - displays discounts the patient receives
- Appointments - displays appointments for the patient
Click on an appointment to launch Workflow - Scheduling. - Tasks - displays tasks for the patient
Click on a task to launch Workflow - Work Lists.
(5) the bottom area. The buttons are as follows:
New - create a new patient
Edit - edit the current patient - note that you will be editing the compete patient record and all the tab items
Delete - delete the current patient - a confirmation window will appear
Check In - checks the patient in - this performs the same actions as pressing the Check In button on the Workflow|Scheduling screen - ie it allows you to check in a patient who does not have an appointment
Merge - merge another patient record into this one - a confirmation window will appear, and if you proceed, a select screen to let you select the patient to be merged in. Note that header information (name, title, etc) of the current patient is retained, but the tab items (customers, identities, etc) are simply combined, and you will need to edit the resulting patient record to delete the unwanted parts. If either patient is desexed or deceased, this will be reflected in the merged patient.
Note that the Merge button will not be displayed unless the user is a member of the Administrator category - see Concepts|Users.
Confirm Delete
When you press the Delete button on the Patients|Information screen, a confirmation window will appear.
If the pet cannot be deleted because it is in use (normally because it has an owner), the text will be "xxxx has relationships and cannot be deleted. Do you want to deactivate it instead?"(where xxx is the name of the pet you are trying to delete). Pressing OK will unset its Active flag, Cancel will abort.
If it is in use but can be deleted (because it has no owner), the text will be "xxxx has relationships. Are you sure want to delete? This operation cannot be undone." (where xxx is the name of the pet you are trying to delete). Pressing OK will delete the pet as well as all references to it, Cancel will abort.
If the pet is not in use and can be deleted, the window will simply ask you to confirm the delete. Press OK to confirm or Cancel to abort. (This will only occur if the pet has no breed, taxes, discounts, etc set.)
Confirm Merge
When you press the Merge button on the Patients|Information screen, this confirmation window will appear.
Press OK to merge the patients or Cancel to abort.
Create/Edit
This screen is used to create or edit the patient record.

The fields in the header are as follows:
Id - the patient's ID
Name - the patient's name
Species - the species - choose from the ones available - this are set via Administration|Lookups|Species. This is a mandatory field.
Breed - the breed - choose from those available - these are set via Administration|Lookups|Breed. You can set this to None. Note that it is possible that a new patient is a breed that is not on the list. If you are not an administrator (and thus cannot add the new breed), you should set the breed to the special value 'New Breed' - as shown below, this will cause the New Breed field to be displayed so that you can enter the appropriate data. Note that in the example below, this system has a species 'Other' defined to allow for the case where the species is also new.

It is also suggested that after you have set the New Breed, and entered the patient's other details, that you call up Workflow|Messaging and send a message to the administrator saying 'need new species/breed Snake - Ball Python'. Note that the customer and new patient name will be automatically included in the message.
After the Administrator has set up the new breed, you can then go back and edit the patient to change the Breed from 'New Breed' to the correct one.
Colour - enter the colour
Sex - choose one of None, Female, Male, or Unspecified
Desexed - check the box if the patient has been desexed
Date of Birth - the patient's DOB
Age - this will display the patient's age in Patient Age Format set for the practice - see Administration|Organisation|Practice
Deceased - check the box if the patient is deceased - this will set the Deceased Date to today, and untick the Active box
Deceased Date - date of death - this cannot be in the future, and if set, the Deceased check box must also be checked and the Active box unticked. If you enter a date and there was previously none, then the Deceased box will be ticked and the Active box unticked.
Active - untick this to deactivate the patient
See also Local Procedures.
The tabs are Customers, Identities, Referrals, Discounts, and perhaps Custom Fields - these are documented below.
Note that in some cases, the tabs have a Hide Inactive xxxxx checkbox. This is present when the item being attached to the patient (ie the patient-owner, the patient-location, the referral or the discount) can be deactivated (either by unsetting its Active flag, or if its To Date is in the past). In this case the item will remain attached to the patient, but the item will not be displayed and the patient will act as though the item was not attached. You can have these inactive items displayed by unchecking the Hide Inactive xxxxx box.
The Customers tab
This tab is used to add/delete/edit a) 'Patient Owner' records and b) 'Patient Location' records.
Patient Owner - A patient can have multiple owners either at the same time (because the ownership is shared) or sequentially (because the patient passes from one owner to another).
The screen is as follows:
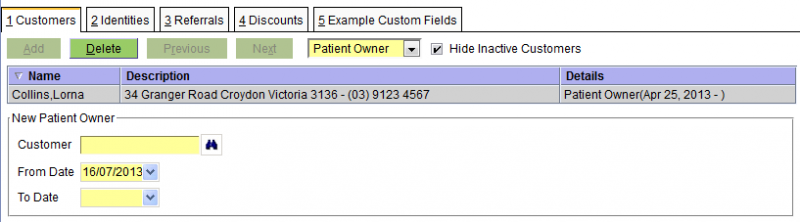
The fields are:
Customer - the name of the customer
From Date - the date from which the ownership started
To Date - the date on which it ended
Note: Although shared ownership of a patient is allowed, you need to set this up by editing the customer's patient-owner entries to add another customer. If you edit the patient's customer-owner entries you will change the ownership of the patient, ie terminate the old ownership and start a new one.
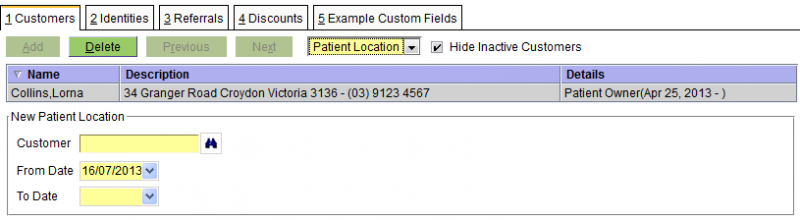
Patient Location - the screen snippet is below, but see the discussion in the customer edit page.
The Identities tab
The Identities tab is used to set the patient's identities. Patients have three types of identities, Microchip, Pet Tag, and Alias. These are discussed in this order below.

The Microchip fields are:
Microchip - the microchip number/code
Description - an optional description of what the code represents
Implant Site - the site where the microchip is implanted. [The pull-down provides the four standard implant sites. If necessary these can be expanded by modifying the entityIdentity.microchip archetype.]
Implant Date or Scan Date - the date when the microchip was implanted, or when it was last scanned
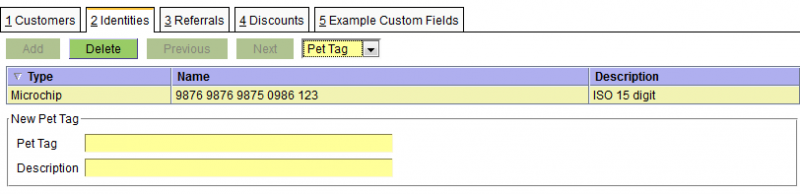
The Pet Tag fields are:
Pet Tag - the Pet Tag number/code
Description - an optional description of what the code represents

The Alias fields are:
Alias - the alias - this can be anything appropriate
Description - an optional description of what the alias represents (in the above case 23990 was the client number in the RxWorks system that this data was converted from)
You might also was to use the Alias Identify for a real alias such as the 'kennel name' BREEAMBERARGENTINA - no wonder they call him Bree for short ;-)
The Referrals tab
The Referrals tab is use to record both 'Referred To' and 'Referred From' referrals. As can be seen from the two snippets below, the fields for each are identical.


The fields are as follows:
Veterinarian - the vet - this is one of the Supplier/Vets - see Concepts|Suppliers for background. Note that if this is a new vet, then you can use the New button on the Veterinarian screen (displayed when you press the binoculars) to quickly make a new Supplier/Vet record. You can also enter the vet's practice name to get a listing of all vets in the practice.
Start Date - the start date of the referral
End Date - the end date of the referral
Reason - the reason for the referral
The Discounts tab
This tab is used to set the discounts that apply to the customer - see Concepts|Discounts for background.
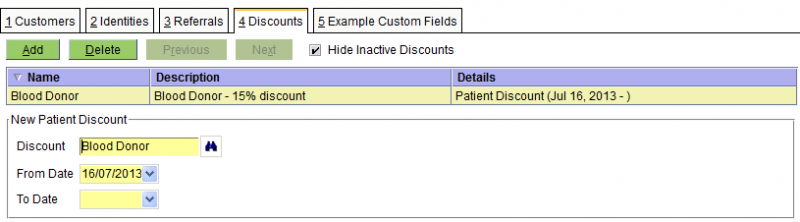
The fields are:
Discount - the discount - note that this can either be a discount, or a discount group
From Date - the date from which the discount applies
To Date - the date on which the discount ends
The Custom Fields tab(s)
See Administation|Lookups|Species for a discussion of the custom fields facility.

The fields here will depend on the specific customer fields archetype.
Select Referral Veterinarian
The Referral Veterinarian select screen is displayed whenever you are looking for a veterinarian referral when editing a patient. It works like a standard select screen, but also allows vets to be searched for by their practice name.

Insurance
This screen displays the insurance policies and claims for the current patient.

The buttons are as follows:
|
Create a new Insurance Policy |
|
Edit the policy or claim |
|
Delete the selected policy or claim. |
|
Make a new claim |
|
Submit a claim to the insurer. Once submitted, the claim cannot be changed. |
|
Pays a gap claim. |
|
Cancels the selected claim. |
|
Mark a claim as being settled by the insurer. |
|
Mark a claim as being declined by the insurer. |
|
|
Print the selected claim. |
|
|
Email the selected claim. |
Gap Claim Payment
If a claim has its Gap Claim flag ticked, it is a gap claim.
When submitted to the insurer, the insurer will determine the benefit amount, and the customer can either pay the gap, or the full amount.
Gap claims can only be paid after the claim has been submitted to the insurer i.e., the the Claim Status must be Submitted or Accepted.
If the insurer hasn't yet determined a benefit amount for the claim, a Waiting for Claim Benefit window will be displayed. This will monitor the claim, until the insurer notifies of a benefit amount. When this occurs, the Gap Claim Status changes to Received.
It may take the insurer some time to determine the benefit amount. Clicking:
|
prompts to pay the full claim amount. The insurer will reimburse the customer. This option is only available once the insurer has accepted the claim i.e. the Claim Status is Accepted. |
|
stops monitoring the claim. To restart monitoring, click Pay Claim again. |
When a benefit amount has been determined, a Pay Claim window will be displayed. This shows the:
|
the total being claimed |
|
the amount the insurer has agreed to cover |
|
the difference between the Claim Total and Agreed Benefit |
|
the amount already paid |
The following options are available, based on how much the customer has already paid towards the claim:
|
Make a Gap claim. This option is available when the amount already paid towards the claim is less than the Gap.
|
|
Make a Gap claim.
|
|
Make a standard claim. i.e. the customer will pay the full claim amount and be reimbursed by the insurer.
|
|
Make a Gap claim.
|
The insurer will be notified to enable them to reimburse the:
- practice, if a gap payment is made
- customer, if full payment is made
Create/Edit Insurance Policy
This is the screen used to create or edit an insurance policy for a patient.

The fields are as follows:
| Policy Number | the policy number assigned to the policy by the insurer |
| Start Date | the date the policy starts on |
| End Date | the date the policy ends on. Optional. If set, the policy cannot be claimed against after the specified date. |
| Customer | the customer the policy belongs to |
| Insurer | the insurance provider |
| Author | the user that created the policy |
Insurance Claim
This is the screen used to create, edit or view an insurance claim for a patient.

The fields are as follows:
|
the number assigned to the claim by the insurer. For claims submitted online, this will be set on submission. |
|
the date the when the claim was created |
|
the date the when the claim was settled, declined or cancelled |
|
the insurer for the policy |
|
the policy number |
|
indicates if the claim is a gap claim. |
|
the user that created the claim |
|
the user responsible for handling the claim. If necessary, the insurer may contact the Claim Handler with queries about the claim. |
|
the practice location where the claim is being made |
|
the clinician responsible for the claim |
|
the total amount of the claim |
|
the total tax of the claim |
|
the current status of the claim |
|
the current gap status of the claim. Only displayed when Gap Claim is ticked, and when viewing the claim. |
|
the benefit amount agreed by the insurer. Only displayed when Gap Claim is ticked, and when viewing the claim. |
|
notes on the Benefit Amount, set by the insurer. Only displayed when Gap Claim is ticked, and when viewing the claim. |
|
optional notes |
Conditions
The Conditions tab lists the conditions being claimed.
The fields are as follows:
|
the number assigned to the claim by the insurer. For claims submitted online, this will be set on submission. |
|
the date that treatment for the condition commenced |
|
the date that treatment for the condition ceased. If the condition is ongoing, this represents the last date when treatment for the condition was given to the patient, within the practice. |
|
the total amount of charges being claimed for this condition |
|
the total tax on the charges being claimed |
|
the status of the condition |
|
a synopsis of the the condition being claimed |
|
the charges being claimed for the condition |
Conditions can be added using:
|
Adds a Condition that requires the user to fill in all of the fields manually |
|
Adds a Condition where the fields and the charges are filled in automatically from the selected Visit |
|
Adds a Condition where the fields and the charges are filled in automatically from the selected Problem |
Attachments
The Attachments tab lists the attachments that will be submitted as part of the claim. These are a copy of the original documents, taken when the claim is submitted.
To see what documents will be attached, click the Generate Attachments button.
The following attachments will be automatically added:
- Patient History - the full patient history up to the time of the claim
- Customer Invoice - an invoice will be added for each invoice referenced by the claim
History
The History tab displays the patient history, and is provided to help construct the claim.
It does not represent the history that will be attached to the claim when it is submitted.
Gap Claims
A gap claim is one where an insurance claim is submitted to the insurer, and the insurer calculates a benefit amount. The customer pays the gap, which is the difference between the total claim and the benefit amount, minus any payments the customer has already made.
Gap claims are only available for online insurers.
When Gap Claim is selected and the claim is submitted, the Gap Claim Status will be Pending, indicating that the insurer hasn't yet set the benefit amount.
When the insurer sets the benefit the:
- Benefit Amount is updated; and
- Gap Claim Status is updated to Received; and
- any notes from the insurer are recorded in the Benefit Notes
The customer can elect to:
- pay the gap, i.e. the difference between the claim Total and and the Benefit Amount.
The insurer will reimburse the practice to the value of the Benefit Amount. - pay the full claim.
Here, the insurer will reimburse the customer.
When the claim is paid, the Gap Claim Status will be set to Paid, and finally to Notified, when the insurer is notified of the payment. This last step is required to allow the insurer to reimburse:
- the practice, if a gap payment was made
- the customer, if full payment was made
Invoices in Gap Claims
When making a gap claim, at least one invoice in the claim must be unpaid or part paid.
- If the amount already paid on the included invoices is less than or equal to the gap amount, the
payment requested will be the difference between the gap and the amount already allocated on
the invoice. - If the amount already paid is greater than gap amount, then the difference will be refunded to the
customer during the claim process.
Medical Records
This screen displays the medical records for the current patient - or if there is no current patient, a Select button allowing you to select a patient.
Note that this screen is for viewing and editing the patient's medical records. However, if you are in the middle of a consult, you should not be using this - you should be using the Visit Editor which is accessed via the Consult button on the Workflow|Scheduling and Workflow|Work List screens.
There are eight different screen shots below, one for each of the tabs: Summary, Problems, Reminders, Alerts, Documents, Charges, Prescriptions, Estimates and Communication. For patient insurance, see Insurance.
All of these have a Select button at the top to allow you to select another patient.
All of them function as select screens. Date selection is always available, and in some you can select using the status or type.
All of them display the details of the item you have selected in the bottom part of the screen.
Summary
This shows the summary of the records.

If you have set the Show Clinician preference, then the display will be as follows. Note that here the practice is using 'short names' for their clinicians (see Concepts|Users) so the display shows 'SM' rather than 'Dr Sam Michaels'.

If the Show Communications preference is enabled, Communications records will be included. This makes it easier to see the flow of events for a patient, such was when reminders were sent. Communication records are for informational purposes only, so they:
- do not appear in printed histories
- are not submitted in insurance claims
Apart for the date, the selection fields are:
Type - this can be set to All or one of Addendum, Note, Problem, Weight, Medication, Investigation, Attachment, Form, Image, Letter or Communications
Include Charges - uncheck this box if you don't want to show the invoice line items. You would do this if you are setting up a medical record to send off as part of a referral and you don't want your charges to be shown. This option can also be set in Preferences.
 - this button changes the sort order of items within the visit - as shown it indicates that the visit items are shown in descending order, ie newest at the top. If you press the button it will change to an up arrow head indicating that the items are in ascending order with the newest at the bottom. Note that the visits themselves are always shown in descending order.
This option can also be set in Preferences.
Search - performs a case-insensitive search on patient records for the input text. The following fields are searched:
- notes and addenda
- record type
- clinician, if the clinician is being displayed
- batch number, if batches are being displayed
- medication product name and label
- invoice item product name
- investigation type and identifier
- document name
- problem presenting complaint and diagnosis
- weight
- communications
Note that Visits will always be displayed, even if there is no match.
Product Type - searches for records with the products with the specified Product Type(s). Product Types can be selected from a list, or by entering a partial name in the text field. The following records are searched:
- Customer Invoice Item
- Form
- Investigation
- Letter
- Medication
The items in the display are partially colour coded. As you can see above, the selected item (the checkup visit) is in blue, and the other items are coloured as shown below.

As you can see problems are pink/red, medication light brown and weight a darker green. Note that any Problem items are shown with a link and clicking this will take you to the Problems tab.
The buttons are:
New - create a new entry - a window will open allowing you to select the type of entry to be created. If it is something other than a visit (ie a note, a form, etc), then the new entry will be created under the currently selected visit. Note that the 'current visit' is the visit containing the currently selected item (which may be the visit itself or a note, form, medication etc item that is part of that visit).
With the exception of Visit and Problem records, records can be automatically locked from editing after a period of time. See Medical Record Locking below.
Edit - edit the selected item. If the Edit button is displayed, then you can edit the item - but for some things (e.g. an invoice item where the invoice has been finalised, or a Note that has been locked) the edit button will be suppressed because you cannot edit in this case.
Delete - delete the selected item - a confirmation window will be displayed. Again, if you can't delete the item, then the Delete button will not be displayed.
Print - print what is shown on on the screen
Mail - email what is shown on on the screen
Add Visit & Note - pressing this will generate a new visit entry and open the New Visit & Note window so that you can add a new Visit and Note. This button should NOT be used to create a normal consult visit (for this you should use the Check-In button on the Workflow|Scheduling screen). It is intended for use when creating a note unrelated to another visit, say as a result of a phone call.
Log - create a Communication record for the patient. This button is only available if the Show Communications preference is enabled.
Import Flow Sheet Reports - imports Medical Records, Billing, Notes and Flow Sheet PDF reports from Smart Flow Sheet. Only displayed if Smart Flow Sheet is configured for the current Practice Location.
Problems
The Problems tab shows the details of the patient's problems. This tab mirrors the Summary tab display but shows the data grouped by problem rather than visit. Visits are shown with a link and clicking this will return you to the Summary tab.
Problems are displayed by status, then date. That is, Unresolved problems are displayed first, in descending date order, followed by Resolved problems.
The Search field works the same as in the Summary tab, with the exception that both Problems and Visits will always be displayed, regardless of the search criteria.

The buttons are as follows:
New - create a new entry - a window will open allowing you to select the type of entry to be created. If it is something other than a problem (ie a note, a form, etc), then the new entry will be created under the currently selected problem. Note that the 'current problem' is the problem containing the currently selected item (which may be the problem itself or a note, form, medication etc item that is part of that problem).
Edit - edit the selected item. If the Edit button is displayed, then you can edit the item - but for some things (eg a invoice item where the invoice has been finalised) the edit button will be suppressed because you cannot edit in this case.
Delete - delete the selected item - a confirmation window will be displayed. Again, if you can't delete the item, then the Delete button will not be displayed.
Print - print what is shown on on the screen
Mail - email what is shown on the screen
Reminders
The Reminders tab shows the details of the patient's reminders.

For details on the Reminders field, click here.
The buttons are as follows:
New - create a new reminder
Edit - edit the selected reminder
Delete - delete the selected reminder - a confirmation window will be displayed
Alerts
The Alerts tab shows the details of the patient's alerts.

For details on the Alerts fields click here.
The buttons are as follows:
New - create a new alert
Edit - edit the selected alert
Delete - delete the selected alert - a confirmation window will be displayed
Documents
This shows the details of the patient's documents. As you can see below, there are 5 different types: Attachments, Images,Investigations, Letters and Forms. All of these except the latter support 'versions', ie previous revisions of the document.

The buttons are:
New - create a new document - a window will open allowing you to select the type
Edit - edit the selected document record (not the document itself - though see below). If the document has status Finalised you will not be able to edit the record.
Delete - delete the selected document - a confirmation window will be displayed. If the document has status Finalised you will not be able to delete it.
Print - if the selected item has an associated document template (which can be the case with an Investigation - see Administration - Laboratory - Investigation Type) this will be presented for printing. Otherwise, if there is an attachment present, in .odt or .doc format, it will be presented for printing. If the document is other than an .odt or .doc file, it will be downloaded and can then be printed.
Mail - emails the selected item as an attachment.
Refresh - (this button only appears when the selected document is a Letter) - refresh the document by regenerating it from its template - a confirmation window will be displayed.
Clicking on the entry in the Document column will cause the document to be downloaded and displayed. Note that for Letters the Document column shows two icons like  . If you click on the right-hand one, the pdf file containing the letter will be downloaded and displayed. If you click on the left-hand one (or the name of the document) then the word processing document will be downloaded and you can open it in your word processor and save it and then edit it. (You need to save it as it is opened read-only.) After editing the file, you can then use the Edit button to edit the letter and upload the revised file.
Charges
This shows the details of the charges resulting from the patient's treatments. Note that this screen just displays information, there are no 'bottom buttons' to let you do things. It is provided so that you can check that everything you think should be charged for has been, and to check on past charges.

Prescriptions
The Prescriptions tab is where patient prescriptions are created and dispensed.

The buttons are:
New - create a new prescription
Edit - edit the selected prescription. If the prescription has been fully dispensed or has expired, it cannot be edited.
Delete - delete the selected prescription. If the prescription has been dispensed or has expired, it cannot be deleted.
Print - prints the selected prescription.
Mail - emails the selected prescription.
Dispense - dispenses the selected prescription. This displays a medication window that allows the Date, Expiry Date and Clinician to be selected. The Label and Quantity are fixed
Cancel Prescription - cancels the selected prescription, if it hasn't been fully dispensed or expired.
Estimates
The Estimates tab is used to manage estimates for the patient. See Concepts - Estimates for background.
It is very similar to the Customers - Estimates screen, except that entry is restricted to the current patient only. If an estimate exists for another patient, or an estimate contains multiple patients, then it will be excluded.
The buttons are as follows:
New - create a new estimate.
Edit - edit the selected estimate
Delete - delete the selected estimate - a confirmation window will appear
Finalise - change the status of the selected estimate to Finalised - a confirmation window will appear. Finalising the estimate locks it from any further changes. If you confirm the Finalise, then a print window will open allowing you to print or email the estimate.
Print - print the selected estimate.
Mail - email the selected estimate.
Copy - copy this estimate to create another one.
Invoice - generate an invoice from this estimate. To ensure that the that the correct clinician is recorded when an estimate is invoiced, the clinician is prompted for unless:
- the current user is a clinician, and;
- Use Logged In Clinician is enabled.
Communications
The Communications tab is used to display and log communication regarding the patient. Each communication may also be viewed via the customer. See Customers - Communications & Alerts for more details.

Medical Record Locking
By default, medical records are automatically locked from editing after a period of time. This is determined by the Practice setting Record Lock Period.
The following record types are automatically locked:
- Addendum
- Attachment
- Attachment Version
- Image
- Image Version
- Investigation
- Investigation Version
- Letter
- Letter Version
- Form
- Medication
- Note
- Weight
An Addendum record can be used to annotate a Medication or Note record after it has been locked. These are displayed after the record in the history that they annotate. To do this, click on the Medication or Note record that you want to add an Addendum to and press the New button and select Addendum.
Note that the visit itself is not locked, and that if you desire, you can add a new note (or other item) to a visit whose other items have been locked. What you cannot do is modify the items that have been locked.
Investigations support some updates after they have been locked:
- Reports can be added.
The existing report is versioned, if one is present. - The Reviewed flag can be changed, on the current and prior versions
- The Result Status can be changed
Other locking exceptions include:
- Medication, Investigation and document records linked to an invoice may be edited or removed via the invoice, until the invoice is finalised
- Investigation and document records can be updated via the Document Loader
- Medication, investigation, and document records can be removed from the patient history if the invoice is reversed.
Confirm Delete
This is the delete confirm screen. Press OK to proceed, else Cancel.
Confirm New
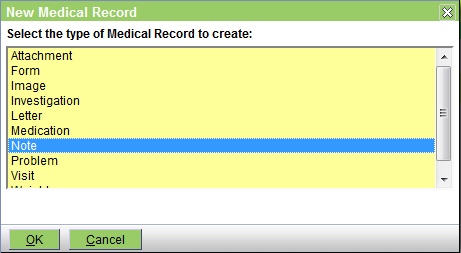
Depending on which tab of the Medical Records or Visit Editor screen that you have open, this window allows you to select the type of medical record entry, alert/reminder, or document to be created. Select the required one and press OK, else Cancel to abort.
For the Summary tab, the window is: (the partially visible last item is 'Weight')
For the Reminders and Alerts tab, the window is:

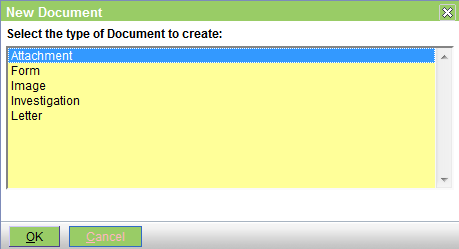
For the Documents tab, the window is:
Confirm Refresh
This window is displayed when you press the Refresh button to refresh a letter from its template. Press OK to confirm, Cancel to abort.

If Version current document is checked, then when the letter is regenerated, the current copy will be saved as a version, otherwise it will be replaced.
Create/Edit Alert
This is the screen used to create or edit a patient Alert. See Concepts|Alerts for background.

The fields are as follows:
Date - the start date for the alert
End Date - the end date for the alert. This can be left blank if the alert has no end date.
Alert Type - select from those available - these are set via Administration|Types|Patient Alert Type
Reason - a short version of the Notes text
Product - the product that created the alert, if any
Author - the user that created the alert
Clinician - the associated clinician
Notes - the long version of the reason for the alert
Status - can be either In Progress or Completed
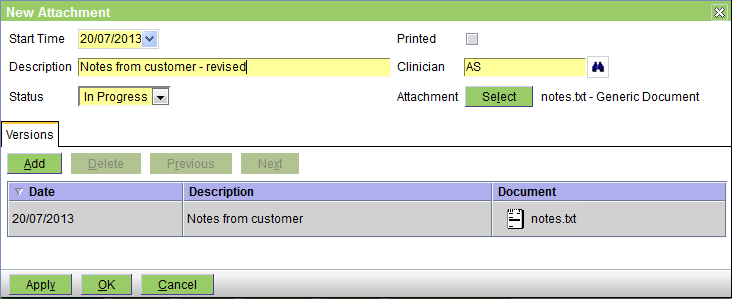
Create/Edit Attachment
This is the screen used to create or edit an attachment document in the patient's medical records. See Concepts|Documents for background. Note that although you can use this facility to attach an image file, it is probably better to use the Image facility for this.
The fields are as follows:
Start Time - the date on which the entry was created - defaults to today
Description - any pertinent description
Status - this can be In Progress, Completed, or Finalised. In Progress implies that you are still working on this; Completed implies that you have finished - but the entry can still be editied; and Finalised means that it is really complete and can no longer be edited.
Printed - this box will be checked when the form has been printed
Clinician - the appropriate clinician
Attachment - press the Select button to attach the file - after the file is attached its name (notes.txt in this case) is shown here.
The Versions tab shows the previous versions. Note that you can use the Add button to add another, but you can also use the Select button. If you use the Select button to attach another file, then the previous 'top' version will just be pushed onto the version list.
As you can guess from the above, there is no problem in adding the same file name twice. In fact although two notes.txt files have been attached, each in fact contains different text.
Create/Edit Form
This is the screen used to create or edit a form document in the patient's medical records. See Concepts|Documents for background.

The fields are as follows:
Start Time - the date on which the entry was created - defaults to today
Description - any pertinent description
Status - this can be In Progress, Completed, or Finalised. In Progress implies that you are still working on this; Completed implies that you have finished - but the entry can still be editied; and Finalised means that it is really complete and can no longer be edited.
Printed - this box will be checked when the form has been printed
Form - select the form to print - these are the document templates that are of Type 'Patient Form'
Product - select a product if appropriate. This is here so that if the form selected is sensitive to the current product, the form can include product information. Thus, for example, we do not have to have a vaccination certificate for each type of vaccination - we can just have a general certificate that prints the name of the current product.
Clinician - the appropriate clinician - normally the form will display the clinician's name
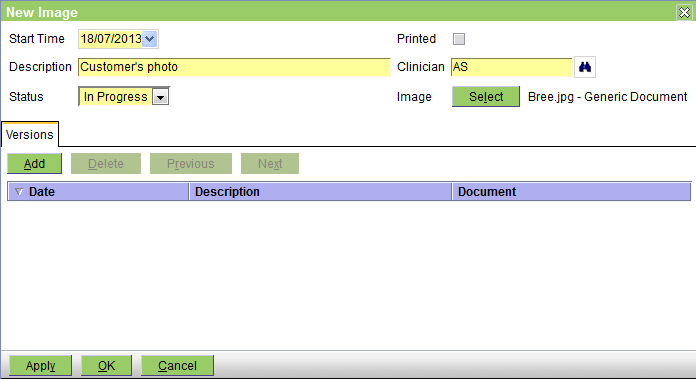
Create/Edit Image
This is the screen used to create or edit an image document in the patient's medical records. See Concepts|Documents for background.
The fields are as follows:
Start Time - the date on which the entry was created - defaults to today
Description - any pertinent description
Status - this can be In Progress, Completed, or Finalised. In Progress implies that you are still working on this; Completed implies that you have finished - but the entry can still be editied; and Finalised means that it is really complete and can no longer be edited.
Printed - this box will be checked when the form has been printed
Clinician - the appropriate clinician
Image - press the Select button to attach the file - after the file is attached its name (Bree.jpg in this case) is shown here.
The Versions tab shows the previous versions. Note that you can use the Add button to add another, but you can also use the Select button. If you use the Select button to attach another file, then the previous 'top' version will just be pushed onto the version list.
Note that there is no problem in adding the same file name twice. Thus if your images arrive in files called img001.jpg, there is no problem if there is already an image imported from a file named img001.jpg.
Create/Edit Investigation
This is the screen used to create/view/edit investigations. For background see Concepts - Investigations.
The fields are as follows:
|
the date on which the investigation was initiated |
|---|---|
|
the type of investigation - these are set up via Administration - Laboratory - Investigation Type |
|
the laboratory that is performing the test(s) associated with the Investigation |
|
the Laboratory Device that the test(s) will be performed by |
|
optional notes to associate with the investigation |
|
this will initially be 'In Progress' - for other settings see Concepts - Investigations |
|
the status of the order. This will initially be 'Pending' to indicate that the order has not been sent. For other settings see Concepts - Investigations |
|
the associated clinician |
|
use the Select button to add the results report to the investigation. Note that if there is an existing report, the first will be pushed down into the Versions tab. If the investigation has been ordered via an online laboratory, (see Concepts - Investigations) there should be no requirement to manually attach the report. |
|
the test(s) to perform |
|
the product(s) that ordered the investigation |
|
results of the investigation |
|
used to display and manage previous versions of the reports. |
The Print Form button is used to print the Investigation form.
Create/Edit Letter
This is the screen used to create or edit a letter document in the patient's medical records. See Concepts|Documents for background.
First lets look at the screen shot for a new letter:
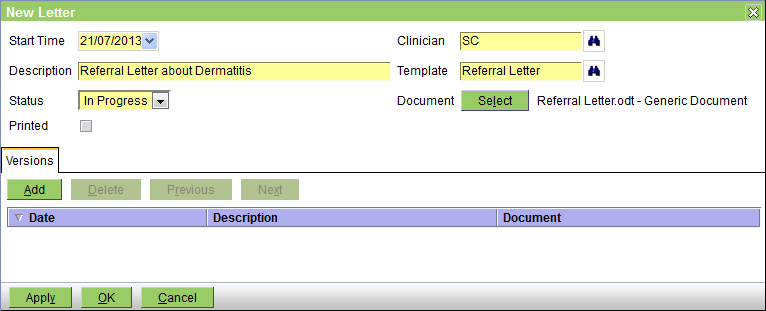
The fields are as follows:
Start Time - the date on which the entry was created - defaults to today
Description - any pertinent description
Status - this can be In Progress, Completed, or Finalised. In Progress implies that you are still working on this; Completed implies that you have finished - but the entry can still be editied; and Finalised means that it is really complete and can no longer be edited.
Printed - this box will be checked when the letter has been printed
Clinician - the appropriate clinician
Template - select the template to be used - these are the document templates that are of Type 'Patient Letter'
Document - you DO NOT need to press the Select button when you are creating a new letter. Simply selecting the Template will generate the letter from the template and insert the appropriate information.
Now the edit screen. The senario is as follows: you created the letter as above. Then you decided that you needed to edit it, so on the Documents tab of the Medical Records screen, you selected the letter and then clicked on the actual letter to download it and open it in your word processor. You then saved a copy (as say Referral Letter-2), edited in the required changes and then saved it.
On the Medical Record screen you now press the Edit button to get the Edit Letter screen. You then press the Document Select button - this will open a browse window to allow you to select your 'Referral Letter-2' and upload it. The screen will then appear as below. The initial version has been saved as the previous version, and your new one as the new current version.
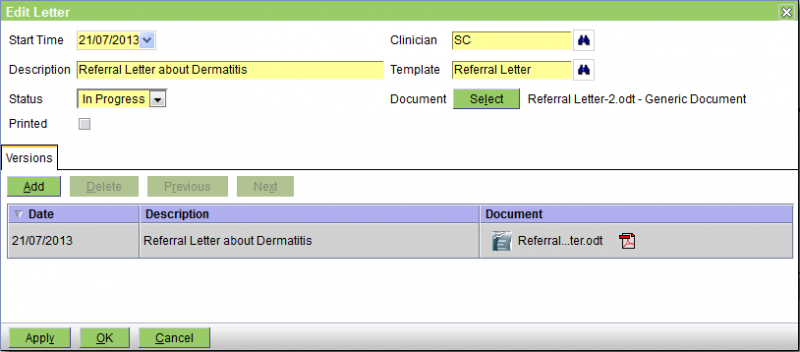
As intimated above, the Versions tab shows the previous versions. Note that you can use the Add button to add another, but you can also use the Select button. If you use the Select button to attach another file, then the previous 'top' version will just be pushed onto the version list.
There is no problem in adding the same file name twice. In the above example the file names were different but they could have been the same.
Parameters
If a template containing parameters is selected (i.e. Fill-In fields in Microsoft Word, or Input Fields in OpenOffice Writer), a window like that below will be displayed prompting for the values of those parameters. On OK, these will be merged with the document. Note that the order of the prompts cannot be specified, ie if the template has prompte P1, P2 and P3, these may be displayed on the screen in the order P2, P1, P3.
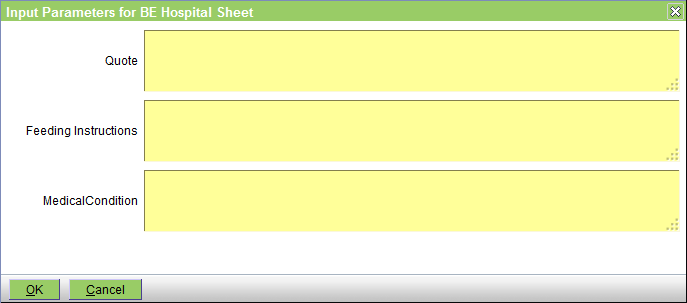
The parameters are normally text fields and hence you can use macros to enter the information.
Create/Edit Medication
This is the screen used to create or edit a medication entry in the patient's medical records.
If the medication entry is being created as a result of invoicing the item, then this screen will only be displayed if the medication product entry has it's Dispensing Label option ticked. It is always displayed to edit the medication entry, or if the entry is being created via the New - Medication button on the Patients - Medical Records screen.

The buttons are as follows:
Print Label - prints the label using the template, 'Drug Label'
New Prescription - creates a new prescription from the medication, copying the Medication, Quantity and Label. The Clinican will default to the current clinician, if any.
Apply - saves any changes.
Print & OK - print the label, saves any changes, and closes the dialog.
OK - saves any changes, and closes the dialog.
Cancel - cancels editing.
The fields are as follows:
Date - the date the medication record was created - defaults to today
Expiry Date - if a Batch has been selected, this represents the Batch expiry date. If not, you can enter the expiry date of the medication. Note that you can enter a relative date (e.g. 2m for 2 months from today).
Quantity - the quantity
Label - the label text- this will be initially set from the medication product record
Medication - the medication product
Batch - the product batch. If selected, this determines the Expiry Date. The Batch dropdown displays all active batches of the medication at the current stock location. The batch with the earliest expiry date is shown first.
Clinician - the clinician
Dispensing Notes - these will be displayed if there are any
Note that if it is important to you that the Dispensing Notes be displayed when the item is added to the invoice but you would not normally print a label (and hence the product's Dispensing Label option is not ticked), you should edit the product to have the Dispensing Label option ticked, but either leave it's Label Text blank, or set to say 'No label required'.
Create/Edit Note
This is the screen used to create or edit a note in the patient's medical records.
The patient history is displayed below, for reference.

The fields are as follows:
Date - the date of the note - defaults to today
Note - the note text goes here. If needed you can change the size of the note window using the handle at the bottom left of the text window.
Clinician - the clinician
Create/Edit Prescription
This is the screen used to create or edit a prescription. See Concepts|Prescriptions for background. In the picture below, the prescription has already been dispensed once so the 'Dispensing' tab is shown. If the prescription was being created the Dispensing tab would be absent.

The fields are as follows:
Date - the date on which the prescription was created - defaults to today
Expiry Date - the date on which the prescription expires. After this date, the prescription cannot be dispensed nor deleted. Note that this is totally separate from the Expiry Date set when you dispense the item - which is of course the expiry date of the dispensed medication. This date defaults to today plus the Prescription Expiry interval set for the practive - see Administration|Organisation|Practice. If you have not set this, then it defaults to zero and the Expiry Date will default to today.
Quantity - the quantity to be dispensed each time
Repeats - the number of repeats
Medication - the product
Label - the dispensing label text - this defaults to that set for the product. This will be the label when you actually dispense from this prescription.
Clinician - the clinician
Times Dispensed - the number of times that this prescription has been dispensed.
The Dispensing Tab shows the information for previous dispenses of this prescription.
Note that when you set up the prescription, you are functionally authorising the dispensing a total of (qty x (repeats+1)). Hence if you set the Quantity to 2 and the Repeats to 5, the total quantity being authorised is 12.
Note also that when the prescription is dispensed neither the Quantity nor the Label text can be altered. If these do need to be altered, this must be done by editing the prescription itself.
Create/Edit Problem
This is the screen used to create or edit a problem in the patient's medical record. See Concepts|Problems for background. The following screen shows a problem being edited.

The fields are as follows:
Date - the date the problem was created - defaults to today
Presenting Complaint - the presenting complaint
Diagnosis - the problem diagnosis
Status - this can be Unresolved or Resolved
Resolved Date - the date on which the problem was resolved
Clinician - the associated clinician
Problem Presenting Complaint/Diagnosis selection
These two screens are presented if you click the appropiate binoculars icon on the Problem edit screen. They allow you to select the Presenting Complaint or Diagnosis respectively. In both cases you can select from standardised VeNom codes or practice specific ones - the available sets are determined via the Administration|Lookups screen.
The Presenting Complaint selection screen is:

The selection fields are:
Type - this can be set to All or either 'Presenting Complaint' or 'Presenting Complaint (VeNom)'. All selects both.
Search - enter the text top search for. As per the example above, this does a 'contains' search rather than a 'starts with' search.
The Diagnosis selection screen is:

The selection fields are:
Type - this can be set to All or either 'Diagnosis' or 'Diagnosis (VeNom)'. All selects both.
Search - enter the text top search for. As per the example above, this does a 'contains' search rather than a 'starts with' search.
In both cases, you can click on the required item to select it and return to the Problem Edit screen or press Cancel to return without making a selection.
Create/Edit Reminder
This screen is used to create and edit reminders. Normally reminders are created automatically by the system (ie as a result of invoicing an annual vaccination, the system will create the reminder for the next one), but they can also be created manually using this screen.
Similarly, they are normally processed automatically by the Reporting - Reminders processing. However, in some circumstances you may want to cancel them or change their due date manually.

The fields are as follows:
Reminder Type - the Type of the reminder
Due Date - the date when the reminder is due
Next Reminder - the date when the reminder is next due to be sent. This is calculated as the Due Date plus the Interval for the current reminder count.
Status - this can be In Progress (ie active), Completed (ie the associated event, eg the vaccination, has occurred), or Cancelled. Normally the system will adjust the state to Completed (when the event occurs) or Cancelled (when the reminder becomes too old), but you can also change the state using this screen.
Reminders Sent - displays the number of reminder notifications generated. Note that if the same reminder was sent by say both email and SMS, this only counts as 1, not 2 reminders sent, as we sent the same reminder by two methods. However, the items display will show both of these, and they will have the same reminder count.
Last Sent - the date on when the reminder was last sent
Completed - the date on which the reminder was completed. Note that if the reminder is cancelled by the system, the date on which this happened is not shown here, is this is a Completed date, not a Cancelled or Completed date.
Product - the associated product
Clinician - the associated clinician
Items
The items tab shows the times and methods by which a reminder has or will be sent.
Create/Edit Visit
This window is used to create or edit the patient's visit record. Note that if you are using the workflow facilities, and in particular the Consult button on the Workflow|Work List screen, then the visit record will be created for you.

The fields are as follows:
Start Date - the date on which the visit started - defaults to today
Complete Date - the date on which the visit was completed
Reason - the reason for the visit
Summary - an optional summary of the visit
Clinician - the clinician
Status - you can set this to In Progress or Completed
The Print button will print the complete visit information (ie including notes, medication, weight, etc) - not just the above information.
Add Problem to Visit
This prompt is displayed when creating a new Problem:

New Problems can be added to the most recent Visit, or to a new Visit.
Click:
- OK to add the Problem to the selected Visit
- Cancel to cancel Problem creation
Create/Edit Addendum
This is the screen used to create or edit an Addendum in the patient's medical records.
Addendum records are used to annotate Medication or Note records after they have been locked.
The patient history is displayed below, for reference.
The fields are as follows:
- Date - the date of the record was created
- Note - the note text
- Clinician - the clinician
Create/Edit Link
This is the screen used to create or edit a hyperlink in the patient's medical records.
This is typically used to reference patient data in an external system.
In PDF versions of the medical records, the hyperlink will be clickable.
The fields are as follows:
- Description - description of the link. If supplied, this will be displayed in the summary and printed records, else the URL will be.
- Date - the date of the record - defaults to today
- Clinician - the clinician
- URL - the hyperlink
Create/Edit Weight
This window is used to create or edit the patient's weight record.
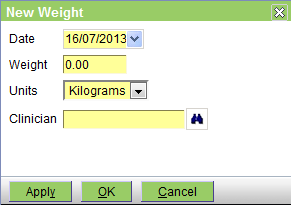
The fields are as follows:
Date - the date on which the weight was measured - defaults to today
Weight - the weight
Units - the units - you can select Grams, Kilograms, or Pounds
Clinician - the clinician
New Medication Record prompt
The New Medication Record prompt is displayed when creating Medication records from:
- Patients|Medical Records|Summary
- Patients|Medical Records|Problems

When Medication records are created this way:
- the customer is not invoiced
- the medication quantity selected does not change the stock level
If there is no need to invoice the customer, or change stock levels, click OK.
If the customer should be invoiced, then click Cancel, and add the medication via:
- Customer|Charges
- the Visit Editor
New Visit & Note
This screen is used to create both a patient Visit and a Note in the patient's medical records.
The patient history is displayed below, for reference.

This should NOT be used to create a normal consult visit (for this you should use the Check-In button on the Workflow - Scheduling screen). It is intended for use when creating a note unrelated to another visit, say as a result of a phone call.
The fields are as follows:
Date - the date of the visit and note - defaults to today
Reason - the reason for the visit
Note - the note text goes here. If needed you can change the size of the note window using the handle at the bottom left of the text window.
Clinician - the clinician to assign to the visit and note
Select
This is the patient select screen. As shown below, if there is a current customer, the screen will show all the patients for that customer. If there is no current customer, no patients will be displayed, and the 'All Patients' box will be ticked.
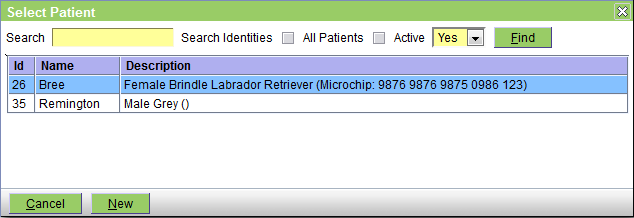
If the required patient is displayed, just click it to select it.
To search by patient name, enter the full or partial name (see using wildcards) and click the Find button, or press the Enter key or Alt-F.
To search the patients belonging to all customers (and not just the current one), click the 'All Patients' checkbox.
To include deactivated patients, set the 'Active' pulldown to 'Both'.
To search by Identity rather than name, click the 'Search Identities' checkbox.
For more information on how select screens work, click here.
Select By Customer
This is a patient select screen that supports searching by customer, patient, and customer contact. To search, fill in the known fields and click the Find button, or press the Enter key or Alt-F.
As shown below, if there is a current customer, the screen will show all the patients for that customer.

If the required patient is displayed, just click it to select it.
To search by customer name, enter the full or partial name in the Customer field (see using wildcards). Customers are searched using the format lastname,firstname e.g. 'smith,adam'. NOTE that there is no space, i.e. 'smith adam' will not work, nor will 'smith, adam' or 'smith , adam'.
To search by patient name, enter the full or partial name in the Patient field.
To search the patients belonging to all customers, clear the Customer field.
To search by customer contact (i.e. phone, address, email), enter the full or partial information in the Contact field. Note that whereas the customer and patient name searches are 'starts with' searches, the contact search is a 'contains' search so entering 'gmail' will find all customers with a gmail address.
To include deactivated patients, set the 'Active' pulldown to 'Both'.
To search by patient Identity rather than name, click the 'Search Identities' checkbox. This can be used to search patients by microchip or pet tag, for example.
For more information on how select screens work, click here.