Administration
The Administration entry in the top menu line is used to access various administration functions. It is displayed only for users who have been set as administrators.
Note that when documenting the screens in this section, it has been assumed that since you must be an andministrator to use them, you only need the fields explained and not the various buttons and how the screen works. If you do need help with the functionality, you should read the Introduction section.
Organisation
The Administration|Organisation screen is a select screen that allows you to select the specific Organisation Type to be viewed or maintained. Below is the screen as initially displayed but with the Organisation Type pull-down list showing.
Note that if you do edit Administration|Organisation items (say to change an email address), then the new values will not become available until the next time you log on (because these organisation settings are fetched once at logon time to improve performance).

Each Type has its own view/edit screen.
Deposit Accounts
This screen is used to create/edit/view the details of the bank accounts in which takings are deposited via the Reporting|Till Balancing|Deposit processing. Most of the fields are used to provide the information to print on the Bank Deposit document obtained using Reporting|Till Balancing|Print.

The fields are as follows:
Name - the name of the Deposit Account
Account Name - the name in which the account is held
Bank - select the bank from those available in the pull-down - see Lookups|Bank
Branch - the name of the branch
Account Number - the account number
Last Deposit - the date on which the last deposit was made (this is updated by the system when the Till Balancing|Deposit processing is done)
Active - uncheck this box to deactivate the account
Locations Tab - used to set the Practice Locations for which this Deposit Account is available. Note that multiple locations can be set, but not repeated - ie an error will occur if you attempt to add one location twice
Select
This is the screen used to select a Deposit Account. It works like a standard select screen.
Job Configuration: Document Loader
Job Configuration: DocumentLoader configures a scheduled job to periodically load files from a directory and attach them to documents or investigations.
Files are associated with documents or investigations by parsing their identifier from the file name.

The Active field:
- schedules the job to run if checked; or
- prevents it from being run if unchecked
The Source Directory is the directory to load files from.
The Destination Directory is the directory to move successfully loaded files to. Note that the Tomcat application must have write access to this directory.
(nb. on linux servers you must use the direct path, not a symbolic link and the group that owns the the source and destination directories must have read and write permissions and the tomcat user must belong to that group eg. use 'sudo usermod -a -G group tomcat7')
The Id Pattern is a regular expression that enables the document identifier to be parsed from the file name. The default expression is [^\d]*(\d+).* - this looks for the first digit string in the file name. For example, the following file names all have the ID 3035108:
DAO DAO_TSANG_ _3035108_20150226_115435_4762.pdf
3035108 CBC test.jpg
Xray DAO DAO_TSANG 3035108.jpg
The Overwrite field determines if files should be loaded if one already exists. If selected, the existing content will be replaced, if it doesn't duplicate the existing content. For documents that support versioning*, the existing content will be saved as a version. The following table indicates the behaviour if a document has been previously loaded:
| Case | File | Ovewrite=n | Overwrite=y |
|---|---|---|---|
| 1 | Same name, same content | Skipped | Skipped |
| 2 | Same name, different content | Skipped | Loaded |
| 3 | Different name | Skipped | Loaded |
Note that in case 2 & 3, if the document supports versioning, then the previous document is set as a version, and the primary document is replaced.
In case 2, if the previous document already exists in the Destination Directory, then the loader will fail and terminate. The file in the Destination Directory needs to be manually moved aside.
* all of the standard document archetypes with the exception of act.documentTemplate in OpenVPMS support versioning. The Document Loader cannot be used to load act.documentTemplate instances.
The Recurse Subdirectories field determines if subdirectories of the source directory should be searched for documents to load.
The Archetypes field is a comma separated list of archetype short names, identifying the document archetypes that may be loaded to. These may include wild cards. Use of wildcards is NOT recommended, as malformed file names may result in files being loaded to incorrect documents. For Investigations, use act.patientInvestigation.
The Enable Logging field determines if loading should be logged. This can be used to help track down problems. The information is written to the OpenVPMS logs in <TOMCAT-HOME>/logs.
If Stop On Error is selected, the loader will stop on the first error it encounters. Note that this means 'stop this run', it does not 'stop all future scheduled runs'. For normal operation, you should leave this unticked, otherwise, it is possible that an error with one document (say because it has a name that does not contain an ID) will prevent other documents being loaded.
The Minutes, Hours, Day Of Month, Month, and Day Of Week fields determine when the job is run.
These are a defined using a simplified version of a Cron expression:
| Field | Allowed Values | Allowed Special Characters |
|---|---|---|
| Minutes | 0-59 | , - * / |
| Hours | 0-23 | , - * / |
| Day Of Month | 1-31 | , - * ? / |
| Month | 1-12 or JAN-DEC | , - * / |
| Day Of Week | 1-7 or SUN-SAT | , - * ? / |
Note that only one of Day Of Month and Day Of Week may be specified. If one is specified, the other must be set to ?.
Examples
| Description | Minutes | Hours | Day Of Month | Month | Day Of Week |
|---|---|---|---|---|---|
| Run at 8am every weekday | 0 | 8 | ? | * | mon-fri |
| Run every 30 minutes | */30 | * | * | * | ? |
| Run every 2 hours | 0 | */2 | * | * | ? |
| Run every 15 mins between 8am and 6pm on weekdays | */15 | 8-18 | ? | * | mon-fri |
The Run As field specifies the user to run the job as. This user is required to establish the permissions to:
- create and update the specified archetypes
- send notification messages
The Notify field specifies the user or user group to notify when a load has completed. Notification only occurs when documents are loaded, or errors are encountered.
Job Configuration: ESCI Inbox Reader
Job Configuration: ESCI Inbox Reader configures a scheduled job to periodically check ESCI Inboxes for messages from suppliers:

The Active field:
- schedules the job to run if checked; or
- prevents it from being run if unchecked
The Minutes, Hours, Day Of Month, Month, and Day Of Week fields determine when the job is run.
These are a defined using a simplified version of a Cron expression:
| Field | Allowed Values | Allowed Special Characters |
|---|---|---|
| Minutes | 0-59 | , - * / |
| Hours | 0-23 | , - * / |
| Day Of Month | 1-31 | , - * ? / |
| Month | 1-12 or JAN-DEC | , - * / |
| Day Of Week | 1-7 or SUN-SAT | , - * ? / |
Note that only one of Day Of Month and Day Of Week may be specified. If one is specified, the other must be set to ?.
Examples
| Description | Minutes | Hours | Day Of Month | Month | Day Of Week |
|---|---|---|---|---|---|
| Run at 8am every weekday | 0 | 8 | ? | * | mon-fri |
| Run every 30 minutes | */30 | * | * | * | ? |
| Run every 2 hours | 0 | */2 | * | * | ? |
| Run every 15 mins between 8am and 6pm on weekdays | */15 | 8-18 | ? | * | mon-fri |
The Run As field specifies the user to run the job as. The selected user must have permissions to:
- update Orders
- create Supplier Deliveries
- create System Messages
OTC
This screen is used to create/edit/view the OTC accounts. See also Concepts|OTC - Over The Counter.
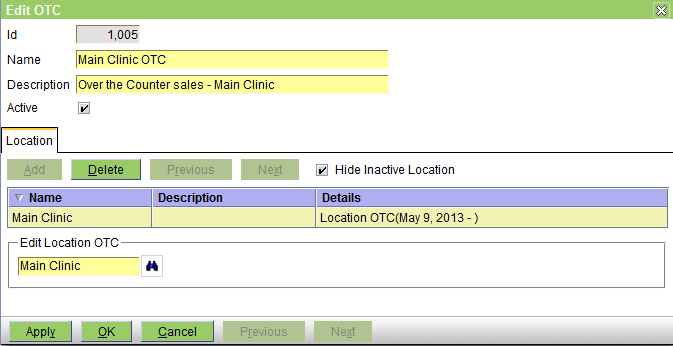
The fields are as follows:
Name - the name of the OTC account
Description - serves to clarify the name
Active - uncheck this box to deactivate the account
Locations Tab - used to set the Practice Locations for which this OTC account is available. Note that multiple locations can be set, but not repeated - ie an error will occur if you attempt to add one location twice
Select
This is the screen used to select an OTC account. It works like a standard select screen.
Practice
This screen is used to create/edit/view the Practice. Note that you can only have one active Practice at a time.

The fields are as follows:
Practice Name - the name of the practice. This will appear on various reports and documents so it should be set as you want it to appear.
Active - uncheck this box to deactivate the practice
Currency - select the currency to be used - see Lookups|Currency
Patient Age Format - select the required format - see Lookups|Duration Formats. If you leave this set at None, then the following will apply:
| Age | Shown as |
|---|---|
| < 1 week | N day(s) |
| < 3 months | N week(s) |
| < 23 months | N month(s) |
| >= 2 years | N year(s) |
Prescription Expiry - the default interval for how long prescriptions are valid - see Concepts|Prescriptions
Medical Records Sort Order - this sets the initial display order of items within the visit on the Patients|Medical Records screen
Reminder Export Format - this determines the file format when exporting reminders on the Reporting|Reminders screen - it can be set to None, Comma or Tab separated values.
Auto Lock Screen - this determines how long a user's session may remain inactive before a dialog is displayed prompting the user to re-enter their password. A value of 0 disables this feature. Note that due to the way the client browser is refreshed, the dialog may be displayed up to 30 seconds after the specified period of inactivity.
Auto Logout - this determines how long a user's session may remain inactive before the user is automatically logged out.
Show Clinician in History Items - if selected, a clinician column is added in Patients|Medical Records, to display the clinician associated with each patient history item. By default, it is unselected.
Show Problems in Visit - if selected, a Problems tab will be displayed in the Visit Editor. By default, it is unselected.
Show Customer Account Summary - if selected, the customer summary will display account information.
Service User - the user responsible for background services. Required by the HL7 services to update outbound messages.
The Contacts tab is used to view and maintain the various contacts. The types are as follows:
Location - you should set this so that it can appear on reports and documents
Phone - again you should set this so that it can appear on reports and documents
Email - you need to set this, not only so that it can appear on reports and documents, but also because it is used by the system when generating the From address on emails being sent out. In particular, the code that sends out Reminders and Statements via email will the Practice's email addresses for customers who do not have a Practice Location set. If you set one with the purpose 'Billing' it will be used for the Statements. If you set one with the purpose 'Reminder' it will be used for Reminders. Note however that emails initated by users are sent out using the current location's email address(es).
See Concepts|Contacts for details.
Below is the Locations tab. You can use this to set the Practice Locations, but it's more normal to attach the locations to the practice when setting up the locations.

Below is the Taxes tab. Use this to set the applicable taxes.

Below is the Templates tab. You should set the 'default' template here for each type of template for which you have multiple templates of that type. For example if you are using different Invoice templates for some Practice Locations, then you should set the default invoice template here.

Below is the SMS tab - use this to add the SMS gateway. There can only be one.

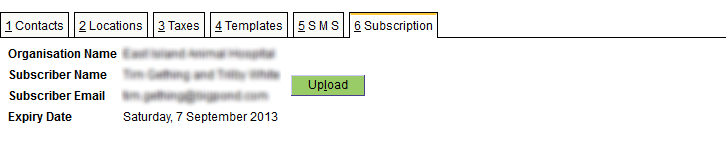
Below is the Subscription tab with no current subscription. First you need to click the link to purchase the subscription. You will be send a key file. Upload this by clicking the Upload button.

Below is the Subscription tab showing the current subscription (with the details intentionally blurred).
Select
This is the screen used to select a Practice. It works like a standard select screen.
Practice Location
This screen is used to create/edit/view the Practice Locations, ie the branches of the practice. See Concepts|Practice and Locations for background.

The fields are as follows:
Location Name - the name of the location. This will appear on various reports and documents so it should be set as you want it to appear.
Active - uncheck this box to deactivate the location
Stock Control - check this box to enable stock control for this location
Mail Host - the host name of your ISP's SMTP server
Mail Port - its port
Mail Username - the username of your ISP account
Mail Password - its password
Mail Connection Security - set to None, SSL/TLS, or STARTTLS as required by your ISP. The standard setup is:
| Mail Port | Security |
|---|---|
| 25 | None |
| 465 | SSL/TLS |
| 587 | STARTTLS |
Default Printer - use the pull-down to select the default printer for this location.
Pricing Group - the pricing group in use for the practice location. This is optional. It is used by practices that set different prices for the same product at different locations. See Concepts|Pricing for details.
Disable Discounts - if selected, disables discount entry when editing charges and estimates at this location.
Stock Locations - sets the Stock Location for the location. If you have Stock Control enabled for this location then you must have one. Multiple locations can share the one stock location. See also Organisation|Stock Location.
OTC - sets the OTC account for the location. You can only have one but multiple locations can share the one OTC account. See also Organisation|OTC.

The Contacts tab is used to view and maintain the various contacts. The types are as follows:
Location - you should set this so that it can appear on reports and documents
Phone - again you should set this so that it can appear on reports and documents
Email - you need to set this, not only so that it can appear on reports and documents, but also because it is used by the system when generating the From address on emails being sent out. Although the code that sends out Reminders and Statements via email uses the Practice's email addresses, emails initiated by users are sent out using the current location's email address. If there are multiple email addresses set, then the user can choose the required one from a pull-down list.
See Concepts|Contacts for details.
Below is the Practice tab. Use this to set the Practice to which this location belongs. Note that you can have a location not attached to a practice, but it can't be used because it can't be selected using the Location pull-down at the top right of the screen.

Below is the Tills tab. Use this to set theTill(s) for the location. You must have at least one, otherwise there is nowhere to put the money. It is possible for multiple locations to share tills. See also Organisation|Tills.

Below is the Deposit Accounts tab. Use this to set the Deposit Account(s) for the location. You must have at least one, otherwise there is nowhere to deposit the money. It is possible for multiple locations to share accounts. See also Organisation|Deposit Accounts.

Below is the Schedule Views tab. Use this to set the Schedule Views for the location. You must have one, but can have more. Multiple locations can share Schedule Views. See also Organisation|Schedule Views.

Below is the Work List Views tab. Use this to set the Work List Views for the location. You must have one, but can have more. Multiple locations can share Work List Views. See also Organisation|Work List Views.

Below is the Templates tab. Use this to set any location specific Document Templates. These are commonly used where it is necesssary for each location to have different logos on invoices, receipts etc. It is quite possible for a document to be generated with the current location's name and address, but its far more difficult to get it to use different images. See also Templates.

Below is the Service Ratios tab. Use this to apply a ratio to prices of products of a specific product type, at this practice location.

Select
This is the screen used to select a Practice Location. It works like a standard select screen.
SMS Configuration: Clickatell SMTP Connection
This screen is used to configure the SMS gateway for Clickatell. See also Concepts|SMS and Reference|Setup|SMS. The screen is in two parts - the top contains the parameters, the bottom allows you to test the setup.

The fields in the top half are as follows:
Name - the name of the connection
Description - a description which serves to clarify the name
Website - Clickatell's website
Active - uncheck this box to deactivate this configuration
Country Prefix - the country code, eg 61 for Australia, 44 for the UK, etc
Area Prefix - the digit used to prefix the area code, ie 0 for Australia - see also below
User - the user name for the Clickatell account
Password - the password for the Clickatell account
API ID - the API ID provided by Clickatell
From - a valid email address
Reply To - an optional email address - responses from the gateway will be sent here
Sender ID - the SMS sender ID. If specified, it must correspond to one configured with the Clickatell account.
Note: If your Clickatell SMS Configuration was created prior to OpenVPMS 1.7.1, you will need to recreate it to access the Sender ID field.
The bottom half of the screen contains:
Number - the phone number to which the test message is to be sent
Message - the text for the SMS message
SMS Button - press to send the email
Email - this panel shows the email that will be sent
Status - this shows 'OK' if all is OK else an error message indicating what is wrong
To get the Email and Status to update you must press the Enter key when the cursor is positioned in either of the Number or Message fields.
Note: The Country and Area Prefixes are used to format phone numbers so that they have the required format. That is, the customer's number will be something like 0413 123 456, but the gateway needs the full international number, ie 61413123456. However, if the customer lives in another country then their number will be something like (for Hong Kong) 852 1234 5678. You need to indicate that this is an international number by prefixing it with a +, ie +85212345678.
So the logic is:
If the number starts with a +, strip it and use that number.
Else does the customer's number start with the Area Prefix? If yes, then strip the prefix and add the Country Prefix.
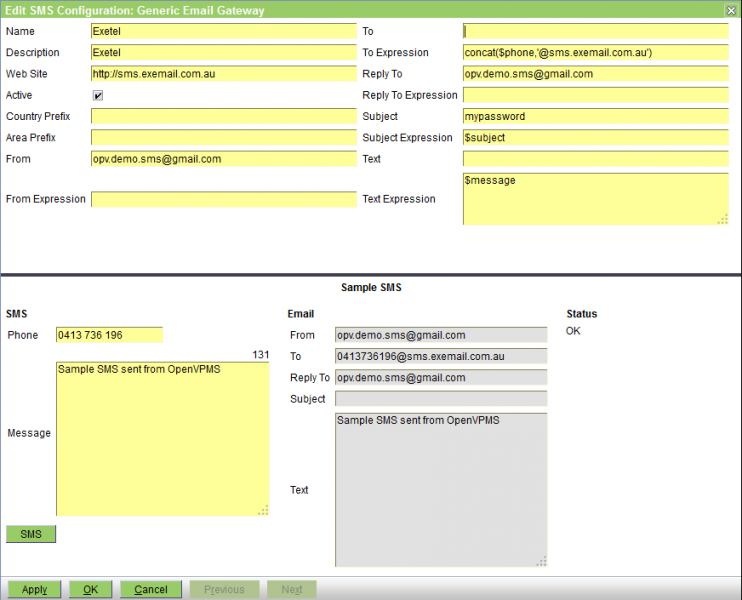
SMS Configuration: Generic Email Gateway
This screen is used to configure the generic SMS gateway. See also Concepts|SMS and Reference|Setup|SMS. The screen is in two parts - the top contains the parameters, the bottom allows you to test the setup. Note that this is a generic gateway configuration screen - the screen shot below shows parameters suitable for Exetel.
The fields in the top half are as follows:
Name - the name of the connection
Description - a description which serves to clarify the name
Website - the provider's website
Active - uncheck this box to deactivate this configuration
Country Prefix - the country code, eg 61 for Australia, 44 for the UK, etc
Area Prefix - the digit used to prefix the area code, ie 0 for Australia - see also below
From & From Expression - these define the email's From address. If only From is entered, this is used. If the From Expression is provided, it is evaluated and the result used. The expression may refer to the From value as "$from".
To & To Expression -these define the email's To address. If only To is entered, this is used. If the To Expression is provided, it is evaluated and the result used. The expression may refer to the To value as "$to".
Reply To & Reply To Expression - these define the email's Reply To address. If only Reply To is entered, this is used. If the Reply To Expression is provided, it is evaluated and the result used. The expression may refer to the Reply To value as "$replyTo".
Subject & Subject Expression - these define the email's Subject. If only Subject is entered, this is used. If the Subject Expression is provided, it is evaluated and the result used. The expression may refer to the Subject value as "$subject".
Text & Text Expression - these define the email's Text. If only Text is entered, this is used. If the Text Expression is provided, it is evaluated and the result used. The expression may refer to the Text value as "$text".
The bottom half of the screen contains:
Number - the phone number to which the test message is to be sent
Message - the text for the SMS message
SMS Button - press to send the email
Email - this panel shows the email that will be sent
Status - this shows 'OK' if all is OK else an error message indicating what is wrong
To get the Email and Status to update you must press the Enter key when the cursor is positioned in either of the Number or Message fields.
Note: The Country and Area Prefixes are used to format phone numbers so that they have the required format. That is, the customer's number will be something like 0413 123 456, but the gateway needs the full international number, ie 61413123456. However, if the customer lives in another country then their number will be something like (for Hong Kong) 852 1234 5678. You need to indicate that this is an international number by prefixing it with a +, ie +85212345678.
So the logic is:
If the number starts with a +, strip it and use that number.
Else does the customer's number start with the Area Prefix? If yes, then strip the prefix and add the Country Prefix.
Select
This is the screen used to select an SMS configuration. It works like a standard select screen.
SMS Configuration: SMSGlobal Email2SMS
This screen is used to configure the SMS gateway for SMSGlobal. See also Concepts|SMS and Reference|Setup|SMS. The screen is in two parts - the top contains the parameters, the bottom allows you to test the setup.

The fields in the top half are as follows:
Name - the name of the connection
Description - a description which serves to clarify the name
Website - SMSGlobal's website
Active - uncheck this box to deactivate this configuration
Country Prefix - the country code, eg 61 for Australia, 44 for the UK, etc
Area Prefix - the digit used to prefix the area code, ie 0 for Australia - see also below
From - a valid email address - this must be the same as that entered in the Email to SMS settings in the Preferences page at https://www.smsglobal.com/mobileworks/preferences.php
The bottom half of the screen contains:
Number - the phone number to which the test message is to be sent
Message - the text for the SMS message
SMS Button - press to send the email
Email - this panel shows the email that will be sent
Status - this shows 'OK' if all is OK else an error message indicating what is wrong
To get the Email and Status to update you must press the Enter key when the cursor is positioned in either of the Number or Message fields.
Note: The Country and Area Prefixes are used to format phone numbers so that they have the required format. That is, the customer's number will be something like 0413 123 456, but the gateway needs the full international number, ie 61413123456. However, if the customer lives in another country then their number will be something like (for Hong Kong) 852 1234 5678. You need to indicate that this is an international number by prefixing it with a +, ie +85212345678.
So the logic is:
If the number starts with a +, strip it and use that number.
Else does the customer's number start with the Area Prefix? If yes, then strip the prefix and add the Country Prefix.
Schedule
This screen is used to create/edit/view the Schedules. These together with the views (see Organisation|Schedule View) determine how the Workflow|Scheduling screen works. It also sets options to control the check-in behaviour. See also the note at the bottom about * as the default appointment type.
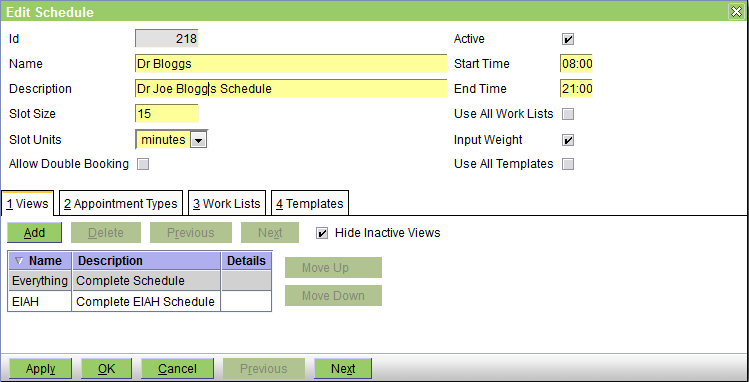
The fields are as follows:
Name - the name of the schedule
Description - serves to clarify the name
Slot Size - this and Slot Units defines the size of each slot in the schedule
Slot Units - can be set to minutes or hours
Allow Double Booking - check this box to allow multiple appointments to be scheduled at the same time. Note that due to a current bug overlapping bookings do not display correctly when a single schedule is shown on the Workflow|Scheduling screen.
Active - uncheck this box to deactivate the schedule. Note that if you do deactivate a schedule because it is no longer needed, then you should also remove this schedule from any schedule views in which it is used, otherwise the Workflow|Scheduling screen will happily display and let you use a schedule that has been deactivated.
Start & End Time - these define the work day - ie the times between which appointments can be booked. If left unset, they default to 08:00 to 18:00 respectively. Enter either in hh:mm or hhmm format. If you enter just the hour the minute portion will be set to the current time (ie 9 yields 9:13 if the current time is 11:13).
If you set say 18:00 as the end time, then the last slot shown on the schedule will start at the slot size before this, ie 17:45 if you have a 15 minute slot size.
For a practice that operates on a 24 hour basis, you can set the start time to 00:00 and leave the end time blank.
Use All Work Lists - if this box is checked, then when an appointment if checked-in from this schedule, you will be able to choose any work list, otherwise only the worklists defined in the Work Lists tab will be available
Input Weight - if this box is checked, then as part of the check-in, the New Weight screen will be displayed so that the patient's weight can be entered
Use All Templates - if this box is checked, then as part of the check-in, all patient form and letter document templates will be displayed for you to select from, otherwise only those defined in the Templates tab will be available
Views tab - used to set the Schedule Views which this Schedule is included in
Appointments Types tab - as shown below, this is used to view, add and delete the Appointment Types that are valid for this Schedule.
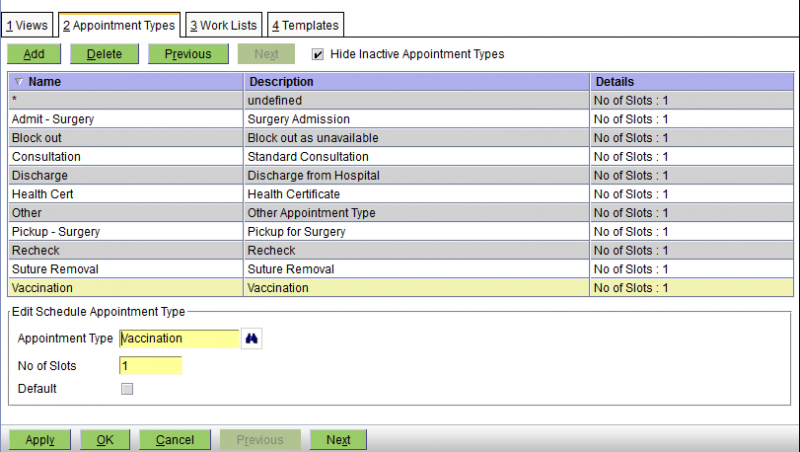
The fields are as follows:
Appointment Type - the appointment type (the available types are determined by the Administration|Types|Appointment screen)
No of Slots - the lenght of this appointment type in this schedule
Default - check this box if this is the default appointment type.
Work Lists tab - as shown below, this is used to view, add and delete the Work Lists you can choose from when checking-in an appointment on this schedule.

As you can see you can add, delete and modify the set of work lists, and also change the order in which they are listed (so that the most common one can be put at the top).
Templates tab - as shown below, this is used to view, add and delete the patient form and letter document templates that will be presented to choose from when checking-in an appointment on this schedule
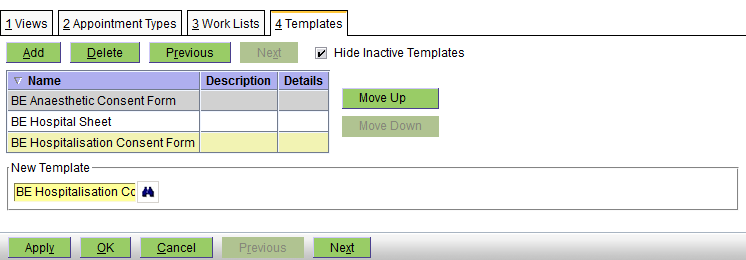
As you can see you can add, delete and modify the list of templates, and also change the order in which they are listed (so that the most common one can be put at the top of the list).
Note that in order to enable the quickest possible selection of the Appointment Type on the Workflow/Scheduling screen, you should define an appointment type "*" (description 'unspecified') and make this the default. With this as the default, then when you create an Appointment when you press the binoculars for the Appointment Type field, you will see the complete list of available Appointment Types. Alternatively, when you tab to the Appointment Type field, (which selects the *), you can then type the first letter of your required Appointment Type (eg c for Consult, h for Health-check, etc - assuming you have set the other appointment types so that each start with different letters).
Select
This is the screen used to select a Schedule. It works like a standard select screen.
Schedule View
This screen is used to create/edit/view the Schedule Views. These together with the schedules themselves (see Organisation|Schedules) determine how the Workflow|Scheduling screen works.

The fields are as follows:
Name - the name of the schedule view
Description - serves to clarify the name
Active - uncheck this box to deactivate the schedule view
Display Expression - this the expression used to construct what is displayed when the schedule view contains multiple schedules. (It's not used if there is only a single schedule in the view.) See also Expressions below.
Display Notes - uncheck this if you do not want the notes icon shown on the multi-schedule version of the Workflow|Scheduling screen. On the single-schedule version, the notes text is shown in the Notes column.
Highlight - you can select None, Clinician, Event Type (ie appointment type), or Status. This determines the initial setting of the Highlight setting on the Scheduling screen. Remember that if you are going to make proper use of this highlighting facility, then you need to set different colours for each clinician (in Administration|Users), appointment type (in Administration|Types|Appointment). However if you want to change the status colours, it's more difficult - see Reference|Colours.
Multiple Day View - if selected, multiple days worth of appointments can be shown at once.
Schedules tab - used to set the Schedules which this Schedule View includes. If there are more than one, then the Workflow|Scheduling screen initially shows each schedule in its own column. If there is only one, then a different screen format is used with columns for each of Status, Appointment Type, Customer, Patient, Reason and Notes. Even with a multiple-schedule view, you can switch the Scheduling screen to show only a single schedule.
Test Button
Pressing the Test button opens a window that allows you to test and compose expressions. It includes documentation and examples as well as its own Test button that actually tests your expression and displays the resulting text.
Expressions
The expression shown in the screenshot above is duplicated here so you can copy it:
concat(openvpms:get(.,'clinician.name'),': ',openvpms:get(.,'customer.name'),' - ',openvpms:get(.,'patient.name'),'\n',openvpms:get(.,'act.reasonName'),' - ',openvpms:get(.,'act.statusName'))Note that what we are doing is concatenating together bits of information from the openvpms:get calls with various separators, eg ': '. The '\n' injects a newline character to start a second line.
The following table shows the parameters that the expressions have access to, that is, each of the node names which can be used in the openvpms:get(.,'nodeName') function.
| Node Name | Explanation |
|---|---|
| act.description | Appointment Notes |
| act.status | Status code (eg PENDING) |
| act.statusName | Status (eg Pending) |
| act.reason | Reason code (eg HIT_BY_CAR) |
| act.reasonName | Reason (eg Hit by Car) |
| customer.name | Name of Customer (eg Smith,Fred) |
| patient.name | Name of Patient |
| clinician.name | Name of Clinician |
| schedule.name | Name of the schedule |
| scheduleType.name | Appointment Type |
| arrivalTime | Time arrived, ie check-in time (eg Sat Jul 27 10:15:47 EST 2013) empty string if not checked-in yet use date:format functions to format, eg date:formatDateTime(openvpms:get(.,'arrivalTime'),'short') yields 27/7/13 10:16 AM |
| waiting | Time as '(h:mm)' since check-in, empty string if not checked-in yet |
There are also a number of others which may be used, but not particularly efficiently as they require database queries.
- patient.objectReference - reference to the patient
- act.objectReference - reference to the appointment/task
- schedule.objectReference - reference to the schedule
- customer.objectReference - reference to the customer
- clinician.objectReference - reference to the clinician
To get the breed, do:
openvpms:lookup(openvpms:get(., "patient.objectReference"), "breed")
To get the customer's last name, do:
openvpms:get(.,"customer.objectReference.lastName")
Notes:
- the various objectReference properties above aren't supported by the Display Expression editor and hence if you use its Test function, you will get 'Expression Error'
- if there is no patient, an empty string will be returned
However, if you need a customer's full name and address to show on a schedule view so that a house call vet can look at the schedule with his iPhone to see where to go next, then the following will do the trick:
normalize-space(openvpms:get(., "customer.objectReference.description"))
The 'normalize-space' function (one of the xpath functions) removes the newline characters to convert the multiline address into a single line.
Finally, an example where the information is displayed over three lines but is limited to 30 characters wide:
concat(substring(concat(openvpms:get(., 'clinician.name'),': ', openvpms:get(., 'patient.name'),' ',openvpms:get(.,'customer.objectReference.lastName')),1,30),'\n', substring(concat('[',openvpms:lookup(openvpms:get(., 'patient.objectReference'),'breed'),']'),1,30),'\n', substring(concat(openvpms:get(.,'scheduleType.name'), ':', openvpms:get(.,'act.reasonName'),' ', openvpms:get(.,'waiting')),1,30)) Select
This is the screen used to select a Discount Type. It works like a standard select screen.
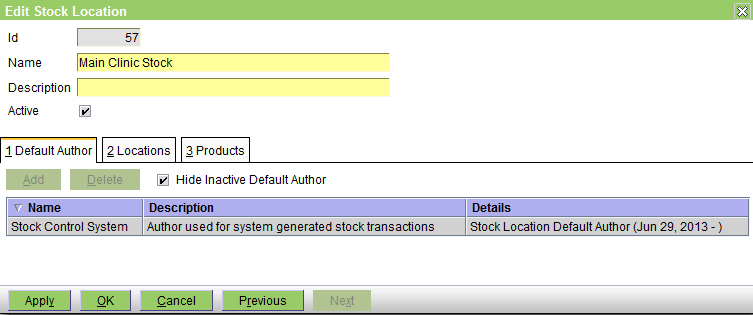
Stock Location
This screen is used to create/edit/view the Stock Locations, ie the store rooms where stock is held. See Concepts|Stock Control for background.
The fields are as follows:
Name - the name of the stock location. This will appear on various reports and documents so it should be set as you want it to appear.
Description - used to clarify the name if necessary
Active - uncheck this box to deactivate the stock location
The Default Author tab is used to view and maintain the user set as the author of stock management transactions generated by the system. It is possible to set an normal user for this, but it is better to create a special user - as is shown in the screen shot above.
Below is the Locations tab. Use this to set the Practice Locations to which this stock location belongs. One stock location can be used by multiple practice locations, but a practice location cannot have more than one stock location. Note that you can have a stock location not attached to a practice location, but it is of little use since all you can do is use the Products|Stock Management|Stock Transfer transaction to transfer items to it. However, you could use this as a mechanism to keep a record of written-off stock, ie create a stock location called Write-offs unlinked to any practice location, and transfer written-off stock to it.

Below is the Products tab. It is normally used just to view the products at the stock location and their stock details. You can used it to add products to this location and set their stock details - but this is normally done via the Products|Information screen. Note that in order to show the product details, you must click on the product line in order to get the details to show.

For the field meanings, see here.
Select
This is the screen used to select a Stock Location. It works like a standard select screen.
Till
This screen is used to create/edit/view the details of the Tills. See Concepts|Tills for background information.

The fields are as follows:
Name - the name of the till
Till Float - the float - ie the amount of cash money to be left in the till when it is cleared as part of the Reporting|Till Balancing|Clear operation
Last Cleared - the date on which the till was last cleared. Although you can modify this field, you should not normally need to as it is set by the system.
Active - uncheck this box to deactivate the till
Printer Name - the receipt printer name. Used in conjunction with Drawer Command to open the cash drawer.
Drawer Command - a comma separated list of numbers, in the range 0..255 that may be used to trigger the cash drawer to open. The Test button can be used to verify that the Drawer Command can be used to open the drawer.
Active - uncheck this box to deactivate the till
Locations tab - used to set the Practice Locations which this till is used by
Opening the Cash Drawer
Many POS terminals support opening the cash drawer by sending a set of control codes to the receipt printer. OpenVPMS supports this through the Printer Name and Drawer Command fields.
OpenVPMS will send the drawer command to the receipt printer when:
- a payment containing Cash, Cheque, or Credit line item is finalised
- a payment containing an EFT line item with non-zero Cashout is finalised
- a refund containing a Cash, Cheque or Credit line item is finalised
Consult your POS terminal vendor for the appropriate control codes to use.
Alternatively, see this list.
Work List
This screen is used to create/edit/view the Work Lists. These together with the views (see Organisation|Worklist View) determine how the Workflow|Scheduling screen works and also to control what screens are presented as part of the check-in and worklist transfer processes. See also the note at the bottom about * as the default task type.

The fields are as follows:
Name - the name of the work list
Description - serves to clarify the name
Max Slots - the maximum number of slots in the work list, ie how many entries it can contain. For normal 'list of jobs' work lists this can be left at the default of 100. However, if your work list represents some limited commodity such as the number of boarding kennels, then you should set the Max Slots to this.
Active - uncheck this box to deactivate the work list. Note that if you do deactivate a work list because it is no longer needed, then you should also remove this work list from any work list views in which it is used, otherwise the Workflow|Work Lists screen will happily display and let you use a work list that has been deactivated.
Use All Templates - uncheck this box if you want to limit the list of document templates presented for selection at check-in and worklist transfer time. You will then need to use the Templates tab to define which templates are to be displayed for selection, and if none are defined then the document selection step will be skipped. If the box is checked, then all suitable templates will be displayed for selection. Note that even if you do want to be able to select from all available templates, you may want to uncheck this box and list all the templates in the Templates tab because you can then control the order so that the most commonly used one are listed first.
Input Weight - uncheck this box if you do not want the Weight recording window to be displayed as part of the checkin process.
Views tab - used to set the Work List Views which this Work List is included in
Task Types tab - as shown below, this is used to view, add and delete the Task Types that are valid for this work list.

The fields are as follows:
Task Type - the task type
No of Slots - this field is not currently used by the system (every task type uses one slot in the work list irrespective of anything you set here)
Default - check this box if this is the default task type
Templates tab - as shown below, this is used to view, add and delete the Templates that are valid for this work list - i.e. those that will be suggested for use when a check-in or task transfer is done.

As you can see you can add, delete and modify the list of templates, and also change the order in which they are listed (so that the most common one can be put at the top of the list).
Note that in order to enable the quickest possible selection of the Task Type on the Workflow/Work Lists screen, you should define an task type "*" (description 'unspecified') and make this the default. When you do the check-in, this will get set as the task type, and can generally be left as is BECAUSE the Notes field of the worklist entry gets automatically set to the Appointment Reason + the Appointment Notes. However, if you do want to set a specific Task Type, you can just edit the Worklist entry and press the Task Type binoculars to show the available types (and all available types will be displayed because * acts as a wildcard mean 'show all').
If you don't like this approach, then be sure to set the default task type for the worklist to the most common task, so that most of the time you don't need to change it.
Select
This is the screen used to select a Work List.
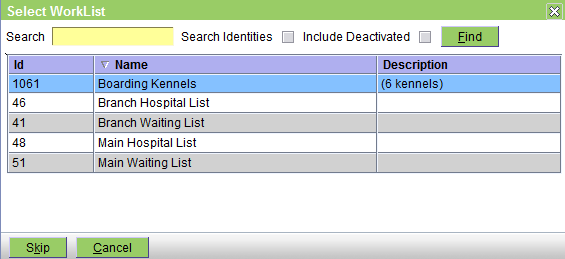
It works like a standard select screen.
This screen is displayed when performing a Check-In, or transferring a task from one work list to another.
Check-In
Click on the required work list to choose it. The patient weight screen will then open as the next part of the check in process.
Pressing Skip will skip the selection of the work list so this activity will not be listed on any work list. This is not normally a sensible thing to do. However, if you do have a current consult running, then you can get to the visit edit screen for that consult by pressing the Check-In button and skipping everything (Alt-K is the easiest) until you get to the visit editor.
Pressing Cancel will abort the check-in.
Transfer
Click on the work list to transfer to. If the work list has document templates, a print dialog will be displayed.
Work List View
This screen is used to create/edit/view the Work List Views. These together with the work lists themselves (see Organisation|Work Lists) determine how the Workflow|Work Lists screen works.

The fields are as follows:
Work List View - the name of the work list view
Description - serves to clarify the name
Active - uncheck this box to deactivate the schedule view
Display Expression - this the expression used to construct what is displayed when the work list view contains multiple work lists. (It's not used if there is only a single work list in the view.) See also Expressions below.
Display Notes - uncheck this if you do not want the notes icon shown on the multi-work list version of the Workflow|Work List screen. On the single-work list version, the notes text is shown in the Notes column.
Highlight - you can select None, Clinician, Event Type (ie task type), or Status. This determines the initial setting of the Highlight setting on the Work Lists screen. Remember that if you are going to make proper use of this highlighting facility, then you need to set different colours for each clinician (in Administration|Users), task type (in Administration|Types|Task Type). However if you want to change the status colours, it's more difficult - see Reference|Colours.
Work Lists tab - used to set the Work Lists which this Work List View includes. If there are more than one, then the Workflow|Work Lists screen shows each work list in its own column. If there is only one, then a different screen format is used with columns for each of Status, Appointment Type, Customer, Patient, Reason and Notes. Even with a multiple-work list view, you can switch the Work List screen to show only a single work list.
Test Button
Pressing the Test button opens a window that allows you to test and compose expressions. It includes documentation and examples as well as its own Test button that actually tests your expression and displays the resulting text. Note that it is possible to write a valid complex expression that the Test facility says is invalid - see the note at the bottom of this page.
Expressions
The expression shown in the screenshot above is duplicated here so you can copy it:
concat(openvpms:get(.,'clinician.name'),':',openvpms:get(.,'patient.name'),' ',openvpms:get(.,'customer.objectReference.lastName'),' =',substring(openvpms:get(.,'act.status'),1,2),' ', openvpms:get(.,'waiting'),'{',date:format(openvpms:get(., 'act.objectReference.appointments.source.startTime'), "HH:mm"),'}',openvpms:get(.,'customer.objectReference.type.name'),'\n','[',openvpms:lookup(openvpms:get(.,'patient.objectReference'),'breed'),'] ',openvpms:get(.,'scheduleType.name'),':',openvpms:get(.,'act.objectReference.author.entity.name'),'\n',openvpms:get(.,'act.description')) Note that what we are doing is concatenating together bits of information from the openvpms:get calls with various separators, eg ': '. The '\n' injects a newline character to start a second line. The above expression generates output like:

ie the clinician is DQ, the patient is Miso, customer last name Liang, status is In Progress, 1 hour 32 between being checked in and the consult starting, the appointment was at 09:15, the customer Account Type is 'Creature Comforts', breed is Poodle-Toy, task type is Hospital Inpatient, the task author is 'Anita Chiu', and the bottom line gives the task notes.
The following table shows the parameters that the expressions have access to, that is, each of the node names which can be used in the openvpms:get(.,'nodeName') function.
| act.description | Task Notes |
| act.status | Status code (eg PENDING) |
| act.statusName | Status (eg Pending) |
| act.reason | [can be used but always empty] |
| act.reasonName | [can be used but always empty] |
| customer.name | Name of Customer (eg Smith,Fred) |
| patient.name | Name of Patient |
| clinician.name | Name of Clinician |
| schedule.name | Name of the work list |
| scheduleType.name | Task Type |
| waiting | Time between check-in and consult starting in format (hh:mm). Empty if this not available. |
There are also a number of others which may be used, but not particularly efficiently as they require database queries.
- patient.objectReference - reference to the patient
- act.objectReference - reference to the appointment/task
- schedule.objectReference - reference to the schedule
- customer.objectReference - reference to the customer
- clinician.objectReference - reference to the clinician
- author.objectReference - reference to the author
To get the breed, do:
openvpms:lookup(openvpms:get(., "patient.objectReference"), "breed")
To get the customer's last name, do:
openvpms:get(.,"customer.objectReference.lastName")
To get the referring practice if any, use:
expr:concatIf('\n', 'Ref: ',openvpms:get(party:getPatientReferralVetPractice(openvpms:get(., 'patient.objectReference')), 'name'))
In the above, the expr:concatIf() function ensures that things work nicely if there is no referring practice since the whole expression becomes null if one component is null.
To get the appointment start time (in 24hour format) for this task, do:
date:format(openvpms:get(., 'act.objectReference.appointments.source.startTime'), "HH:mm"))
Notes:
- the various objectReference properties above aren't supported by the Display Expression editor and hence if you use its Test function, you will get 'Expression Error'
- when you are testing a new expression, remember that you need to logout and log back in again in order for the new expression to be active
- if there is no patient, and empty string will be returned
- The various $patient, $customer, $task etc variables that are available in macro expressions are not available here
However, if you need a customer's full name and address to show on a schedule view so that a house call vet can look at the schedule with his iPhone to see where to go next, then the following will do the trick:
normalize-space(openvpms:get(., "customer.objectReference.description"))
The 'normalize-space' function (one of the xpath functions) removes the newline characters to convert the multiline address into a single line.
Select
This is the screen used to select a Work List View. It works like a standard select screen.
Confirm Delete
When you press the Delete button on the Administration|Organisation screen, a confirmation window will appear.
If the selected Organisation is not in use and can be deleted, the window will simply ask you to confirm the delete. Press OK to confirm or Cancel to abort.
If it cannot be deleted because it is in use, the text will be "xxxx has relationships and cannot be deleted. Do you want to deactivate it instead?"(where xxx is the name of the item you are trying to delete). Pressing OK will unset its Active flag, Cancel will abort.
If it is in use but can be deleted, the text will be "xxxx has relationships. Are you sure want to delete? This operation cannot be undone." (where xxx is the name of the item you are trying to delete). Pressing OK will delete the item as well as all references to it, Cancel will abort.
Confirm New
This is the New Organisation confirmation window. Select the type of Organisation to be created and then use OK to continue or Cancel to abort. Note that if you have selected a type on the Organisation screen, then this will already be selected in this window (even if it is not showing in the list of types) - thus you can normally simply click OK to proceed.
Types
The Administration|Types screen is a select screen that allows you to select the specific Type to be viewed or maintained. Below is the screen as initially displayed but with the Types pull-down list showing.
Note that if you do edit Administration|Types items (say to change an an appointment type colour), then the new values will not become available until the next time you log on (because these type settings are fetched once at logon time to improve performance).

Each Type has its own view/edit screen.
Appointment
This screen allows you to create/view/edit the details for each Appointment Type. This and Organisation|Schedule determine what appointment types can be made.

The fields are as follows:
Appointment Type - it's name
Description - you can use this to clarify the type of appointment
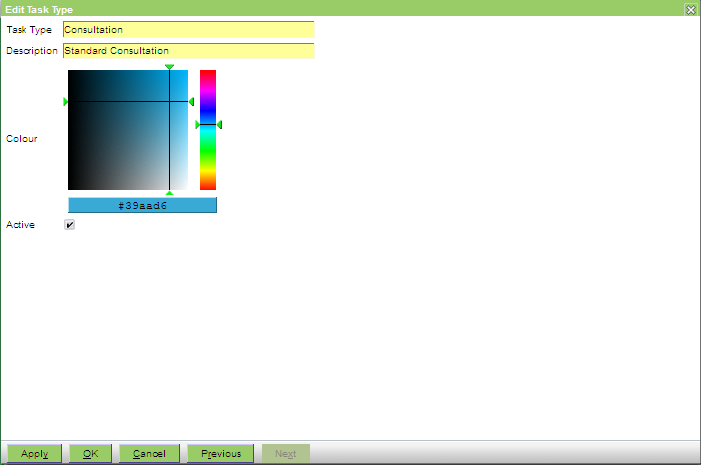
Colour - used to set the colour used to identify appointment types in the schedule screen. You use the mouse to select the colour via the colour and luminosity/hue boxes. If you want to check the colours of the different appointment types, the easiest way to do this is to view the appointment type and then to use the Next and Previous buttons to run back and forth through the different types.
Note that you should avoid the 'light cream' colour f2f3b3 which displays as follows: 
because this is used to highlight the selected item on the Workflow|Scheduling screen.
Active - uncheck the box to deactivate the Appointment Type
Discount
This screen allows you to create/view/edit the Discount Types. See also Concepts|Discounts.

The fields are as follows:
Name - the name of the discount
Description - a description that serves to clarify the name
Discount Type - either Percentage (ie a percentage of the amount), Fixed (ie a fixed amount), or At-cost + Rate + Tax
Rate - either the fixed amount (for the Fixed type), or the percentage amount (for the Percentage and At-cost types)
Include Fixed Amount - check this box if the discount is to apply to the fixed component of the product price as well as its unit component
Active - uncheck this box to deactivate the discount
Note that the 'At-cost + Rate + Tax' type is so-named to reflect how the discount amount is calculated. Whereas with a Percentage discount of 10%, the sale price is reduced by 10% and thus the discount amount is 10% of the original sale price.
With an At-cost discount of 10%, the item is sold for (cost+10%)+tax, and thus the discount amount will depend on the markup.
Select
This is the screen used to select a Discount Type or a Discount Type Group. It works like a standard select screen.
Discount Group
This screen allows you to create/view/edit the Discount Groups. These are used to group together Discounts so that multiple discounts can be more easily set for a customer or patient. See also Concepts|Discounts.
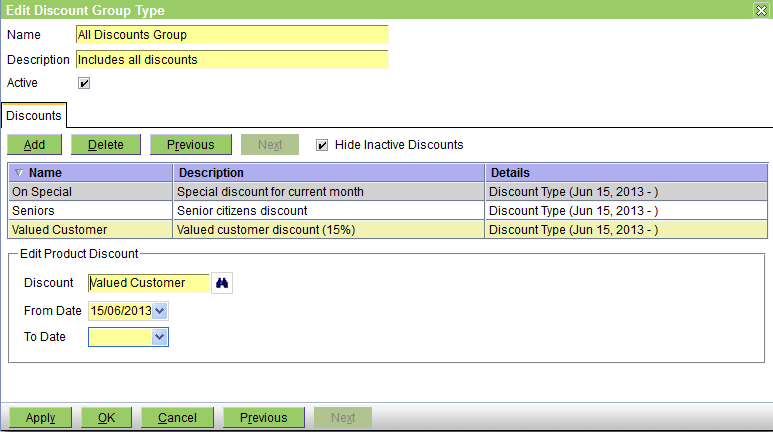
The fields are as follows:
Name - the name of the discount group
Description - a description that serves to clarify the name
Active - uncheck this box to deactivate the discount group
Discounts Tab - used to add and delete the discount types in the group. Its fields are:
Discount - enter the name of the Discount or use the binoculars to display a list to select from
From and To Dates - these define the inclusive dates between which the discount applies. The From date is mandatory, the To date can be left unspecified and in this case means 'forever'.
Note that you cannot add the same discount type more than once, ie the group can only contain one of each discount type.
Select
This is the screen used to select a Discount Type to be included in a Discount Type Group. It works like a standard select screen.
Investigation
This screen allows you to create/view/edit the details for each Investigation Type. These define the Investigations that can be:
- linked to a product via its Investigations tab
- added to the medical record
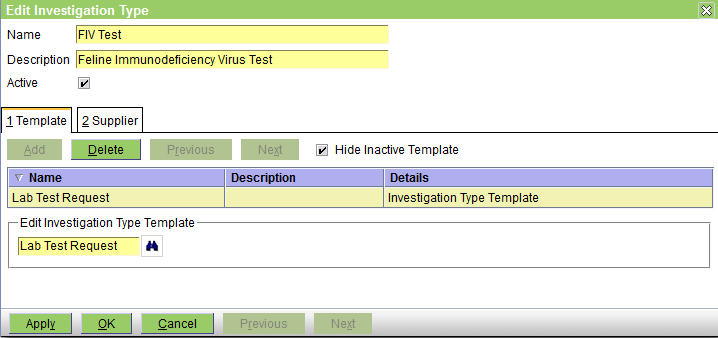
The fields are as follows:
Name - the name of investigation type
Description - you can use this to clarify the type of investigation
Active - uncheck the box to deactivate the Investigation Type
Template tab - this is used to display, add, modify and delete the Document Template. If one is specified then it defines the document that will be printed when the investigation is initiated. It is normally some sort of form that can be used to request the required test(s). A maximum of one template can be specified.
Supplier tab - this is used to display, add, modify and delete the associated Supplier. If one is specified then will be displayed on the Workflow|Investigations screen. A maximum of one supplier can be specified.

Product
This screen allows you to create/edit/view the details for each Product Type. Each Merchandise, Medication, and Service Product can be given a Product Type. These allow you to:
a) determine how the product appears on the invoice
b) set different taxes by product type
c) set different discounts by product type

The fields are as follows:
Product Type - it's name
Description - you can use this to clarify the type of product
Invoice Sort Order - the lower the number set here, the earlier the item appears on the invoice. If you are using the standard invoice documents, then items having the same number (or no number at all) will be sorted by the date/time that they were added to the invoice - earliest at the top, newest at the bottom. However, if you are using invoices tailored to group items by Product Type, then you will probably need to ensure that the Invoice Sort Order is set to a different value for each product type.
Detail on Invoice - untick this box if you want all the invoice items of the same type combined as one line item on the invoice. Note that this facility is not supported by the invoice documents in the standard distribution. To make use of it requires tailoring of the jrxml file used to print the invoice items.
Active - uncheck the box to deactivate the Product Type
Pharmacy - this is only required if you use the HL7 facility where it is used the set a Pharmacy or Pharmacy Group for all products of this Type
Taxes tab
This is used to display/set the taxes applicable to the Product Type. To adjust, click the tax in the Available or Selected box and then click the > or < button respectively.
Discounts tab
This is used to display/set the discounts applicable to the Product Type. The fields are as follows:
Discount - enter the Discount Type or click the binoculars to select one. Note that you cannot attach Discount Type Groups to a Product Type, only a Discount Type. You can add one or more.
From Date - the date from which the discount will apply
To Date - the date to which the discount will apply - left unspecified this means 'forever'
Reminder
This screen allows you to view/edit the details for each Reminder Type. For general information on the Reminder system, see Concepts|Reminders. See also Stopper Reminders below.

The fields are as follows:
Reminder Type - its name
Description - you can use this to clarify the type of reminder
Active - uncheck the box to deactivate the Reminder Type
Group - check this box if you want multiple reminders to the one customer to only generate one reminder letter. See also the Grouped Reminders discussion below.
Interactive - check this box if you want confirmation when this type of reminder is generated as a result of using a product to which the reminder is attached (such as a vaccination). Note that this sets the default setting of the Interactive flag for this reminder. However, each product that uses this reminder can have its own setting of the Interactive flag. Specifically, this means that if you have existing products using this reminder, then altering the Interactive setting here will have no effect - you will have to go and set the Interactive flag as required for each product that uses this reminder.
Reminder Interval - the number of 'Interval Units' from the time that the reminder is created until it is due
Interval Units - you can set this to years, months, weeks or days
Cancel Interval - the number of 'Cancel Units' after a reminder is due that it is automatically cancelled. This should be set to be a little more than the Overdue Interval set for the "last" template that you have - ie the one with the highest Sent Count. If you set it less than the last Overdue Interval, then the reminder will be cancelled before all the reminders that you planned have been sent.
Cancel Units - you can set this to none, years, months, weeks or days
Sensitivity Interval - the number of 'Sensitivity Units' that determines the colour of the reminder when displayed on the Patient Information & Medical records screens when you click the Reminders bell icon in the left panel. It shows as follows:
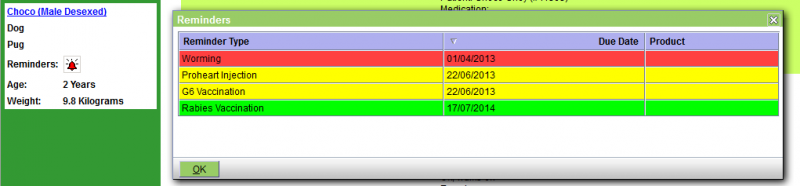
If a given reminder has a sensitivity period of two weeks, then up until two weeks before the reminder is due, it will be shown in green; in the two weeks prior to and after the due date, it will be shown in orange; and after two weeks after the reminder date, it will be shown in red.
Sensitivity Units - you can set this to none, years, months, weeks or days
Templates tab - this is used to display and edit the Document Template to be used when printing reminders of this type. You should have at least one template defined. You can set up multiple templates so that different reminder notices are generated for the initial reminder and first, second, etc overdue notices. (If you don't have any templates, then when the reminders are processed using Reporting|Reminders, any reminders of this type will be skipped and nothing can be sent to the customer. However, the reminder is displayed in the Patients|Medical Records screen, and thus does function as an aide-memoire to clinicians and staff.) The fields are as follows:
Document Template - enter the name of template or use the binoculars to search for one. Note that the template that you specify must have its Type (see Templates|Edit) set to Patient Letter, unless you have checked Group (see above) in which case it must be set to Grouped Reminders. If you tick the List box (see below), then the document template will not be used, but you still must specify a template.
Reminder Count - this is the reminder number, 0 for the initial one, 1 for the second etc.
Overdue Interval and Overdue Units - these set the times between the initial and following reminders. The Interval should be set to zero for the initial (Reminder Count 0) template, and increasing intervals for the second, third etc.
List - if this box is ticked then no individual reminder notice is generated, but instead the customer and patient details are printed on a list
Export - this can be used if reminder mailouts are handled via a third party. When ticked, customers that want reminders mailed will have their details exported to a file during reminder processing using Reporting|Reminders. See here for details of the export format.
SMS - this can be used to specify that reminders should be sent via SMS, if customers have a phone contact with 'Allow SMS' ticked. If a customer doesn't have an SMS contact, then reminders are sent using their default reminder contact.
A typical template setup might have these entries:
- Reminder Count: 0 Overdue: 0 days Document: Vaccination reminder - First List: unchecked
- Reminder Count: 1 Overdue: 30 days Document: Vaccination reminder - Second List: unchecked
- Reminder Count: 2 Overdue: 60 days Document: Vaccination reminder - Second List: checked
This will send a first reminder letter on the due date of the initial reminder, a second reminder 30 days after the due date of the initial reminder and then print the reminder details on a report 60 days after the due date of the initial reminder. The latter will show up with Action 'List' in the Reporting|Reminders screen. The two former ones will show up as Post or Email dependent on the customers preferred mode of communication. Note that for the above (with Reminder Count 2 overdue at 60 days), a Cancel Interval of say 90 days would be appropriate.
Species tab - this is used to display and edit the species to which this reminder can apply. You don't have to use this facility. It is only needed if you want to ensure that species specific reminders are applied only to the relevant species. To adjust, click the species in the Available or Selected box and then click the > or < button respectively.
Groups tab - this is used to display and edit the group(s) to which this reminder belongs. To adjust, click the group in the Available or Selected box and then click the > or < button respectively.
You don't have to use this facility. It is only needed if you want to group reminders so that generating reminder B will complete an existing reminder A. Use Administration|Lookups|Reminder Groups to create a group names say G, and the use the Groups Tab to make both reminders A and B members of group G.
"Stopper" Reminders
You may want to create a special reminder whose purpose is simply to complete other reminders. Consider the following:
Senario - have a new puppy and so manually create Desex reminder for 4 months forward. When we do the actual Desex operation we want this reminder to disappear, but with no creation of any future reminder.
Solution:
- create a reminder group called say Desex-G
- create the Desex reminder as normal, but with group Desex-G
- create Desex-Complete reminder with a zero Interval and zero Cancel Interval, and also set the group Desex-G
- for all desex products, set the reminder type as 'Desex-Complete'
Now when we invoice the Desex operation, a new Desex-Complete reminder will be created. This will complete the original Desex reminder.
If a customer has multiple reminders of types that have the Group box ticked, then these, irrespective of the Document Template specified for the applicable reminder count, will use the Document Template that has Type 'Grouped Reminders' - PROVIDED that the action is Post or Email. Consider the following, and assume that the action is Post in all 4 cases:

If both the G6 and Proheart reminder types have their Group box ticked, then one document will generated for Sir Humphry; it will be generated using the Grouped Reminders Document Template, and it will list the 4 reminders shown.
If only the G6 reminder type has the Group box ticked, then 3 documents will be printed: one Grouped Reminder for the G6 vaccinations showing both Dotty and Twiglet, and two Proheart reminders, one for Dotty and one for Twiglet, generated using the Document template specified for the reminder count. If Twiglet did not have a G6 vaccination due, then there would still be 3 documents, with the Grouped Reminder being replaced by a G6 vaccination reminder letter for Dotty.
That is, if the Group boxes are ticked, then the Grouped Reminder Document Template will be used - but ONLY IF there are multiple reminders. If the customer only has one reminder (and thus there is no need to group them) then the Document Template used is that specified in the Reminder Type's Templates tab for the applicable reminder count.
Note that there should only be a single Document Template of Type 'Grouped Reminders' available - either because there is only one in the system, or a single one is specified in the Practice Location or Practice Templates tab.
A sample Grouped Reminders document template is included in the standard system. It will need tailoring for your practice.
Task
This screen allows you to view/edit the details for each Task Type. This and Organisation|Work List determine what appointment types can be made.
The fields are as follows:
Task Type - its name
Description - you can use this to clarify the type of task
Colour - used to set the colour used to identify task types in the worklist screen. You use the mouse to select the colour via the colour and luminosity/hue boxes. If you want to check the colours of the different task types, the easiest way to do this is to view the task type and then to use the Next and Previous buttons to run back and forth through the different types.
Note that you should avoid the 'light cream' colour f2f3b3 which displays as follows:
because this is used to highlight the selected item on the Workflow|Work Lists screen.
Active - uncheck the box to deactivate the Task Type
Confirm Delete
When you press the Delete button on the Administration|Types screen, a confirmation window will appear.
If the selected Type is not in use and can be deleted, the window will simply ask you to confirm the delete. Press OK to confirm or Cancel to abort.
If it cannot be deleted because it is in use, the text will be "xxxx has relationships and cannot be deleted. Do you want to deactivate it instead?" (where xxx is the name of the item you are trying to delete). Pressing OK will unset its Active flag, Cancel will abort.
If it is in use but can be deleted, the text will be "xxxx has relationships. Are you sure want to delete? This operation cannot be undone." (where xxx is the name of the item you are trying to delete). Pressing OK will delete the item as well as all references to it, Cancel will abort.
Confirm New
This is the New Type confirmation window. Select the Type to be created and then use OK to continue or Cancel to abort. Note that if you have selected one on the Type screen, then this will already be selected in this window (even if it is not showing in the list of types) - thus you can normally simply click OK to proceed.
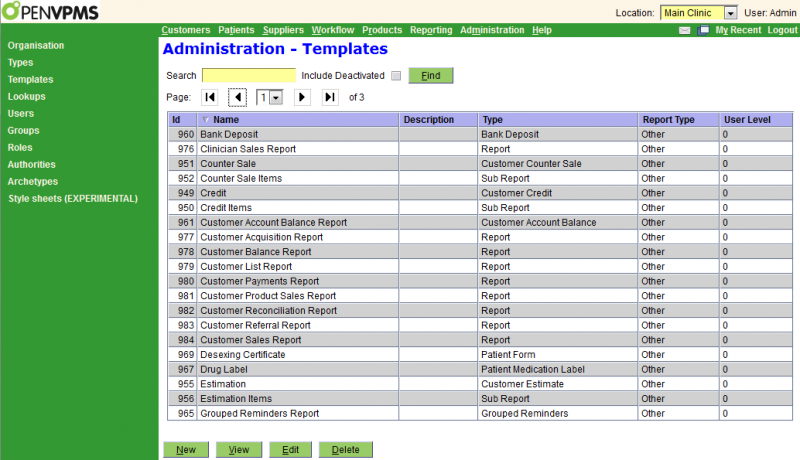
Templates
This screen allows you manage the Document Templates. Every form and report has a document template. The template specifies things like usage, paper format, associated printers, its content, and when it is printed. See also Concepts|Printing for background information, and Template Create/View/Edit for the template details.
As shown below, the system comes with a number of standard templates. These have to be loaded using the templateload utility (see the readme.txt file in the release package for instructions). Template sets are provided for A4, A5 and Letter. You can use these but you will probably want to modify some of them. You may also want to use one from the Resource Library set. See below for a quick summary of how to do this.
Template Usage: One can divide the templates into three groups:
Reports - you use the Reporting|Reports screen to select the report to run
Selectable forms - (eg Patient Forms) you will be presented with a list to select from
System forms - (eg Invoices) where the system chooses the template.
For the first two you can obviously set up as many as you need - you just choose the one you want. In the last case (eg Invoices) you need to be careful because if you create three different invoice templates, the system will just use the first it finds. This is not normally a problem - after all you only need one type of invoice form. However, if you do want to use different templates for each Practice Location, then you can do this by defining the templates to be used by the location. See Administration|Organisation|Practice Location.
If you do need to create or modify reports and forms, see Reference|Reports and Forms. Note that if you want to modify an existing report or form, then if you View the template, you can then click on the Content field to download the report/form ready for editing.
Installing a new template
To install a new template from the Resource Library, do as follows:
- download the jrxml (or odt) file by right-clicking on the attachment link and using 'Save Link As' (or 'Save Target As' etc depending on your browser) - remember where you saved it
- click the New button
- on the resulting New Document Template screen set the Type to Report, then click the Upload button. If it's not a report, then you need to set the appropriate Type.
- on the resulting window, click Browse and navigate to where you downloaded the file and select it. Click the Send button.
- back at the Edit Document Template screen, click the OK button
Changing a standard report paper size
The system comes with a set of reports and documents in the <OPENVPMS-HOME>/reports directory. This is structured as follows:
 |
You can see that there are 7 directories with most having multiple sub-directories, one per function, and each of these has a sub-directory for each paper size each containing the templates for that paper size. Note that not all paper sizes are provided. In particular, the Reports are provided only in A4 and not in A5 or Letter. So if you initially loaded the A4 set, and want to change your invoices to the A5 equivalents, then you need to load the templates in Customer/Invoice/A5. Do this by editing each template, and then pressing the Upload button to load the appropriate content. For the invoices you will see that the directory contains the files Invoice.jrxml, Invoice Items.jrxml, and Invoice Reminders.jrxml. Hence you need to edit the Invoice, Invoice Items, and Invoice Reminders templates, and in each case upload the relevant file from the Customer/Invoice/A5 directory.
|
Create/Edit/View
This is the create/edit/view screen for document templates. See also Concepts|Printing and Administration|Templates for background information.

The fields are as follows:
Name - the name of the template. The name can be anything (ie in the example above, we could change the name to 'ABCDE' and the system would still work) but it is sensible to use meaningful names. You can have multiple templates with the same name, but again, it is sensible not to.
Description - a description of the template. This should be used if necessary to clarify the purpose of the template.
Active - uncheck this to deactivate the template.
Type - this is used to define the usage of the template - for example when printing an invoice for a customer, the system looks for templates of type 'Customer Invoice'. The Type also defines what information fields are made available to the Content generator (see below). Most of the Types are self explanatory. Use 'Report' for a report (eg a list of customers or sales, etc), and 'Sub Report' for the report's repeated components (ie the line items). See also this summary.
User Level - this allows you to define who can run which reports. Each user has a level (0-9). A user with level N can only run reports of level N and below.
Report Type - select the report type from the pull-down list. Those available are set using Administration|Lookups|Report Type. The Report Type can be used to select a group of reports on the Reporting|Reports screen.
Preferred Print Mode - this determines when documents are printed or offered for printing. The option is used when the document is generated as a result of invoicing an item which has an attached document. It can be set to:
None - the print mode is not specified
Immediate - print immediately using the printer/interactive option
Check Out - (the default) delay print until at Check Out time
Manual - documents must be manually selected for printing
At Check Out time, the system checks if any documents have been accumulated. If there are any that have not been printed, then a window is displayed showing the accumulated documents each with a print checkbox - those that have already been printed, and those with Mode=Manual will have the box unchecked - those whose mode is 'Check Out' will have their box checked.
Paper Size - used to indicate to the printer what size paper is required. It can be set to None, A4, A5, Custom, and Letter. Normally can be left at 'None' unless the printer(s) that you are using allow the selection of different sized paper.
Content - the 'content' is the name of the file containing the JRXML report or Open Office or Microsoft Word template used to generate the document. See also Introduction|Reporting and JXPath Extension Functions.
If you are editing the template, click the Upload button to upload the required file. If you are viewing the template, then you can click the content file name to download the template content.
Note that for templates that are Type=Subreport, the Report that uses the subreport finds the subreport via its Content name, not its Template name. Hence if you edit a subreport template and upload content with a different file name, you will have to modify the report to use this new subreport content name.
Orientation - set to Portrait or Landscape as required
Copies - set to the required number of copies
Paper Height, Width and Units - these can normally be left at their defaults unless you have specified 'Paper Size' as Custom.
Note that for OpenOffice and Microsoft Word templates, the Paper Size, Orientation, Paper Height, Paper Width, and Paper Units settings of the Document Template are ignored. These settings must be specified within the OpenOffice or Word template. That is, they are only used for templates that use Jasper Reports (jrxml) content.
Email Subject, Body - these are used only when the system is generating emails to send out reminders and statements. Hence they can be left empty for all templates other than those used for reminders and statements. For these templates, it is mandatory to provide email body text. The email subject can be left blank, and if so will be set to the Name of the template. Note also that although you can use macros to generate the body text as you create/edit the template, you cannot use macros to generate the email text at run time. That is, although the reminder attached to the email can say 'Fido's next vaccination is due', you cannot get the email text to say 'Attached see reminder for Fido'.
Note also that the reminder and statement emails will have a From address that will be set as follows (where RB is the contact purpose and is Reminder for reminders and Billing for statements):
- the RB email contact associated with the customer's Practice Location; or
- the Practice's RB email contact, if the customer doesn't have a Practice Location, or the Practice Location doesn't have an RB email contact; or
- the Practice's preferred email contact, if there is no RB email contact
SMS - this is used for customers that have elected to receive SMS messages for patient reminders. Note that macros are not supported, to avoid exceeding the 160 character limit.
File Name Format - used to specify the file name format of generated documents. If unspecified, the document name is derived from the template file it was generated from. So a PDF generated from the template 'Invoice A5.jrxml' would be assigned the name 'Invoice A5.pdf'. Available formats are determined by Administration|Lookups|File Name Format
Printers tab
The Printers Tab is used to display and maintain the printers that can be used with this template. You don't have to use this facility, but if you don't then your users will have to choose the required printer each time they print something.
Before using this you need to set up the printers available to the Practice Locations(s) - see Administration|Organisation|Practice Location.
The fields are as follows:
Practice Location - the Practice Location. Note that you can also insert the Practice here. This useful for the case where you want to set a global default printer, and override it for one (or more) locations. For example if the standard label printer is LABEL-R, but for the upstairs office you wish to use LABEL-U, then it may be more convenient to set LABEL-R for the practice, and LABEL-U for the Main-Upstairs location, than to set the label printer for each practice location. Of course, if you only have two practice locations, then it makes no difference which way you do it, but if you have a more complex setup then it may be better to use the 'set for practice, and override for one location' approach.
Printer Name - choose one from the pull-down list
Paper Tray - if applicable, select the required tray - you will want to use this if you are running plain paper in one tray and letterhead in the other
Interactive - check this box if you want the print dialog box to be displayed (so you can use preview or email rather than print, or change the printer if necessary or load the required paper or ...) before the printing occurs. If the box is not checked, then printing proceeds immediately.
Delete Template
When you press the Delete button on the Administration|Templates screen, a confirmation window will appear.
If the selected Template is not in use and can be deleted, the window will simply ask you to confirm the delete. Press OK to confirm or Cancel to abort.
If it cannot be deleted because it is in use, the text will be "xxxx has relationships and cannot be deleted. Do you want to deactivate it instead?"(where xxx is the name of the item you are trying to delete). Pressing OK will unset its Active flag, Cancel will abort.
Select
This is the screen used to select a Document Template. It works like a standard select screen.
It will be presented whenever you need to choose a template, for example when assigning templates to a Practice or Practice Location, or (more commonly) when selecting a document at check-in time. In the latter case only the relevant templates will be displayed.

Summary
The following table summarises the standard Document Templates and their Types and usage.
| Document Template Name | Template Type | Used by/for |
|---|---|---|
| Bank Deposit | Bank Deposit | Reporting|Deposits|Print |
| Customer Account Balance Report | Customer Account Balance | Reporting|Debtors|Report |
| Counter Sale | Customer Counter Sale | Customers|Charges|Counter Sale|Print |
| Credit | Customer Credit | Customers|Charges|Credit |
| Estimation | Customer Estimate | Customers|Estimates|Preview|Print |
| Invoice | Customer Invoice | Customers|Charges|Invoice|Print |
| Receipt | Customer Payment | Customers|Payments|Payment|Print |
| Statement | Customer Statement | Reporting|Debtors|Print & Send All |
| Grouped Reminders Report | Grouped Reminders | Reporting|Reminders|Send All |
| Message | Message | Workflow|Messaging|Print |
| Desexing Certificate | Patient Form | check-in processing |
| Vaccination Certificate | Patient Form | check-in processing |
| Patient Image | Patient Image | Patients|Medical Records|Documents|Print where the item is an Image |
| Referral Letter | Patient Letter | report macro |
| Reminder Cartrophen First | Patient Letter | Reporting|Reminders|Print & Send All |
| Reminder Desexing First | Patient Letter | Reporting|Reminders|Print & Send All |
| Reminder Vaccination First | Patient Letter | Reporting|Reminders|Print & Send All |
| Reminder Vaccination Puppy and Kitten First | Patient Letter | Reporting|Reminders|Print & Send All |
| Reminder Vaccination Second | Patient Letter | Reporting|Reminders|Print & Send All |
| Drug Label | Patient Medication Label |
Customers|Charges|Invoice & Patients|Medical Records|New|Medication where item has a dispensing label |
| Patient Clinical Event | Patient Visit | Patients|Medical Records|Print |
| Patient Reminders Report | Reminder Report | Reporting|Reminders|Report |
| Clinician Sales Report | Report | Reporting|Reports |
| Customer Acquisition Report | Report | Reporting|Reports |
| Customer Balance Report | Report | Reporting|Reports |
| Customer List Report | Report | Reporting|Reports |
| Customer Payments Report | Report | Reporting|Reports |
| Customer Product Sales Report | Report | Reporting|Reports |
| Customer Reconciliation Report | Report | Reporting|Reports |
| Customer Referral Report | Report | Reporting|Reports |
| Customer Sales Report | Report | Reporting|Reports |
| Patient Acquisition Report | Report | Reporting|Reports |
| Patient Deceased Report | Report | Reporting|Reports |
| Patient List Report | Report | Reporting|Reports |
| Patient Sterilisation Report | Report | Reporting|Reports |
| Practice Clinician Sales Report | Report | Reporting|Reports |
| Product List Report | Report | Reporting|Reports |
| Product Price List Report | Report | Reporting|Reports |
| Stock Reorder Report | Report | Reporting|Reports |
| Stock Take List Report | Report | Reporting|Reports |
| Stock Valuation Report | Report | Reporting|Reports |
| StockTake Sheet Report | Report | Reporting|Reports |
| Counter Sale Items | Sub Report | line items component of Report |
| Credit Items | Sub Report | line items component of Report |
| Estimation Items | Sub Report | line items component of Report |
| Invoice Items | Sub Report | line items component of Report |
| Invoice Reminders | Sub Report | line items component of Report |
| Order Items | Sub Report | line items component of Report |
| Receipt Items | Sub Report | line items component of Report |
| Statement Items | Sub Report | line items component of Report |
| Order | Supplier Order | Suppliers|Orders|Preview & Generate |
| Till Balance | Till Balance | Reporting|Till Balances|Print |
| Work In Progress Report | Work in Progress Charges | Reporting|Work In Progress|Report |
Lookups
The Administration|Lookups screen is a select screen that allows you to select the specific Lookup to be viewed or maintained. These Lookups are used mostly to define the values that can be entered in various fields - for example the Species can only be set to one of the define Species Lookup Types. Below is the screen as initially displayed but with the Types pull-down list showing.

Each Type has its own view/edit screen. Note that those shown are only a subset of the full set of Lookup Types which are as follows:
|
Bank |
Diagnosis |
Reminder Group
|
Once you have pressed the Find button and items are displayed, more buttons are displayed as shown below.

The Delete button will initiate the deletion of the selected item. You will not be able to delete it if it is in use.
The Replace button is used to to either to remove all usages of the selected item or to replace all usages of the selected item with another. To illustrate when you would want to do the second, assume that you have been using two Product Groups, Washing and Cutting which you now want to combine into one. You would do this by first editing Washing to change its name to Grooming, then Replacing Cutting by Grooming and checking the 'Delete lookup?' box - see Confirm Replace. Note that if the lookup has a target relationship (eg Suburbs which have an associated State) then you will not be able to replace SuburbA by SuburbB if these two are not in the same State. Similarly you cannot replace BreedA by BreedB unless both have the same Species.
When items are displayed and they are all of the same type, then the columns change to suit the type - contrast the screen below which displays as below with that for Banks above.
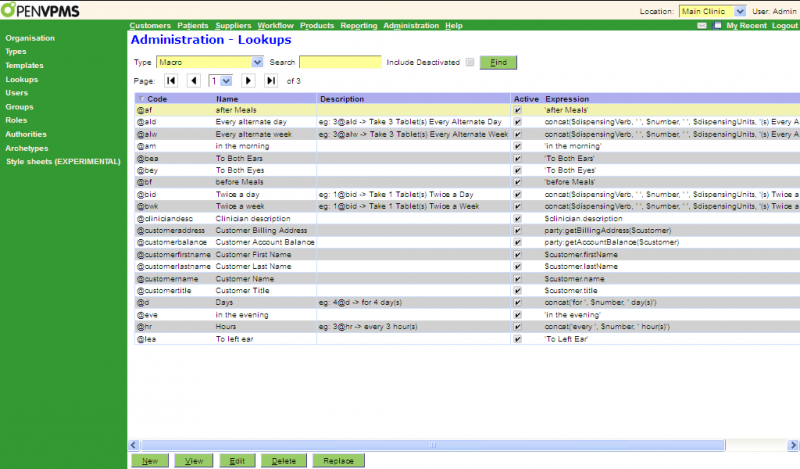
The meanings of the column headings are documented in each of the Lookup Type create/edit screens in this section.
Bank
This screen is used to create/view/edit the Bank lookups. Note that these hold just the Bank names, details of the account such as Branch and Account Number are held elsewhere.
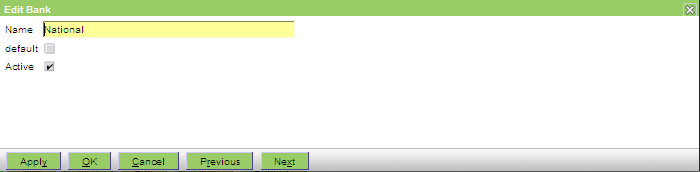
The fields are as follows:
Name - the name of the bank
default - check the box to make this the default bank
Active - uncheck the box to deactivate the bank
Breed
This screen is used to create/view/edit the details of the Breed lookups.
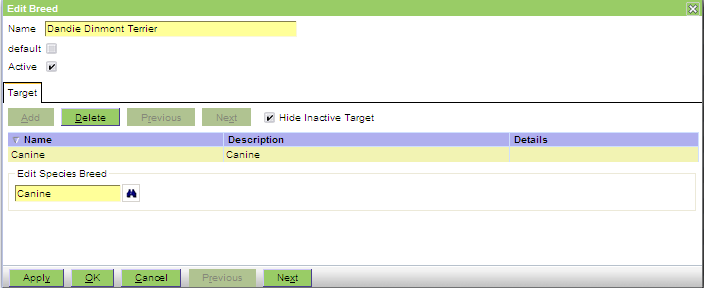
The fields are as follows:
Name - the name of the breed
default - check the box to make this the default breed
Active - uncheck the box to deactivate the breed
Target tab - this is used to set/display the Species
Note that you can only have one Species for each Breed. In cases where the same breed name occurs in two or more species, then you create multiple entries with the same name but each with a different species.
Colour
This screen is used to create/view/edit the details of the Colour lookups. Note that currently these are not used by the system. That is, when you enter the patient details, you can set the patient's colour to anything - unlike Species and Breed, it's value does not have to be chosen from a list. If you really have a need to limit the colours that can be set, then your integrator can adjust the relevant archetype so that the Colour lookup is used to limit the colours that can be set.

Contact Purpose
This screen is used to create/view/edit the details of the Contact Purpose lookups.

The fields are as follows:
Name - the Contact Purpose
Active - uncheck the box to deactivate the Contact Purpose
The system comes with a basic set (Billing, Correspondence, Home, Mobile, Postal, Reminder and Work) which will normally suffice. However, you might want to add 'Spouse' or 'Partner' or 'Maid'.
These contact purposes are independent of the Contact Type (ie Location, Phone, Email and Fax).
The system does make use of the Contact Purpose in some situations.
- When generating Reminders it uses the Reminder contacts
- When generating Statements it uses the Billing contacts
- The various JXPath extension functions like party:getCorrespondenceAddress and party:getBillingAddress use the relevant contact purpose. [But note that ther is no getPostalAddress function.]
- In all cases the selection logic is to look for the preferred contact of the relevant purpose, if none, then use the first found for the purpose, if none then use the first preferred contact of any purpose.
- Note however, that the system does NOT look at the Contact Purpose when providing lists of email addresses. For example, if you are emailing a customer invoice, the system will not look for a Billing Contact Purpose. Rather the list of available email addresses is determined by the current workspace as follows:
In the customer and patient workspaces, the To dropdown will include:
- the customer's email addresses
- the referral email addresses
- any practice email addresses associated with the referrals
In the supplier workspaces, the To dropdown will include:
- the supplier's email addresses
In all other workspaces, the To dropdown will be empty.
Country
This screen is used to create/view/edit the details of the Country lookups. Note that you need at least one of these - for the country that you operate in. You may need others if you have customers or suppliers located in other countries.
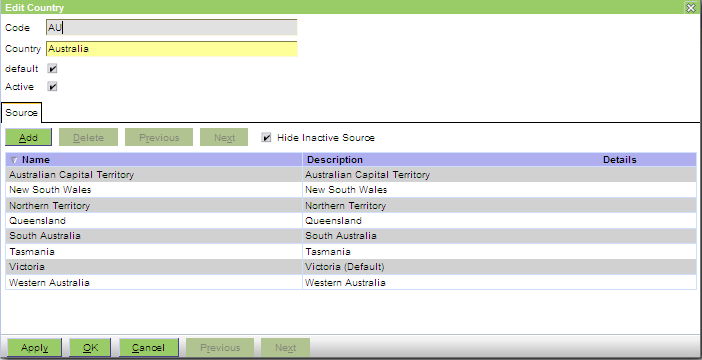
The fields are as follows:
Code - the code for the country. It is conventional to use the standard country codes (eg see http://en.wikipedia.org/wiki/ISO_3166-1), but you can in fact use any upper case letter string (eg AUST, or AUSTRALIA in place of the standard AU). Note that once you have created the Country Lookup, you cannot change the Code - you have to create a new one, and then use the Replace mechanism.
Country - the name of the country
default - check the box to make this the default country
Active - uncheck the box to deactivate the country
Source tab - this is used to display and set the States that are part of the country - use Lookup|State to create these
Credit Card
This screen is used to create/view/edit the details of each type of Credit Card. Not all of the fields are currently used by the system.
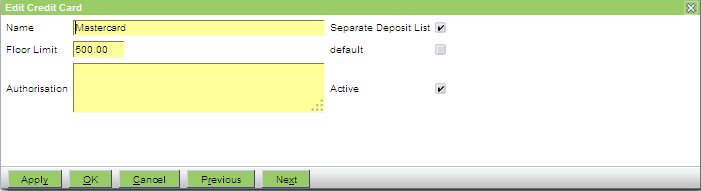
The fields are as follows:
Name - the name of the Credit Card
Floor Limit - not currently used by the system. Reserved for future use to set the minimum payment amount for which this credit card can be used.
Authorisation - not currently used by the system. Reserved for future use to so you can enter a note about the authorisation procedure required for this card.
Separate Deposit List - not currently used by the system. Reserved for future use to control whether, when processing the Bank Deposits, the system is to generate a separate report for amounts paid by this card.
default - check the box to make this the default credit card
Active - uncheck the box to deactivate the credit card
Currency
This screen is used to create/view/edit the details of the Currency lookups. Note that this is used in only one place, to set the currency used by the practice. The system runs in single currency mode and there is no support for foreign currency transactions.

The fields are as follows:
ISO code - the code for the currency. When creating the Currency, the pull-down list allows you to select from the standard set (eg see http://en.wikipedia.org/wiki/ISO_4217). Note that once you have created the Currency Lookup, you cannot change the Code - you have to create a new one, and then use the Replace mechanism.
Currency - the name of the currency
default - check the box to make this the default currency
Rounding Mode - this determines how amounts are rounded. It can be set to Half Down, Half Up or Half Even. See below for more.
Minimum Cash Denomination - the value of the smallest coin in this currency
Active - uncheck the box to deactivate the country
OpenVPMS assumes that all currencies are decimal and displays amounts to two decimal places, ie it assumes a dollars and cents structure. When doing calculations (say for a 20% discount on an amount of $23.57) then commonly the calculation will not yield an exact number of cents (in this case the discount amount is 23.57/5=4.714). The Rounding Mode determines how the fractional cents are rounded as follows:
| Half Up |
Round to nearest cent, for half a cent, round up away from zero. Note that this is the rounding mode that most of us were taught at school. |
4.714->4.71 4.715->4.72 4.716->4.72 -4.714->-4.71 -4.715->-4.72 -4.416->-4.72 |
| Half Down | Round to nearest cent, for half a cent, round down towards zero. |
4.715->4.72 -4.715->-4.71 |
| Half Even |
Round to nearest cent, for half a cent, round towards the even cent. Note that this is the rounding mode that minimizes cumulative error when applied repeatedly over a sequence of calculations. |
4.715->4.72 4.725->4.72 -4.715->-4.72 -4.725->-4.72 |
Custom Payment Type
This screen is used to create/view/edit the details of the Custom Payment Type lookups. When you make a payment, there is a pull-down list of payment types (Credit Card, EFT, Cash, Cheque, Other, and Discount). If you select Other, then the available Payment Types are the Custom Payment Types.

The fields are as follows:
Name - the Custom Payment Type
default - check the box to make this the default custom payment type
Active - uncheck the box to deactivate the custom payment type
Customer Account Type
This screen is used to create/view/edit the details of the Customer Account Type lookups. You don't have to use Customer Account types, but doing so enables better financial management of debtors and provides a method of quickly identifying important groups of customers by using an alert.
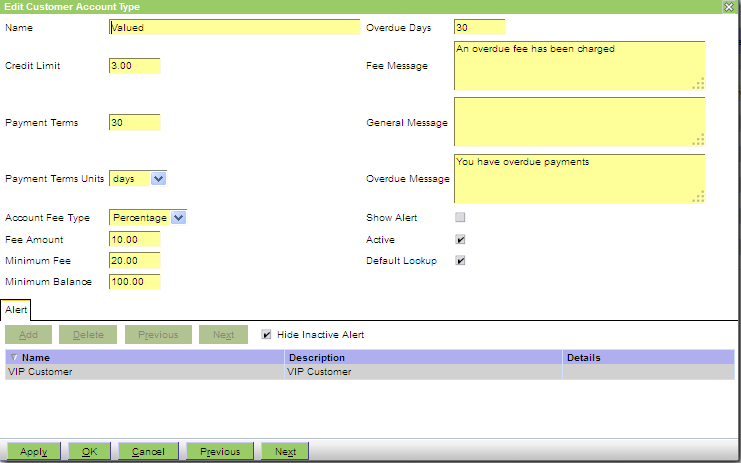
The fields are as follows:
Name - the name of the Account Type
Credit Limit - not currently used by the system
Payment Terms and Payment Terms Units - define the period within which payment is expected and define how the Overdue Balance is calculated - see below. The units can be days, weeks or months.
Account Fee Type - can be set to None, Fixed, or Percentage. If not None, then when the End Period processing is done using Reporting|Debtors and statements are being generated, a check will be made to see if an overdue fee is applicable.
Fee Amount - this is either the fee amount (if the Fee Type is set to Fixed) or the percentage of the overdue balance (if the Fee Type is set to Percentage)
Minimum Fee - no fee is charged if the fee amount is less than this amount
Minimum Balance - no fee is charged if the overdue balance is less than this amount
Overdue Days - this defines how long a payment can be outstanding before it is considered to be overdue and thus liable for an Account Fee
Fee Message - if an Account Fee is charged, the Notes text of the generated Debit Adjustment transaction is set to this text, or if none has been entered, to "Account Fee". Note that because of a current bug, the text entered is ignored and the Notes text is always "Account Fee".
General Message - not currently used by the system
Overdue Message - not currently used by the system
Show Alert - not currently used by the system
Active - uncheck the box to deactivate the the Account Type
Default Lookup - check the box to make this the default Customer Account Type - ie that set when a new customer is created.
Alert tab - not currently used by the system
Calculation Logic
To determine the current overdue balance:
- the payment terms (e.g 30 days) are subtracted from the current date
- any unpaid amounts dated prior to this new date are summed to get the overdue balance
The account fee is determined during statement generation.
A non-zero account fee will be returned if:
- the customer has an account type;
- there is a non-zero overdue balance for the account fee date (derived from the statement date - Overdue Days);
- the overdue balance is >=Minimum Balance; and
- the account fee is greater than Minimum Fee
The account fee is calculated as:
- overdue balance * Fee Amount/100 if the Account Fee Type is PERCENTAGE; or
- Fee Amount if the Account Fee Type is FIXED
Customer Alert Type
This screen allows you to create/view/edit the Customer Alert Type lookups.
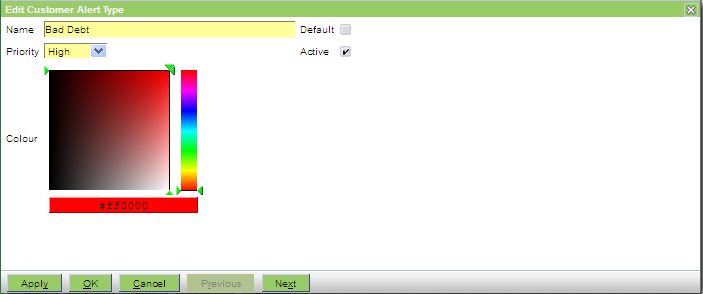
The fields are as follows:
Name - the Alert's name
Priority - can be set to High, Medium or Low. If there are too many alerts for the display space, higher priority ones get preference.
Colour - used to set the colour used for the alert. You use the mouse to select the colour via the colour and luminosity/hue boxes.
Default - check this box to make this alert the default type
Active - uncheck the box to deactivate the alert type
Customer Insurance
This screen is used to create/view/edit the Customer Insurance lookups (used in the Insurance Plan field on the customer information screen).
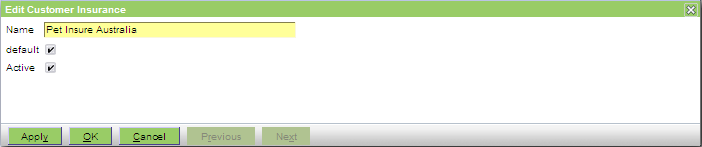
The fields are as follows:
Name - the name of the Insurance Plan
default - check the box to make this the default Insurance Plan
Active - uncheck the box to deactivate the Insurance Plan
Customer Note Category
This screen is used to create/view/edit the Customer Note Category lookups.

The fields are as follows:
Name - the name of the note category
default - check the box to make this the default category
Customer Referral
This screen is used to create/view/edit the Customer Referral lookups. These are used to set the 'Referred By' values on the customer information screen.

The fields are as follows:
Name - the 'referred by' value
default - check the box to make this the default
Active - uncheck the box to deactivate the referral
Customer Type
This screen is used to create/view/edit the Customer Type lookups. These are used to set the Categories available on the customer information screen.

The fields are as follows:
Name - the customer type
Active - uncheck the box to deactivate the type
Customer Vet
This screen is used to create/view/edit the Customer Vet lookups. These are used to set the 'Preferred Vet' values on the customer information screen. Note that there is no relationship between the names set here and the actual names of the vets in the practice - ie in the example below, no check is made to see that there is a Dr Bloggs on staff. This implies that you could have 'Not Dr Bloggs' as an entry.

The fields are as follows:
Name - the 'preferred vet' value
default - check the box to make this the default
Active - uncheck the box to deactivate this entry
Demographic Update
This screen is used to create/view/edit the Demographic Update lookups. These are used to set what is available under the Update tab on the product information screen. An update is used to change something in the patient record as a result of the use of the product - eg to set the desexed status after a spaying operation.

The fields are as follows:
Name - the name of the update
Expression - the jxpath expression that does the update
Node Name - the name of the node to be used
Active - uncheck the box to deactivate this entry
The following table gives examples including the above:
| Name | Expression | Node |
|---|---|---|
| Desex | party:setPatientDesexed(.) | patient.entity |
| Deceased | party:setPatientInactive(.) | patient.entity |
| DDate | openvpms:set(.,"deceasedDate",java.util.Date.new()) | patient.entity |
Pricing Group
This screen is used to create/view/edit Pricing Group lookups. See Concepts|Pricing for details.
These are used to classify product prices to enable different pricing between Practice Locations.
Note that since only one Pricing Group can be assigned to each Practice Location, you will normally have fewer Pricing Groups than locations.

Name - the name of the Pricing Group
Default - check the box to make this the default Pricing Group
Active - uncheck the box to deactivate the Pricing Group
Report Type
This screen is used to create/view/edit the Report Type lookups. These are used to set the Report Types available for document templates.

The fields are as follows:
Name - the report type
Default - check the box if this is to be the default report type
Active - uncheck the box to deactivate the type
Diagnosis (VeNom)
Use this screen to view VeNom (Veterinary Nomenclature) Diagnosis codes.
These are used by patient Problems.
These cannot be edited as they are specified by the VeNom standard.
To add a diagnosis, create a Diagnosis instead.
Diagnosis
This screen allows you to create/view/edit a Diagnosis.
These are used by patient Problems.

In general, you should only need to create a Diagnosis if there is no equivalent Diagnosis (VeNom).
File Name Format
This screen allows you to create/view/edit a File Name Format.
These are used to format the names of documents generated from a Document Template.

The fields are as follows:
- Name - the format name
- Description - a description of the format
- Expression - the xpath expression to format file names
The expression is provided with:
- a $file variable. This represents the file name of the original template, minus the extension
- the object that the template is being applied to e.g. act.customerAccountChargesInvoice, act.customerAccountPayment, act.patientDocumentLetter, act.customerDocumentForm, act.supplierDocumentAttachment
- a $patient variable, if a patient is linked to the act
- a $customer variable, if a customer is linked to the act, or the owner of the patient, if a there is only a patient present
- a $supplier variable, if a supplier is linked to the act
To ensure that generated file names are valid, any illegal characters such as \, /, :, *, ?, <, >, and | are replaced with underscores.
Presenting Complaint (VeNom)
Use this screen to view VeNom (Veterinary Nomenclature) Presenting Complaint codes.
These are used by patient Problems.

These cannot be edited as they are specified by the VeNom standard.
To add a presenting complaint, create a Presenting Complaint instead.
Presenting Complaint
This screen allows you to create/view/edit a Presenting Complaint.
These are used by patient Problems.

In general, you should only need to create a Presenting Complaint if there is no equivalent Presenting Complaint (VeNom).
Duration Formats
This screen is used to create/view/edit the Duration Formats lookups. These are used to set how a patient's age is presented and allows the format to vary as a function of age. Normally only one is needed and it is used to set the values in the 'Patient Age Format' field on the Administration|Organisations|Practice screen.
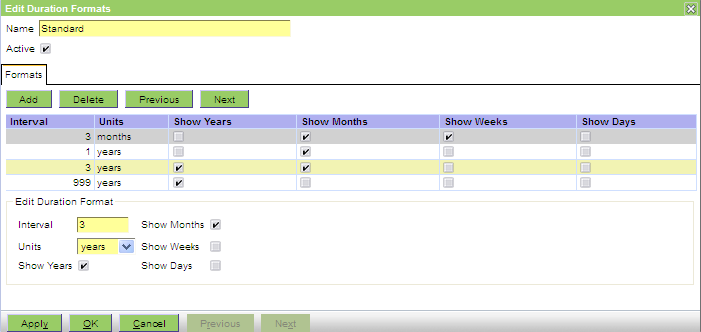
The fields are as follows:
Name - the name of the format
Active - uncheck the box to deactivate the format
Formats tab - its fields are as follows:
Interval - sets the (inclusive) age (in units of Units) below which this format is to be used (ie less than or equal to 3 years in the above example)
Units - can be years, months, days or weeks
Show Years/Months/Weeks/Days - check the boxes to display the years/months/weeks/days
Note that when adding formats, these can be added in any order. The last entry (999 years) provides the setting for the more than 3 years case. If no 'Patient Age Format' is set for the Practice, then the formats used are as follows:
| Age | Shown as |
|---|---|
| < 1 week | N day(s) |
| < 3 months | N week(s) |
| < 1 year | N month(s) |
| >= 1 year | N year(s) |
If the age is greater than that set for the largest defined interval, then the above table is used to define the format.
Macro
This screen is used to create/view/edit the Macro lookups. These are used to enable the accelerated entry of text in any text field.
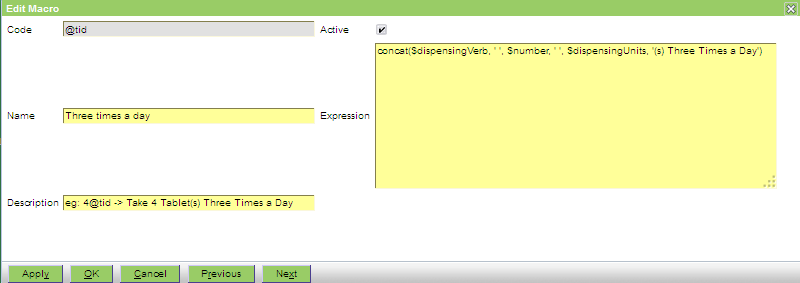
The fields are as follows:
Code - the text that will be replaced. The code must start with a letter or @, and the other characters can be letters or numbers or _. Hence abc, A4b, a_B, a_4, @aBc, and @abc are all valid. Note however that although the case is preserved (ie you can define a macro aBBa), you then cannot have another macro abba. Also if you do create a macro with a mixed case name, eg @aBc then you must invoke it as @aBc - @abc will not find it. It is thus probably best to always use lower case letters. Also take care not to use an actual word as it will expand into text inappropriately, for example bid can transform into twice daily when you may just mean bid. Perhaps end the code in "x" to avoid this mishap. Alternatively you can use @ as a prefix.
Name - the name of the macro. Normally this reflects the text that will be generated.
Description - an optional description. It is sensible to use this to provide a hint to the user as to how the macro is invoked - because the description will be displayed as part of the Macro Select window when the user types Alt-M. A useful convention is as follows:
| Case | Name | Description |
|---|---|---|
| simple text expansion | same as generated text | none unless needed to clarify when used |
| expression | something suitable, eg Twice a Day |
usage instructions such as the following: eg: 4@bid -> Take 4 Tablet(s) Twice a Day |
| data retrieval | something suitable, eg Customer Name |
none unless needed to clarify when used |
Active - uncheck the box to deactivate the macro
Expression - the replacement text or an expression (see below). For replacement text you have a 4,999 character limit and can format with leading spaces and paragraphs. The text should be enclosed in double quotes. You can also enclose with single quotes, but then if you use the single quote character as an apostrophe in the text, the macro will fail. For example, if you want to have text such as today's temperature, the single quote in today's will cause the macro to fail if the whole of the text is not enclosed in double-quotes.
The Expression can contain more that just text - it can incorporate the preceding number, it can invoke another macro, and it can perform a lookup. You can also use the concat function to concatenate things, and other XPath functions.
If you do use concat, then if you need the generated text to be on separate lines, you just split the line in the middle of a string like the following:
	 concat('This is the first part',' and this is the end of line one
This is the second line')
and this will expand to two lines:
	 This is the first part and this is the end of line one
This is the second line
$number: If you define a macro, say @hrs to have the expression concat('every ',$number,' hours') then when you enter 6@hrs, it will be replaced by "every 6 hours". That is, the number preceding the macro code ('@hrs' in this case) can be accessed using the special variable $number. As well as simple integers (like 6 or 10), you can use decimals (like 2.5) or fractions (like 1/4).
You cannot pass more than one number into the macro, but you can use the following trick. You can use a decimal and then cut it up using an expression like the following:
concat('Part1=',substring-before(string($number),'.'),' Part2=',substring-after(string($number),'.'))If a macro say @parts is defined with the above expression, then 12.34@parts will expand to 'Part1=12 Part2=34'.
You can even use three parts using the expression:
concat('Part1=',substring-before(string($number),'.'),' Part2=',substring-before(substring-after(string($number),'.'),'.'),' Part3=',substring-after(substring-after(string($number),'.'),'.'))Now 123.567.789@parts will expand into 'Part1=123 Part2=456 Part3=789'. That is, although we are passing in a number with an illegal format, we can cut it into parts.
The above trick is useful if you a building a macro to generate something like 'Take x mls y times a day for z days'.
If you prefer, you can use / as the separator rather than the decimal point by changing '.' in the above expressions to '/'. You then invoke the macro as 123/456/789@parts.
Lookups: If you define a macro, say dispensingUnits, to have the expression openvpms:lookup(openvpms:get(.,'product.entity'), 'dispensingUnits')
this will be used to look up the dispensing units for the current product. Other useful examples are:
openvpms:lookup(openvpms:get(.,'product.entity'), 'dispensingVerb') and
openvpms:lookup(openvpms:get(.,'product.entity'), 'sellingUnits')Obviously, you need a understanding of the archetypes to make extensive use of this facility.
Macros in Macros: We can make use of the above two facilities by defining a macro, say @oid with the expression:
concat($dispensingVerb, ' ', $number, ' ', $dispensingUnits, '(s) Once Daily')
Here we are invoking two other macros, dispensingVerb and dispensingUnits, and also making use of the $number. Thus 4@oid will expand to something like "Give 4 Tablet(s) Once Daily"
Note that invoked macro (eg 'dispensingVerb') MUST have a name that starts with a letter, otherwise the expansion will not work. (What will happen is that the invoked macro will be immediately expanded instead of delaying its expansion until you invoke the outer macro.)
If you do really need to invoke a macro starting with @, then you need to 'hide' the macro by splitting it as in the following example:
macro:eval(concat('@', 'lea'))Here we have hidden the macro code from expansion using concat, and then evaluated it with the macro:eval() function. If in the earlier example, the dispensing macros were in fact @dispensingVerb and @dispensingUnits, then we could write the macro as follows:
concat(macro:eval(concat('@','dispensingVerb')),' ',$number, ' ',macro:eval(concat('@','dispensingUnits')),'(s) Once Daily')
JXPath Extension Functions
Macro expressions are JXPath expressions and may therefore use the JXPath Extension Functions.
Macro Variables
Within the OpenVPMS web application, there a number of pre-defined variables that can be used in macros.
For example, the $patient variable refers to the current selected patient. If no patient is selected, then the variable is undefined.
The standard JXPath functions can be used to access the variable fields. e.g:
- openvpms:get($patient, "name") - gets the current patient name
- openvpms:lookup($customer, "title") - gets the current customer's title (as opposed to the title code)
For convenience, the variables support the archetype dot notation, so the above can be simplified to:
- $patient.name
- $customer.title
Note: these variables are not available in reports.
The following variables are available:
| Variable | Archetype(s) | Description | Example |
|---|---|---|---|
| $patient | party.patientpet | The current patient | $patient.name |
| $customer | party.customer* | The current customer | party:getBillingAddress($customer) |
| $practice | party.organisationPractice | The current practice | party:getCorrespondenceAddress($practice) |
| $location | party.organisationLocation | The current practice location | party:getTelephone($location) |
| $stockLocation | party.organisationStockLocation | The current stock location | $stockLocation.description |
| $supplier | party.supplier* | The current supplier | $supplier.notes |
| $product | product.* | The current product | $product.label |
| $deposit | party.organisationDeposit | The current deposit account | $deposit.accountNumber |
| $till | party.organisationTill | The current till | date:formatDate($till.lastCleared) |
| $clinician | security.user | The current clinician | $clinician.name |
| $user | security.user | The current user | $user.id |
| $invoice | act.customerAccountChargesInvoice |
The current invoice. Only valid:
|
openvpms:get($invoice, "amount") |
| $visit | act.patientClinicalEvent |
The visit for the current patient. Only valid:
|
$visit.reason |
Message Reason
This screen is used to create/view/edit the Message Reason lookups. These are used to set the Reasons available on the message create/edit screen.

The fields are as follows:
Name - the message reason
default - check the box to to make this the default reason
Message Status
This screen is used to create/view/edit the Message Status lookups. These are used to set the Statuses available on the message create/edit screen.

The fields are as follows:
Name - the message status
default - check the box to to make this the default status
Patient Alert Type
This screen allows you to create/view/edit the details for the Patient Alerts.

The fields are as follows:
Name - the Alert's name
Priority - can be set to High, Medium or Low. If there are too many alerts for the display space, higher priority ones get preference.
Colour - used to set the colour used for the alert. You use the mouse to select the colour via the colour and luminosity/hue boxes.
Default - check this box to make this alert the default type
Active - uncheck the box to deactivate the alert type
Person Title
This screen is used to create/view/edit the Title lookups. These are used to set the Titles available on the customer create/edit screen.

The fields are as follows:
Name - the title
default - check the box to to make this the default title
Active - uncheck the box to deactivate the title
Practice Type
This screen is used to create/view/edit the Practice Type lookups. These are used to set the Categories available on the Supplier-Veterinary Practice create/edit screen.

The fields are as follows:
Name - the practice type
Active - uncheck the box to deactivate the type
Product Group
This screen is used to create/view/edit the Product Group lookups. These are used to set the Classifications available on the Product (merchandise, medication and service) create/edit screens.
Note that the Classifications available include both the Product Groups and the Product Income Types.

The fields are as follows:
Name - the group
Active - uncheck the box to deactivate the group
Confirm Delete
When you press the Delete button on the Administration|Lookups screen, a confirmation window will appear.
If you press OK to confirm the delete, then, if the Lookup is not in use, it will be deleted. Otherwise an error window will appear with the text:
Cannot delete lookup. It is being used.
To delete the lookup, select 'Replace' to replace it with another lookup.
Click OK to dismiss the error window and use the Replace button to replace the Lookup.
Confirm New
This is the New Lookup confirmation window. Select the type of Lookup to be created and then use OK to continue or Cancel to abort. Note that if you have selected a type on the Lookup screen, then this will already be selected in this window (even if it is not showing in the list of types) - thus you can normally simply click OK to proceed.
Confirm Replace
This is the Replace Lookup confirmation window. As shown below it allows you to confirm the Lookup you are about to replace and choose what to replace it with.
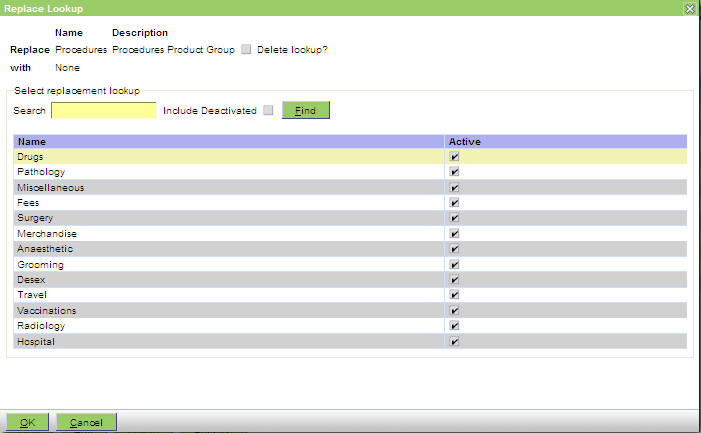
Notes:
- You must choose a replacement, ie you cannot leave it set as 'None' as shown above.
- If you check the Delete Lookup? box, then the Lookup you are replacing will be deleted when the replacement is complete. ie in the above case, the Product Group Lookup 'Procedures' would be deleted.
Product Income Type
This screen is used to create/view/edit the Product Income Type lookups. These are used to set the Classifications available on the Product (merchandise, medication and service) create/edit screens.
Note that the Classifications available include both the Product Income Types and the Product Groups.

The fields are as follows:
Name - the income type
Active - uncheck the box to deactivate the income type
Reminder Group
This screen is used to create/view/edit the Reminder Group lookups. These are used to set the Groups available on the Administration|Types|Reminders create/edit screen.

The fields are as follows:
Name - the group name
Description - an optional description used to clarify the purpose of the group
Active - uncheck the box to deactivate the reminder group
Report Macros
This screen is used to create/view/edit the Report Macro lookups. These are used to enable the accelerated entry of text in any text field by running a report. The primary use of these is to generate email text.

The fields are the same as for normal Macros (see Lookups|Macros) but with a different usage for the Expression field and an additional Report field.
Description - it is sensible to use a description like the above to emphasise that the macro will generate a text version of the report (and not the actual fully formatted report)
Expression - this is used to pass the data source to the report and we need to access the thing that we are going to report on. This is done using of the JXPath Extension Functions - specifically one of the party:get*() series. As you can see in the above example the expression is getting the last visit for the current patient.
Note: You need to be careful with the syntax used in the Expression. Specifically, you can only use the $xxxx argument format ($patient in the above screen shot) if the ReportMacro is to be invoked directly by the user. If the ReportMacro is to be invoked from say an Open Office document by using the macro:eval function, then you cannot use the $xxxx argument format. Instead, simply use a period - ie party:getPatientVisit(.) and in the Open Office document the user field should be like: [macro:eval('@referral',openvpms:get(.,'patient.entity'))] - here the second argument is passing the patient entity needed by the macro expression.
Report - the Report to run
The above macro runs the Referral Letter report, using the current patient's most recent Visit. Note that if there is no current patient, then the macro simply will not expand - ie the user will be left with the '@referral' that they typed.
Report macros can use:
- OpenOffice documents
- Microsoft Word documents
- JasperReports templates
If you are using OpenOffice or Word documents, you may want to do some conditional text handling (ie if sex=male use 'he', if female use 'she', else use 'it'. This is possible - see here for OpenOffice, here for MS Word.
When using JasperReports templates, there are a number of issues to be aware of:
- a fixed size font should be used
- special properties need to be defined to indicate to JasperReports how to divide the report into a grid
- fields should start on grid boundaries to avoid text being excluded
The easiest approach is to:
- define all dimensions in pixels
- set the character width and height to a round number
- ensure the page height and width is divisible by the character size
To set the character size to 10x10 pixels in iReport:
- right click on the report in Report Inspector
- select Properties
- scroll down to Properties in the displayed table
- click on the elipsis; this will display a dialog containing the defined properties.
- add property net.sf.jasperreports.export.text.character.width with value 10
- add property net.sf.jasperreports.export.text.character.height with value 10
Set the page width and height to a multiple of the character width and height. E.g. 500x500
See also JasperReports - Text Export Sample
Species
This screen is used to create/view/edit the details of the Species lookups. These determine what patient species are available.

The fields are as follows:
Name - the name of the species
default - check the box to make this the default species
Active - uncheck the box to deactivate the species
Custom Fields - normally this is left at 'None'. The system supports the use of custom fields. To make use of this feature, you need to copy/modify the entity.customPatientExample archetype that is shipped with the system to make archetypes having names matching entity.customPatient* (eg entity.customPatientLastVaccination). Note that if you do make use of this facility, then:
a) for existing patients, the new custom field tab will not appear until you edit the patient, but from then on it will appear for that patient
b) when you are creating a new patient, the custom tab will not appear until you set the species (because the custom field is species specific)
Source tab - this is used to set/display the Breeds belonging to the species
State
This screen is used to create/view/edit the details of the State lookups.
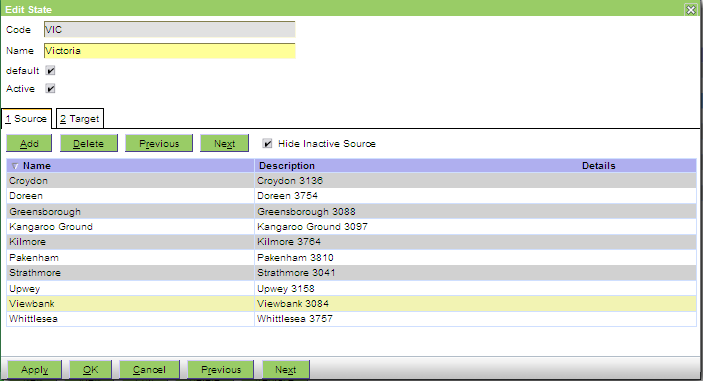
The fields are as follows:
Code - the code for the state. It is conventional to use the standard state codes, but you can in fact use any upper case letter string (eg VICTORIA in place of the standard VIC). Note that once you have created the State Lookup, you cannot change the Code - you have to create a new one, and then use the Replace mechanism.
Name - the name of the state
default - check the box to make this the default state
Active - uncheck the box to deactivate the state
Source tab - this is used to display and set the suburbs that are part of the state - use Lookup|Suburb to create these
Target tab - this is used to display and set the country - use Lookup|Country to create this
Suburb
This screen is used to create/view/edit the details of the Suburb lookups.
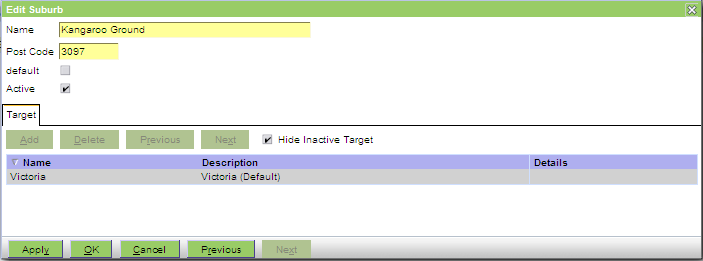
The fields are as follows:
Name - the name of the suburb
Post Code - the post or zip code
default - check the box to make this the default suburb
Active - uncheck the box to deactivate the suburb
Target tab - this is used to display and set the state - use Lookup|State to create this
Supplier Account Type
This screen is used to create/view/edit the Supplier Account Type lookups. These are used to set the Account Types available on the Supplier (Organisation and Person) create/edit screens.
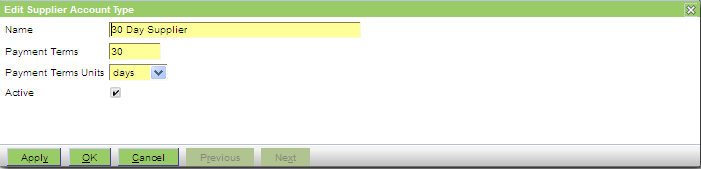
The fields are as follows:
Name - the account type
Payment Terms and Payment Terms Units - the supplier's payment terms
Active - uncheck the box to deactive the account type
Note that the system contains no automatic payment processing system which would make use of the Payment Terms fields to pay only invoices that are due (and this functionality is usually handled by the accounting system). However, it is quite possible to build a supplier payments due report that would use these fields.
Supplier Type
This screen is used to create/view/edit the Supplier Type lookups. These are used to set the Categories available on the Supplier (Organisation and Representative) create/edit screen.
The fields are as follows:
Name - the supplier type
Active - uncheck the box to deactive the supplier type
Tax Type
This screen is used to create/view/edit the Tax Type lookups. These set the available taxes on the Taxes tabs for Practices, Practice Locations, Product Types, Products, and Customers.
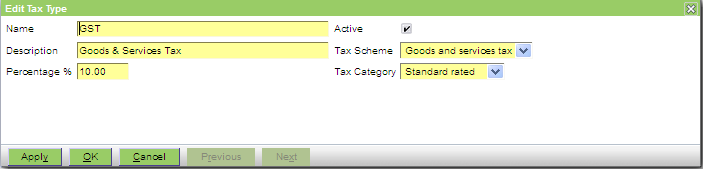
The fields are as follows:
Name - the tax name (normally its short name such as GST or VAT)
Description - the full name of the tax
Percentage - the tax rate as a percentage
Active - uncheck the box to deactive the tax type
Tax Scheme - can be set to None, Goods and services tax, or Value added tax.
Tax Category - can be set to None, Standard rated, or Zero rated.
The latter two fields (Tax Scheme and Category) are used only are used to map ESCI (e-Supply Chain Interface) taxes to their OpenVPMS equivalents. See the ESCI documentation for more details: http://www.openvpms.org/documentation/esci If you are not using ESCI, then these two can be left at their defaults, ie None.
Units of Measure
This screen is used to create/view/edit the Units of Measure lookups. These are used to set the units available for the Selling, Dispensing and Packaging Units on the Product Information screens.
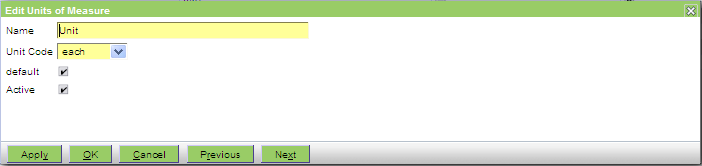
The fields are as follows:
Name - the name of the Unit of Measure (eg Unit, Grams, Pounds, Box, Syringe, Pack of 10)
Unit Code - this is used by the ESCI facility (see below). If you are not using ESCI, then you can happily leave this set at its default of 'each'.
default - check this box to make this the default Unit of Measure
Active - uncheck the box to deactive the Unit of Measure
The Unit Code is used by the ESCI facility to map UN/CEFACT Unit Codes* to the practice equivalents. The list contents are defined within the archetype lookup.uom and can only be added to by modifying the archetype. Note that OpenVPMS only provides a subset of the available codes, so if a required code is missing, it can be added but must be present in the list provided by http://docs.oasis-open.org/ubl/cs-UBL-2.0/cl/gc/cefact/UnitOfMeasureCode...
* UN/CEFACT Recommendation N°. 20 - Codes for Units of Measure Used in International Trade - http://www.unece.org/fileadmin/DAM/cefact/recommendations/rec20/rec20.zip
Units of Measure Group
This facility is not used in the current system. It is reserved for future use to categorise units of measure in order to set a practice wide default for weight units.
User Type
This screen is used to create/view/edit the User Type lookups. These are used to set the Categories available on the Administrator|Users create/edit screen.
The system comes with four user Types, Administrator, Clinician, Nurse and Receptionist. The first two are important for the functioning of the system. Users with Type Administrator, get will have the Administration workspace available. Only users with Type Clinician can be selected as the Clinician in places where the system allows or requires the clinician to be entered.
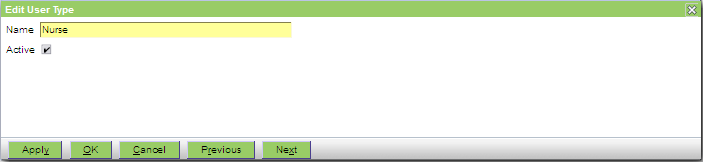
The fields are as follows:
Name - the user type
Active - uncheck the box to deactive the user type
Veterinary Speciality
This screen is used to create/view/edit the Veterinary Speciality lookups. These are used to set the Categories available on the Supplier-Veterinarian create/edit screen.
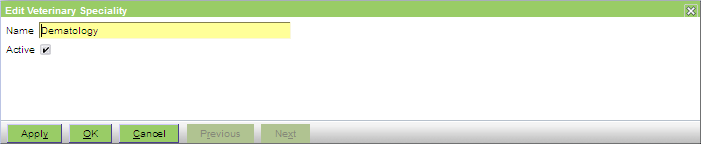
The fields are as follows:
Name - the speciality
Active - uncheck the box to deactivate the speciality
Visit Reason
This screen is used to create/view/edit the details of each Visit Reason.

The fields are as follows:
Name - the Visit Reason
Default - check the box to make this the default reason for appointments and visits
HL7
The Administration|HL7 screen enables HL7 support to be configured.
This includes:
- Services - the HL7 services that OpenVPMS connects to
- Connectors - these determine how OpenVPMS connects to the services
Connectors
The Connectors screen supports viewing and editing HL7 connectors.
Connectors may be:
- Senders - used to send HL7 messages from OpenVPMS to an external system
- Receivers - used to receive HL7 messages from an external system

The buttons are as follows:
| New | create a new Connector |
| Edit | edit the selected Connector |
| Delete | delete the selected Connector - a confirmation window will appear |
| Messages | displays HL7 messages sent or received via the selected Connector |
| Stop | stops messaging for a Sender. Messages will be queued until the Sender is started. |
| Start | starts messaging for a Sender |
HL7 MLLP Receiver
This is the create/edit/view screen for HL7 MLLP Receivers. These are responsible for receiving HL7 messages using the MLLP protocol over TCP/IP, from external applications.

The fields are as follows:
| Id | the receiver identifier |
| Name | the receiver name |
| Active | uncheck this box to deactivate the receiver. Deactivating the receiver prevents HL7 messages being received. |
| Port | The TCP/IP port to listen on |
| Sending Application | Uniquely identifies the sending application among all other applications within the network. |
| Sending Facility | Identifies the sending application facility. |
| Receiving Application | Uniquely identifies the receiving application among all other applications within the network. |
| Receiving Facility | Identifies the receiving application facility. |
| Include Milliseconds | If checked, timestamp fields in acknowlegements will include milliseconds. |
| Include Time Zone | If checked, timestamp fields in acknowlegements will include the time zone. |
HL7 MLLP Sender
This is the create/edit/view screen for HL7 MLLP Senders. These are responsible for sending HL7 messages using the MLLP protocol over TCP/IP, to external applications.

The fields are as follows:
| Id | the sender identifier |
| Name | the sender name |
| Active | uncheck this box to deactivate the sender. Deactivating the sender prevents HL7 messages being sent. |
| Host | The host to connect to |
| Port | The port to connect to |
| Sending Application | Uniquely identifies the sending application among all other applications within the network. |
| Sending Facility | Identifies the sending application facility. |
| Receiving Application | Uniquely identifies the receiving application among all other applications within the network. |
| Receiving Facility | Identifies the receiving application facility. |
| Response Timeout | The maximum time to wait for responses, in seconds. |
| Retry Interval | The time to wait after an error occurs, before resubmitting a message. |
| Include Milliseconds | If checked, timestamp fields will include milliseconds. |
| Include Time Zone | If checked, timestamp fields will include the time zone. |
Messages
The Messages window displays HL7 messages sent or received via a HL7 Connector.

The buttons are as follows:
| Find | Find all messages matching the criteria. Also press this to refresh the display. |
| OK | closes the window |
| Resubmit |
resubmits a message to an external application. Only applies to:
|
Services
The Services screen supports viewing and editing HL7 services.

The buttons are as follows:
| New | create a new service |
| Edit | edit the selected service |
| Delete | delete the selected service - a confirmation window will appear |
Patient Event Service
A Patient Event Service is an HL7 service that notifies an external application of patient events using HL7 messages.

The fields are as follows:
| Id | the service identifier |
| Name | the service name |
| Description | the service description |
| Active | uncheck this box to deactivate the service. Deactivating the service prevents HL7 messages being sent. |
| Connector | the HL7 connector used to send messages to the external application |
| Location | the practice location that this service will send messages for |
HL7 Messages
For a list of messages and their triggers, see the HL7 Patient Administration Messages.
Pharmacy
This is the create/edit/view screen for HL7 Pharmacy services.
These are responsible for:
- submitting orders for Medication and Merchandise products to an external pharmacy, during invoicing
- generating Pharmacy Orders and Returns when the pharmacy dispenses products.

The fields are as follows:
| Id | the Pharmacy identifier |
| Name | the Pharmacy name |
| Description | the Pharmacy description |
| Active | uncheck this box to deactivate the Pharmacy. Deactivating the Pharmacy prevents orders being placed and dispense messages received. |
| Order Connector | the connector used to submit orders to the Pharmacy. |
| Dispense Connector | the connector used to receive dispense messages from the Pharmacy. |
| Location | specifies the Practice Location that this Pharmacy is used for. |
| User | specifies the user that Customer Orders and Returns will be created with. |
HL7 Messages
For the messages supported by a Pharmacy see:
Pharmacy Group
A Pharmacy Group is used to group multiple HL7 Pharmacy services in multi-location practices. A Medication or Merchandise product uses the Pharmacy Group.
When invoicing a product linked to a Pharmacy Group, the current practice location determines which Pharmacy is selected to order the product.

Users
This screen allows you manage the Users. See also Concepts|Users.
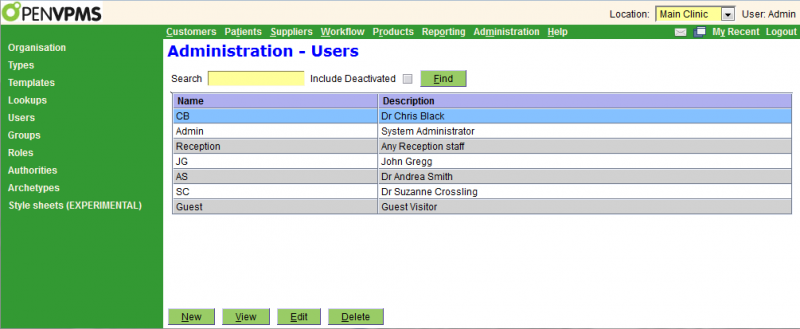
Confirm Delete
When you press the Delete button on the Administration|Users screen, a confirmation window will appear.
If the selected User is not in use and can be deleted, the window will simply ask you to confirm the delete. Press OK to confirm or Cancel to abort.
If it cannot be deleted because it is in use, the text will be "xxxx has relationships and cannot be deleted. Do you want to deactivate it instead?"(where xxx is the name of the item you are trying to delete). Pressing OK will unset its Active flag, Cancel will abort.
Create/Edit/View
This screen allows you to create, edit and view Users. See also Concepts|Users for background information.

The fields are as follows:
Login Name - the name with which the user logs in. Note that you can set this to have upper and lower case letters (eg Doris). The user will be able to login with doris, Doris, DORIS, or even doRis. The upper case version of the login name must be unique, ie you cannot have one user named Doris and another named DORIS.
Password and Confirm Password - the user's password
Full Name - the name that will be used within the system - ie that shown in the Clinician pull-downs, and the name used to send messages. As shown in the above, this need not be a full name, and it is faster to select the clinician if the name is short or has a unique first letter.
Description - if you use short names then this should be the person's full name, else if can be any useful text. Note that if you do use short names (with the full name in the description) then you will need to modify reports and documents that display the 'Full Name' field to instead display the Description field.
Colour - used to set the colour used for the user when highlighting them on the Scheduling and Work Lists windows. It is not necessary to set the colour for anyone who is not a clinician. You use the mouse to select the colour via the colour and luminosity/hue boxes. If you want to check the colours of the different users, the easiest way to do this is to view the user and then to use the Next and Previous buttons to run back and forth through the different user.
Note that you should avoid the 'light cream' colour f2f3b3 which displays as follows: 
because this is used to highlight the selected item on the Workflow|Scheduling and Work Lists screens.
Active - uncheck this box to deactivate the user
Contacts tab - this is used to display, add, delete and edit the Contacts for the user - see here. Note that adding an email contact for each staff member makes it easy to CC or BCC staff on any emails sent.
Roles tab - this is used to display, add, delete and edit the Roles for the user
Groups tab - this is used to display, add, delete and edit the User Groups the user belongs to

Category tab - this is used to display, add, delete and edit the User Types for the user. Set Administrator for all users who need to access the Administration menu and other administrative functions (Customer Accounts Check and Merge, Patient Merge, and Product maintenance [Edit, Delete, Copy, Export & Import]). Set Clinician for any user who needs to be selectable in the Clinician pull-downs. You can set multiple categories, ie both Clinician and Administrator.

Location tab - this is used to display, add, delete and edit the Practice Locations for the user. You specify Practice Locations in order to limit the Locations that the user can select at the top right of the screen. If you do not specify any, then the user can select any Location. You should set the default flag on the user's default Location- this will then be the selected Location when the user logs in.

Groups
This screen allows you manage the User Groups. These are only used to allow groups of users to be addressed when sending a message.
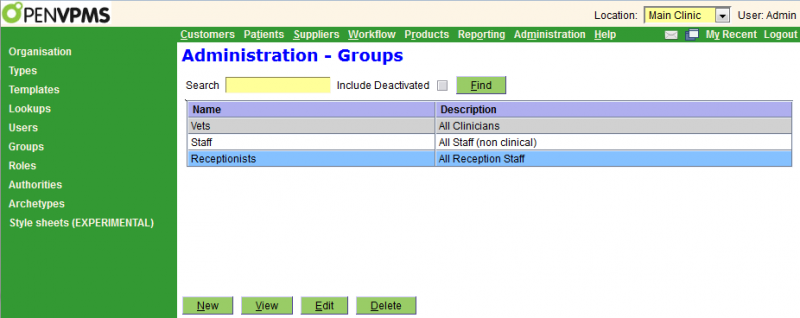
Confirm Delete
When you press the Delete button on the Administration|User Groups screen, a confirmation window will appear.
If the selected Group has no members and can be deleted, the window will simply ask you to confirm the delete. Press OK to confirm or Cancel to abort.
If it has members, the text will be:
xxx has relationships. Are you sure want to delete?
This operation cannot be undone.
(where xxx is the name of the Group you are trying to delete). Pressing OK will delete the Group, Cancel will abort.
Create/Edit/View
This screen allows you to create, edit and view User Groups.
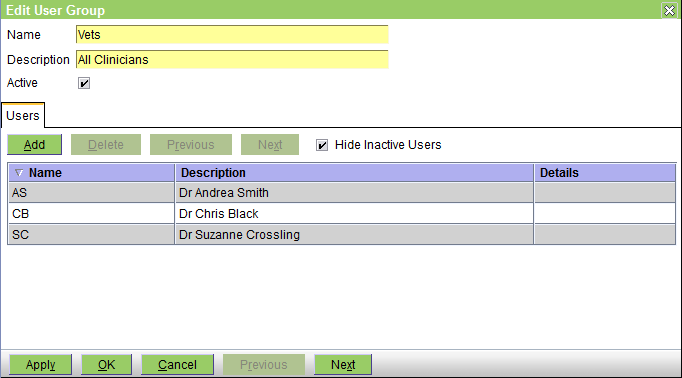
The fields are as follows:
Name - the name of the group
Description - use this to clarify the purpose of the group
Active - uncheck this box to deactivate the group
Users tab - this is used to display, add and delete users from the group
Roles
This screen allows you manage the Roles. These are used to define the roles that are assigned to Users. See also Concepts|Users for background information.
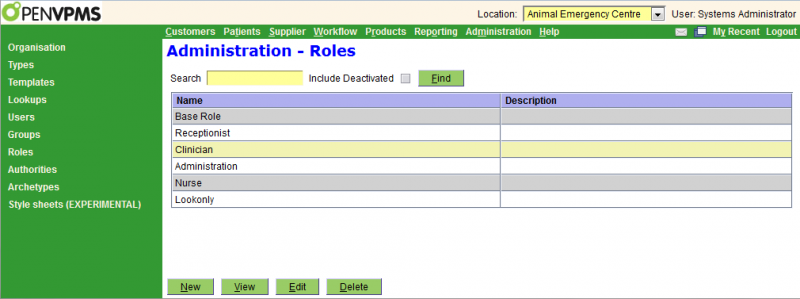
Confirm Delete
When you press the Delete button on the Administration|Roles screen, a confirmation window will appear.
If you press OK to confirm the delete, then, if the Role is not in use, it will be deleted. Otherwise an error window will appear with the text like:
Failed to delete object with reference security.role.1.0:.......
Click OK to dismiss the error window.
Create/Edit/View
This screen allows you to create, edit and view Roles.

The fields are as follows:
Name - the name of the role
Description - use this to clarify the purpose of the role
Active - uncheck this box to deactivate the group
Authorities tab - this is used to display, add and delete authorities from the role
Note that in the above you will see that the Clinician role can create or save (ie modify) everything, but remove (ie delete) only messages. If you don't include message remove, then the user will not be able to delete their own messages. However, a normal (ie non-administrator) user can happily operate with no other remove authorities - recall that in general nothing should be deleted, only deactivated.
Authorities
This screen allows you manage the Authorities. These are used to define the authorities that are assigned to roles. See also Concepts|Users for background information.

Confirm Delete
When you press the Delete button on the Administration|Authorities screen, a confirmation window will appear.
If you press OK to confirm the delete, then, if the Authority is not in use, it will be deleted. Otherwise an error window will appear with the text like:
Failed to delete object with security.archetypeAuthority.1.0:.......
Click OK to dismiss the error window.
Create/Edit/View
This screen allows you to create, edit and view Authorities. Normally you should never need to change these.
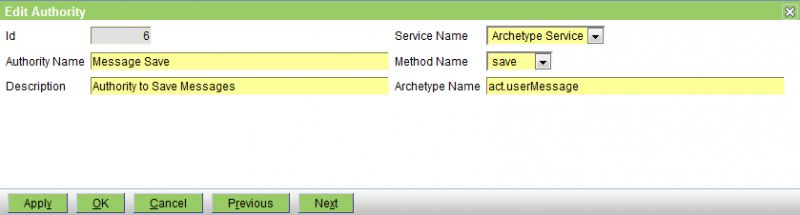
The fields are as follows:
Authority Name - the name of the authority
Description - use this to clarify the purpose of the authority
Service Name - must be set to Archetype Service
Method Name - can be one of save, new or remove
Archetype Name - the name of the archetype
Archetypes
This screen is used to select an archetype to view and maintain archetypes. (See further down for what an archetype is.)
Note that if you are a normal administrator, you almost certainly do not need to use this screen. If you are developing reports, then you will find this facility useful for seeing how things are put together so that you can write the necessary SQL code. (See also Reference|Report Fields.)
If you do really need to modify an archetype, then the best way is probably to modify the archetype's adl file (after saving a copy), then shutdown the system by stopping Tomcat, then use the archload script to load the archetype(s), and finally restart Tomcat. [Though if you do need to leave the system running so that business operations can continue, you can use archload and then press the Reload button - see below.]
Note also that if you use this screen to make changes to a derived node or you import an archetype that makes changes to a derived node, then you will be presented with the option to update derived nodes. If you do not accept this offer, then the derived node(s) will not be updated until the object itself is edited and saved. If you use archload to import the modified archetype, then because archload does not have this 'update derived nodes' facility, these will not get updated until you edit the affected object.

This is a standard select screen with three extra buttons:
Import - click this to upload an archetype from an adl file. Note that a) you should not do this unless you know exactly what you are doing; and b) it is probably better to shut down the system and use the archload script to load the archetype(s) and then restart the system. Note that if you do import as archetype using this button, then if the imported archetype has changes that affect the data (eg a change in a derived field) then you will get the following message
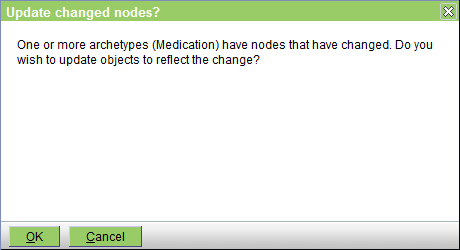
If you press the OK button, then the affected data will be updated. If you have large data sets then this can take a long time. If you press the Cancel button then then existing data will not be updated, but any new or modified records will include the update.
Note that the above message will also be displayed if you edit a node and your changes affect the data.
This option to apply updates to the affected data is not available if you use the archload script.
Export - click this to export the archetype to an adl file. Note that if you want to study the archetypes don't use this - it generates a very complete but overly complex adl file. If you do want to look at a file, take a copy of the adl file from the <OPV-HOME>\update\archetypes\org\openvpms\archetype folders. Alternatively, use the View or Edit buttons. Note however, that if you use View, you will not be able to see the full archetype. Specifically, if the archetype has a node that links to multiple archetypes (eg participation.product's entity node), then if you use View, you will only be shown one. To see all four you need to Edit the archetype.
Reload - click this to force a reload of the archetypes after you have used the archload utility (otherwise you will need to restart Tomcat). Note that reloading archetypes in this way has a number of limitations:
- user's currently on the system may be accessing old copies. Working with both old and updated versions of an archetype may yield unexpected behaviour, so it is strongly recommended no users be on the system, and the administrator logs in again after performing the reload.
- some archetype data is cached (e.g. act statuses), and can only be refreshed by restarting OpenVPMS
OpenVPMS is built using some modern system design concepts borrowed from the health informatics field. Specifically its architecture was influenced by the work of the openEHR Foundation (archetypes), and the HL7 Reference Information Model (acts, entities, participations etc). It is interesting to note that in the health informatics field, two primary concerns are the 'future proofing' of the information structures and the ease of exchanging data between organisations. Although OpenVPMS does not implement either standard directly because they are more complex than is required, the inherent flexibility of the approach has stood us in very good stead.
Each entity (eg customer, patient, supplier, product etc), each 'act' (ie the actions associated with each entity - eg invoice for customer, order to supplier, visit to a patient) and each relationship between these has a set of 'attributes' (eg customer last-name/title/first-names etc, patient species/breed/age/colour etc) that define the entity, act and relationship.
These are described using a variant of XML (eXtended Markup Language), and the 'description' is called an archetype. These are held in files with the extension .adl (for Archetype Description Language).
Because of the way the OpenVPMS code is built (it's completely driven by the archetypes), and because the archetypes can be changed by a knowledgeable person, certain adjustments to the system are very simple and require no change to the underlying code.
Two examples:
- Say you wanted to use an otherwise unused field (eg the Travel field on the Customer Information screen) for some other purpose (eg to hold the customer's Citizen ID Number). To modify the system so that Travel becomes 'Citizen ID' on the customer screen, all you have to do is to edit the party.customerPerson archetype to change the Display Name of the field called 'travel' from 'Travel' to 'Citizen ID'.
- Say you wanted to to ensure that the microchip numbers entered into the system have one of three formats, 9999 9999 9999 999 or 999*999*999 or 10 characters alpha numeric, then you edit the entityIdentity.microchip archetype to set both the necessary validation and the appropriate error message.
To make the equivalent changes in most other systems is impossible – because they are completely compiled applications and thus have 'no user serviceable parts inside'.
Note that if you are modifying archetypes, then although you can do it directly by editing it on the screen, it is best to edit the adl file, and then import it. This has two advantages. Firstly you have a copy of the modified archetype that can be re-used if/when the system is upgraded. Secondly, if you are adding a new field (more correctly referred to as a node), then you can control where it is displayed because, in general, the screen layout is determined by the order of the nodes in the archetype.
Database Structure It is appropriate here to also mention something about the database structure used by OpenVPMS. If you have ever played with conventional databases, you will be used to having tables which hold like data, ie there will be a customer file, a patient file, a product file, etc etc. This is not the case with OpenVPMS where the database tables hold entities, acts and relationships. Thus the entities table contains entries for all the entities, ie customers, patients, products, etc with each tagged with an archetype to say what sort of entity it is. Further information about each entity is held in the entity-classifications and entity-details and other tables.
This setup makes it a bit more difficult to extract data from the system, for example when building the SQL code required for a report. However, it has huge benefits in the ease of extending the system when it is necessary to add extra fields.
Confirm Delete
When you press the Delete button on the Administration|Archetypes screen, a confirmation window will appear.
If you press OK to confirm the delete, then, if the Archetype is not in use, it will be deleted. Otherwise an error window will appear with the text like:
Failed to delete object with descriptor.archetype.1.0:.......
Click OK to dismiss the error window.
Create/Edit/View
This is the create/edit/view screen for archetypes. Feel free to use this screen to examine archetypes, but unless you know exactly what you are doing, do not use it to modify things.

The fields are:
ID - the id number of the archetype
Name - the name of the archetype
Display Name - its display name
Class Name - the name of the java class that defines the archetype
Latest - check this box if this is the latest version
Primary - check this box if this is a primary archetype. The primary field is used to filter similarly named archetypes from lists when wildcards are used. E.g listing archetypes for act.customerAccount* with primary=true will exclude all of the item acts (act.customerAccountPaymentCash etc). Most cases where workspaces list archetypes by archetypes (e.g. Admin|Organisation), they list primary archetypes.
That said, there aren't too many non-primary archetypes, and these wouldn't be matched on the wildcards used anyway.
Node table - this shows each 'node' or component of the archetype. In the above example there are only 4. If there are more than 10, then the display is paged.
Node tab - this shows the attributes of the selected node (microchip in the above example). Its fields are:
Name - the name of the node
Display Name - this is used as the name of the field when it appears on the screen
Type - the java class that defines the node's type
Path - defines where this node is held in the database
Min, Max Cardinality - define how many of these nodes there can be. (1,1) means there must be one only (ie the field is mandatory), (0,1) means that the node is optional but there can be no more than one, (0,-1) means that the node is optional, but there in no limit to the number.
Min, Max Length - define the allowed number of characters if this is a string
Default Value - the default value for this node
Derived - check this box if the value of this node is to be derived from others
Derived Value - an expression that provides the derived value. For example, the Description node of the till archetype is "concat('Last Cleared : ',/details/lastCleared, ' Cash Float : ',/details/tillFloat)".
Hidden - check this box is the node is not to be displayed
Read Only - check this box if the node cannot be updated
Assertion Descriptors tab - this shows the attributes of the selected assertion. Assertions are used to validate the data for the node. There are a dozen different types (such as number, stringcase, expression, regular expression, lookup, etc). In the above example there is a single regular expression assertion. The fields are in general different for each assertion type, and are not documented here.
Style Sheets
This is an experimental facility and not completely implemented. It allows you to control and experiment with the stylesheet parameters that define the layout of the OpenVPMS screens.
OpenVPMS has a set of stylesheets for different screen resolutions. This facility allows you to modify the parameters for each resolution, define a new resolution, and to open a new window with a specified resolution to see how things look.
Note that any changes made will be lost when you log out. That is, this facility is for experimenting with the effects of stylesheet changes, not permanently making them.
The screen is as follows:
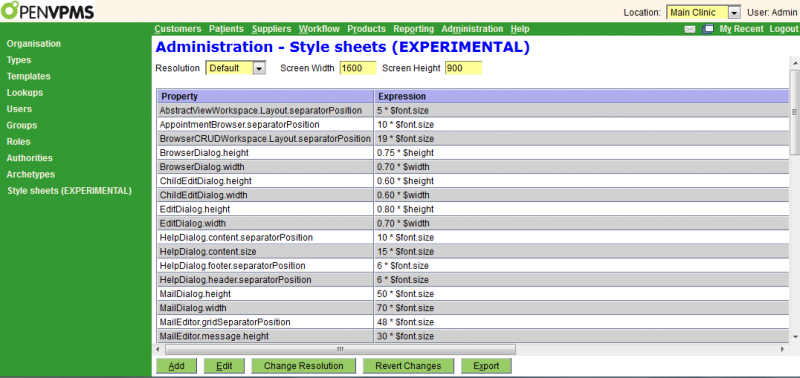
The fields are:
Resolution - a pull-down list of the available resolutions. Initially this will show 'Default' and the screen width and height will be that of your screen.
Screen Width and Height - the screen width and height corresponding to the resolution
Property - this column showns the name of the property. These are fixed and cannot be modified, deleted or added to.
Expression - this column shows the expression used to determine the value of the property. As you can see the majority consist of a number multiplied by a parameter such as the font size, screen height or width.
The buttons are as follows:
Add - opens a window to allow you to add a new screen resolution - you can also edit the various settings. When you press the OK button, the current display will be updated to reflect your settings.
Edit - opens a window to allow you to modify the expressions for the currently selected resolution. To get these to be applied to the current screen, press the OK button on the edit screen, and then press the Add button and immediately OK it.
Change Resolution - displays a window to allow you to set a screen width and height and then opens a new OpenVPMS window with that width and height. This allows you to see what the screens will look like on a screen of that size.
Revert Changes - enables you to discard all changes you made in this session
Export - displays a note window displaying the settings. Note that the properties are held as a default set with overrides for each resolution. Hence, if you press Export when the Resolution is shown as Default, there will be a full set of properties shown in the note window. However, if you call up say 800x600 resolution and then press Export, you will see only a very small number of properties - and these are the ones in the full set that are overridden for 800x600 resolution.
For permanent changes you need to edit the properties files in the <TOMCAT HOME>\webapps\openvpms\WEB-INF\classes\style directory.
If you are changing an existing resolution, say 800x600, then you only need to edit the file default-800x600.properties
If you are creating a new resolution, say 600x1024, then you need to create the file default-600x1024.properties and fill it with the information copied from the note window displayed by the Export button. Then you need to add the new resolution to the list in the default-resolutions.properties file.
Finally you need to restart Tomcat to make the changes take effect.