Installation Documentation
This documentation is all community contributed. Feel free to contribute your own documentation to the website so that other users can benefit. If there is no documentation for your operating system please use the windows install docs as a guide and then contribute back the documentation to the community for your operating system.
NOTE: the online documentation contains sections covering installation.
This documention is version specific, and should be consulted for information about the version you are installing.
The OpenVPMS 2.3 installation documentation is located here.
Package Guidelines
This page contains the package guidelines for OpenVPMS as per the date this file was updated. Where a package mentioned here has been superseded by its maintainer we recommend the use of that new package unless specifically mentioned here.
Java
Oracle Java 8.x - Java Runtime Environment. (ie JRE)
Alternatively
Oracle JDK 8.x
OpenJDK 8.x
Apache Tomcat
Tomcat 7.x
OpenOffice
OpenOffice 4.x
Apache MySQL
Mysql 5.5.x
Mysql Connector for Java 5.x
Additional helpful but not required Software
Mysql Notifier 1.x
MySQL Workbench
JasperSoft Studio 6.x
Windows
Installing OpenVPMS on Windows 10
Contents
- Download Files
- Install Java8
- Set Java Environment Variable
- Open Port 3306 in your Windows Firewall
- Install MySQL
- Install MySQL GUI Tools
- MySQL Configuration
- Apache Installation
- Configure Apache Tomcat
- OpenOffice Installation
- Configure OpenOffice Path
- MySQL Database Driver Setup
- OpenVPMS Database Setup
- OpenVPMS Service User Setup
- Apache Tomcat Service Setup
- OpenVPMS Application Test/Run
- OpenVPMS Application From Other PCs on Network
Introduction
This tutorial describes one user's step-by-step installation of OpenVPMS 2.x on a PC with a Windows 10 32-bit or 64-bit operating system. Originally written with images for Windows 7, there have been some changes in software upgrades, appearance, links and images will be updated for Windows 10 if there's any significant difference. Update advice: Apps are updated and links are accurate as of 18 November 2021. This guide is not an official OpenVPMS guide.
When installing OpenVPMS you should
- be logged in on an account with Administrator privileges;
- consider disabling UAC will also smooth the installation process. This will become important especially when trying to configure Tomcat.
Download OpenVPMS Installation And Other Required Files
- Download the latest openVPMS Installation files.
Unzip the Installation Pack onto your C: drive. This should create a C:\openvpms-release-2.n.n folder with the necessary files to install OpenVPMS.
You don't need the version number in the folder name - it's fine to just rename the folder to "OpenVPMS". This will be useful if you have other software that accesses OpenVPMS: if you upgrade versions, you won't need to alter those other software packages.
Create a folder called, say C:\openVPMS\Installation Files.
- Download Open Office 4.1.n from openoffice.org and save in C:\OpenVPMS\Installation Files folder.
- Download Java 8 SE Runtime Environment from the Java Downloads page and save it to C:\OpenVPMS\Installation Files.
You only need the RunTime Environment version (64-bit or 32-bit).
Java 11 can be installed however there are a number of locale changes in Java 11, compared to Java 8. This causes differences in formatting for date functions that use the LONG, MEDIUM and SHORT date formats.
From my reading of the Oracle Binary Code License for Java 8 "Oracle grants you a non-exclusive, non-transferable, limited license without license fees to reproduce and use internally the Software complete and unmodified for the sole purpose of running Programs".
- Download the Windows MySQL 5.5.62 installation file from the MySQL archives site.site. Scroll down and select highest 5.5.nn version.
Select Windows Essentials (x86 for 32-bit or x64 for 64-bit) and download into C:\OpenVPMS\Installation Files
- Download the MYSQL GUI Tools from the MySQL archive site.
Select the Windowsx86 for 32-bit or x64 for 64-bit and save into C:\OpenVPMS\Installation Files folder. Yes I know this is deprecated but has the MySQL Administrator which makes for simple (and essential) admin connection and setup and is quicker to install (no requirement for MS Visual C++) than MySQL Workbench (however for running SQL queries and other tasks, Workbench is the accessory app of choice).
- Download the MYSQL Java Connector 8.0.nn from the MySQL site: click on Archives, then select 8.0.27 and Platform Independent .ZIP file and save into C:\OpenVPMS\Installation Files folder.
- Download Apache Tomcat (at time of writing current version is 9.0.x) from the Apache Software Foundation site.
Select the Core | 32/64-bit Windows Service Installer option and save into C:\OpenVPMS\Installation Files folder.
Start Installation
0. Back Up
Consider taking a System Image of your server before you start - sometimes timewise it's easier to revert to "start over" rather than fix recalcitrant errors.
1. Install Java8 (updated)
Execute jre-8u281-windows-x64 (or x86 for 32-bit).exe and accept all defaults.
2. Set Java 8 Environment Variable (updated)
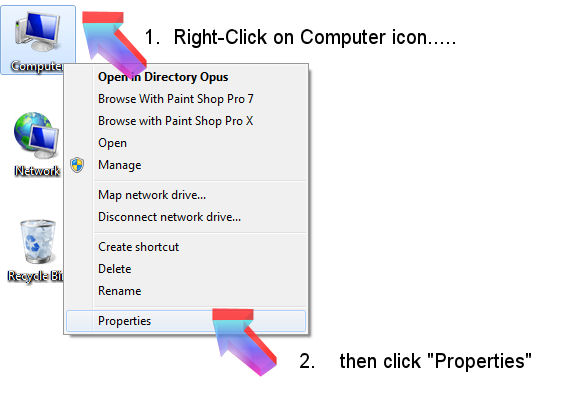
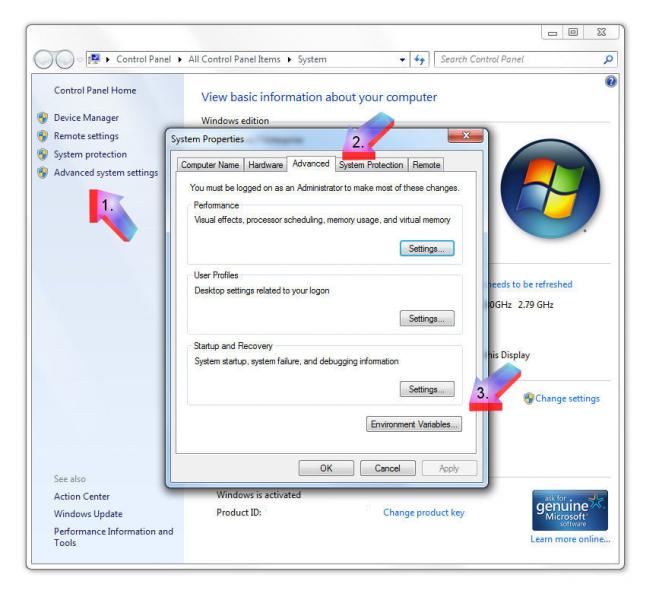
Right-Click on Computer icon on desktop, then click "Properties".
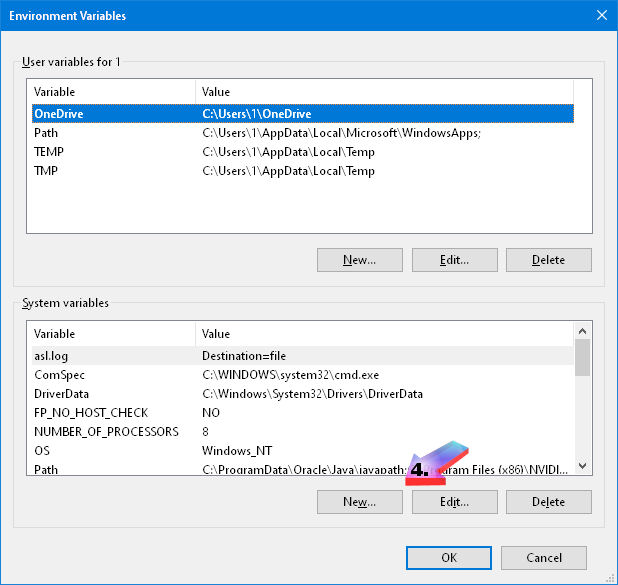
Click on Advanced System Settings (1), Advanced (2) and then Environment Variables (3):
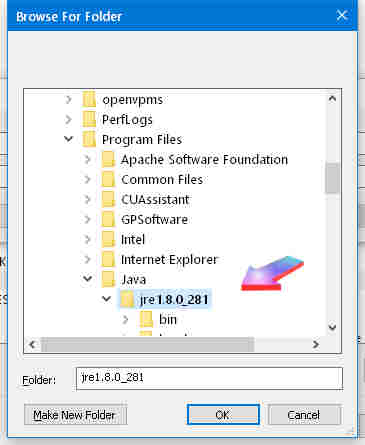
Under System Variables (lower box - upper box is for User Variables), click on New(4), then enter JAVA_HOME and browse to the Java folder and press OK
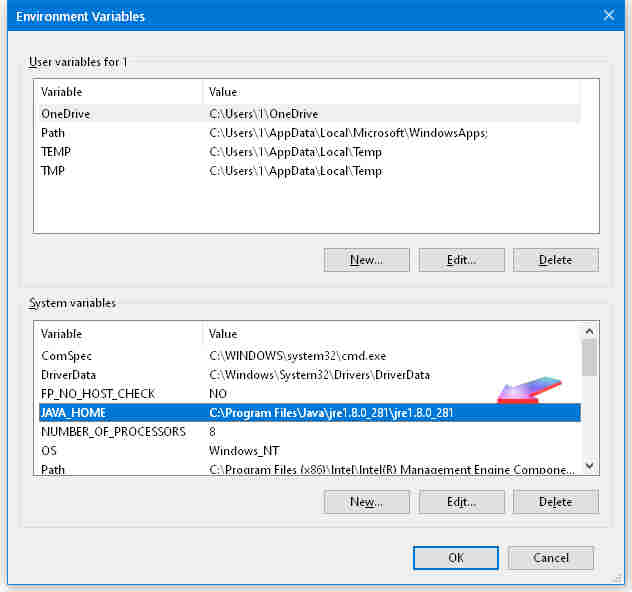
The end result should look like this:
Click OK, OK, then close the remaining window.

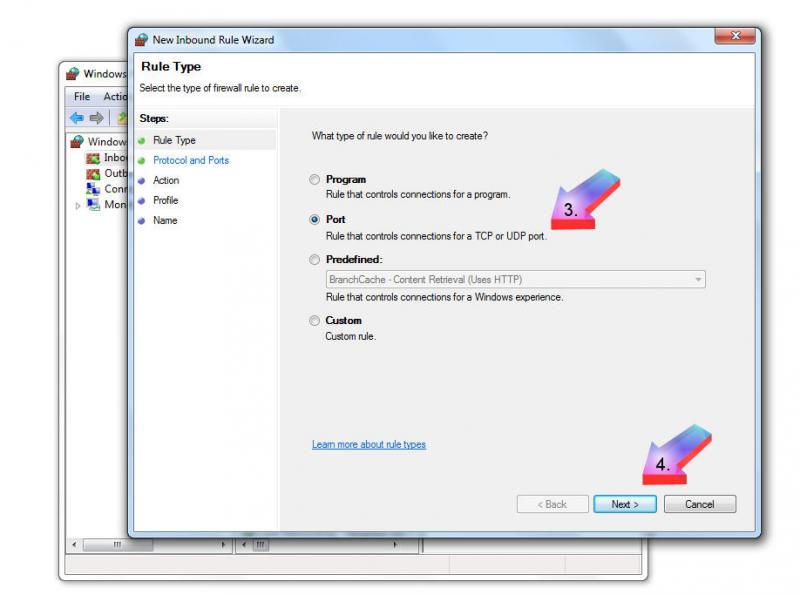
3. Open Port 3306 in your Windows Firewall
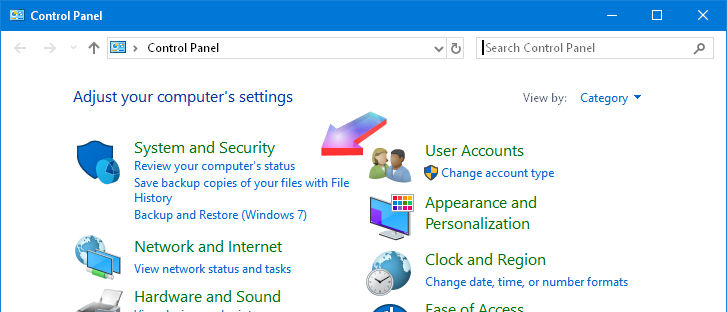
Click Start | Control Panel | System And Security:
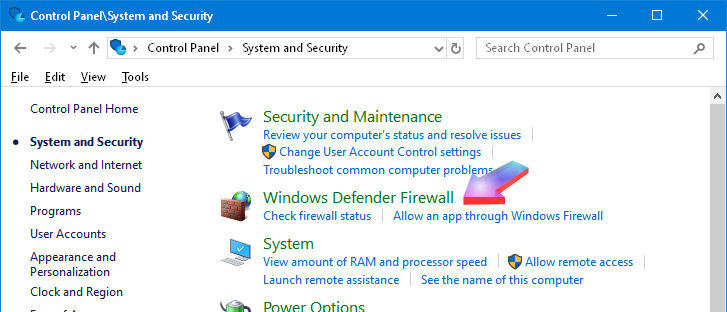
Click on Windows Defender Firewall:
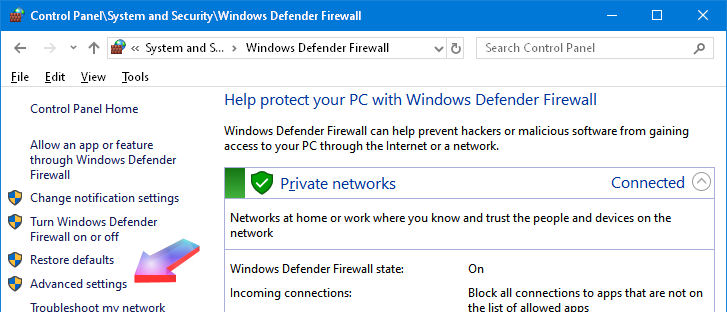
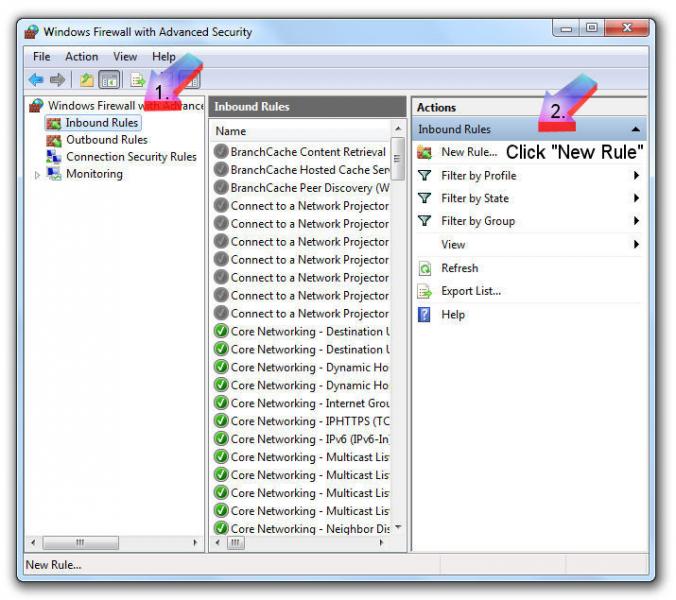
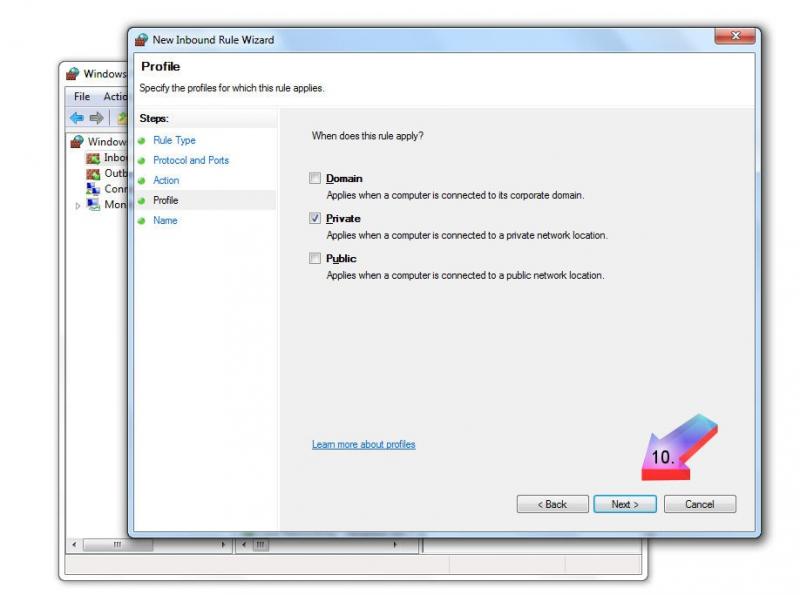
Click on Advanced Settings, then follow images as below:
You've confirmed the new rule, so close the window (click on red x).
If you're going to access OpenVPMS from other computers on a network within the clinic, you'll also need to allow port 8080.
Repeat the steps above, this time typing in 8080 as the TCP Port to allow and name it Openvpms.4. Install MySQL
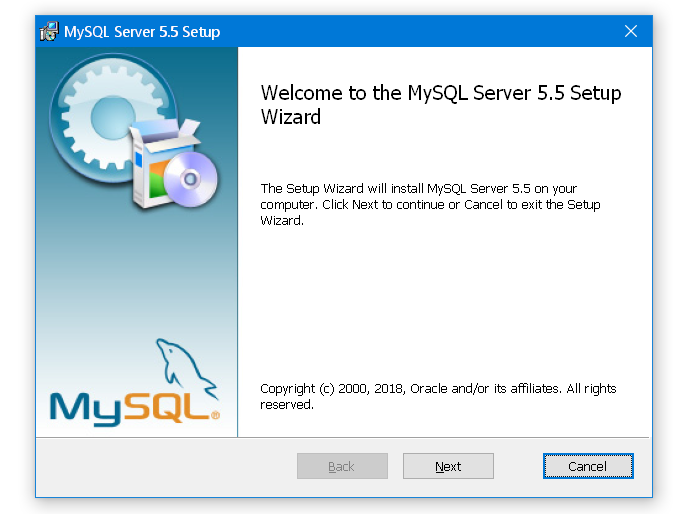
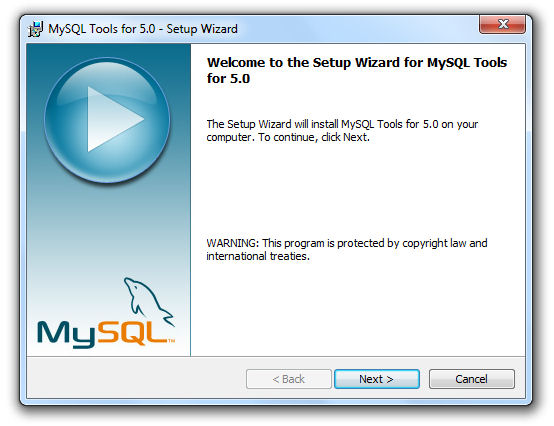
Double-click on the "mysql-essential-5.5.nn-win32.msi" file you have downloaded and follow the images below:
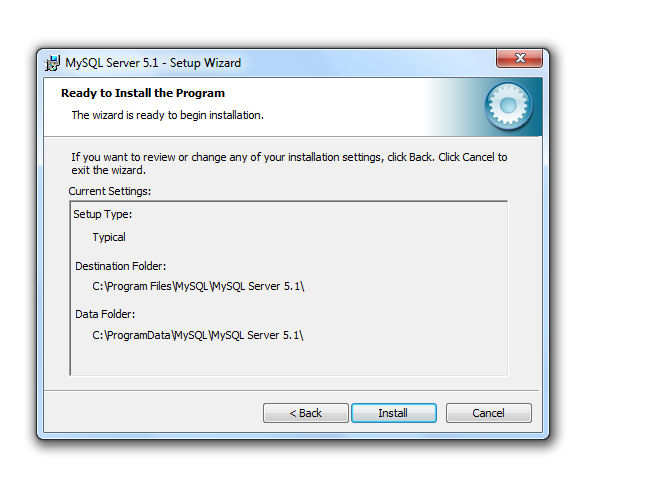
Be patient: at this point, it may take some time for the progress bar to start moving (on one of my PCs, over three minutes), so just leave the PC to do its work: the following screens should be self-explanatory: press Next when prompted to do so:
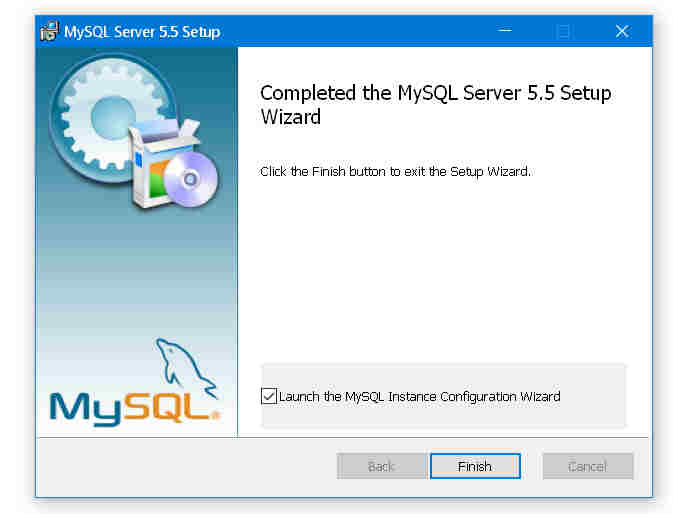
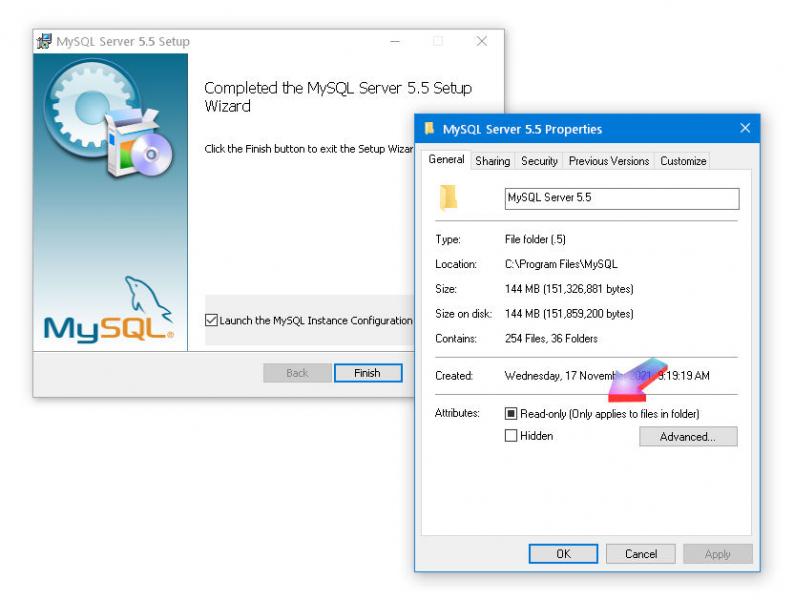
At next screen, DO NOT CLICK "Finish" until you read the following steps:
STOP HERE! (Don't click "Finish" just yet)
Leave the above window on the screen.
Why?
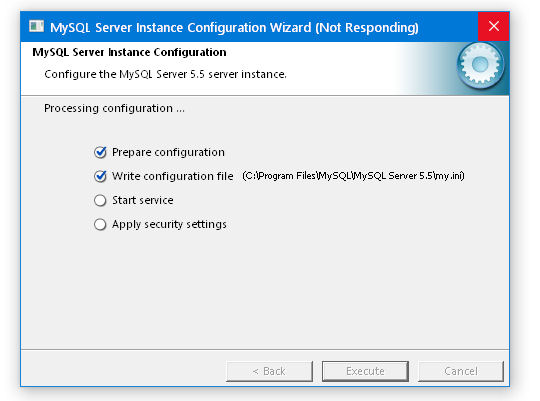
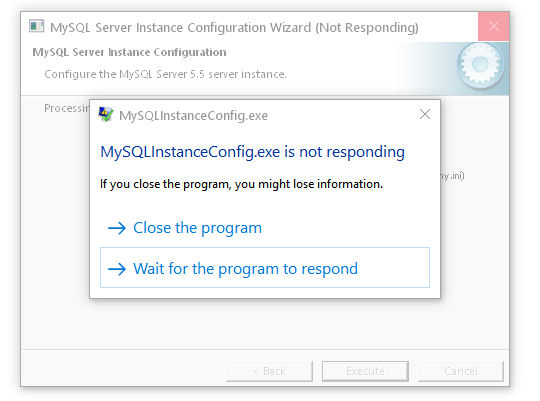
You need to set read/write permissions before configuration or the Configuration Wizard will fail at execution, thus:
Open Windows Explorer, browse to ProgramFiles\MySQL\MySQL Server 5.5.
Right-click on the folder and select Properties; un-check Read-Only tab:
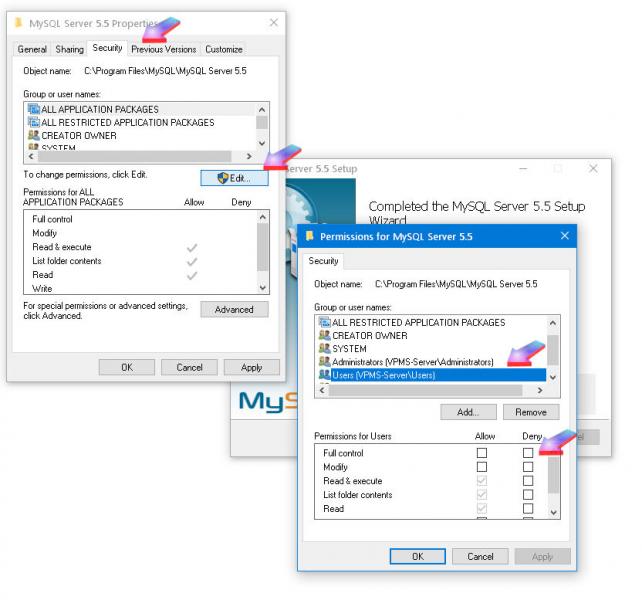
Click on Security tab, then Edit, then Users:
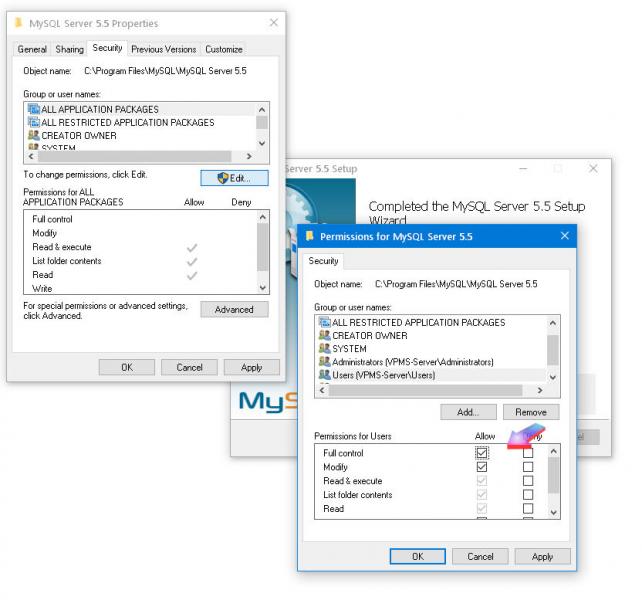
Click on Allow | Full Control then click OK:
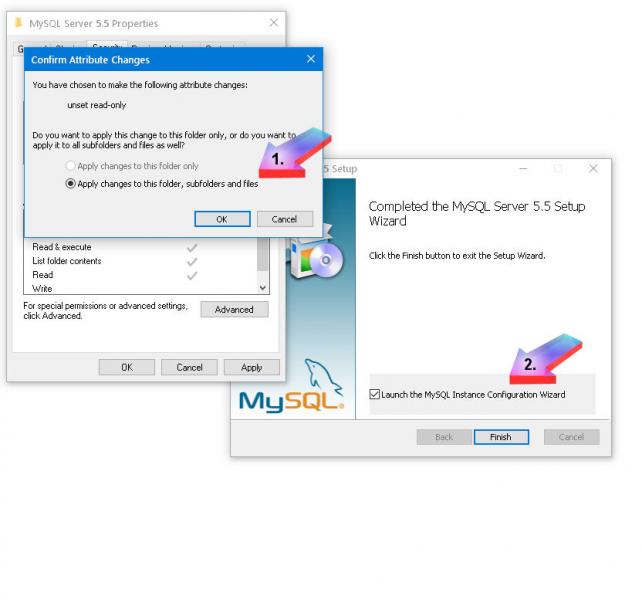
Ensure "Apply changes..." (1) is checked and click Ok Ok.
Now go ahead and click "Finish" to load the Configuration Wizard (2).
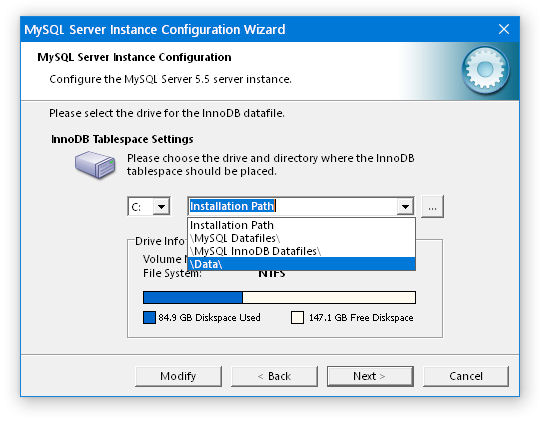
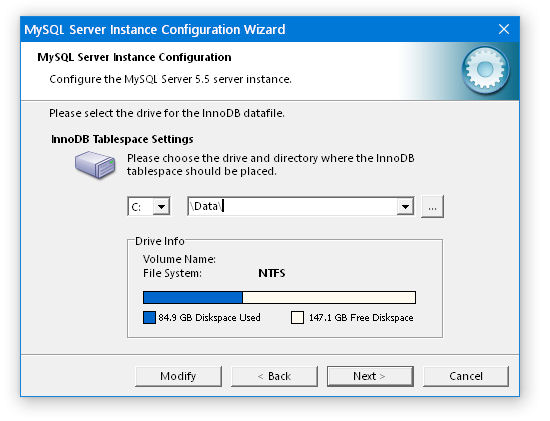
At this screen, click on the drop-down arrow and select \Data:
Your screen should then look like this: if it does, click Next to continue:
You now need to ensure all permissions are enabled. In previous Windows7 installation instructions, this step was placed here. However, in indows 10 pro, if you didn't un-set the read-only flag and set Full Control permissions before configuring MySQL the Configuration app would crash at the "Starting Service" button.
It won't hurt to check your permissions here before continuing.
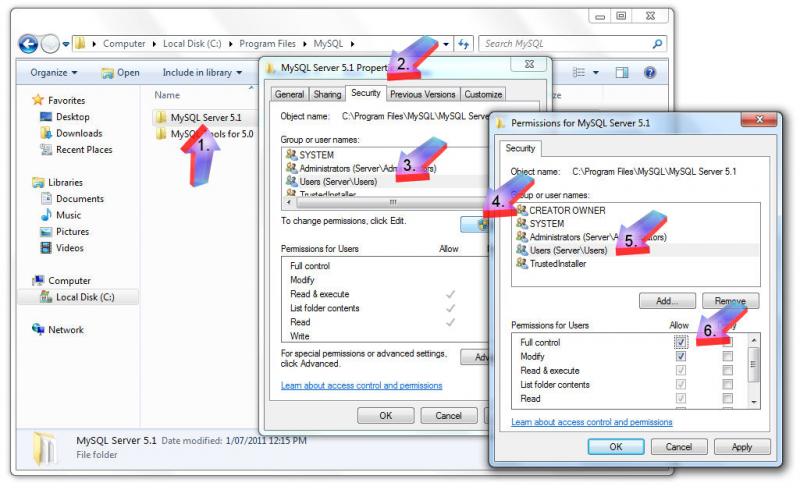
- Click on "Computer" icon, browse to C:\Program Files\MySQL;
- right-click on MySQL Server 5.5 (1);
- select Properties and then click on Security (2) tab;
- select Users (3);
- then click Edit (4), click Users (5) and click to enable Full Control (6);
- and press OK.
5. Install MySQL GUI Tools
Double-click on the "mysql-gui-tools-5.0-r17-win32.msi" file you have downloaded to commence installation. Whilst this is an older app, you need this to configure MySQL in the next step. This step is essential but is not listed in the official OpenVPMS documentation
Click "Next" all the way through to complete default installation.
6. MySQL Configuration
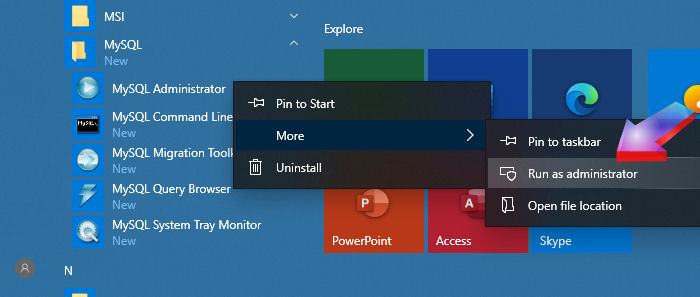
Click Start | MySql | right-click MySql Administrator | More | Run As Administrator.
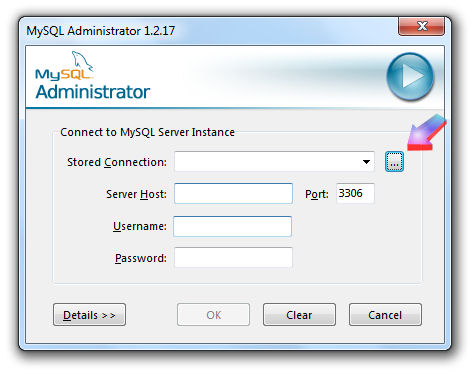
Click on the button with the ellipsis (...) arrowed in image below:
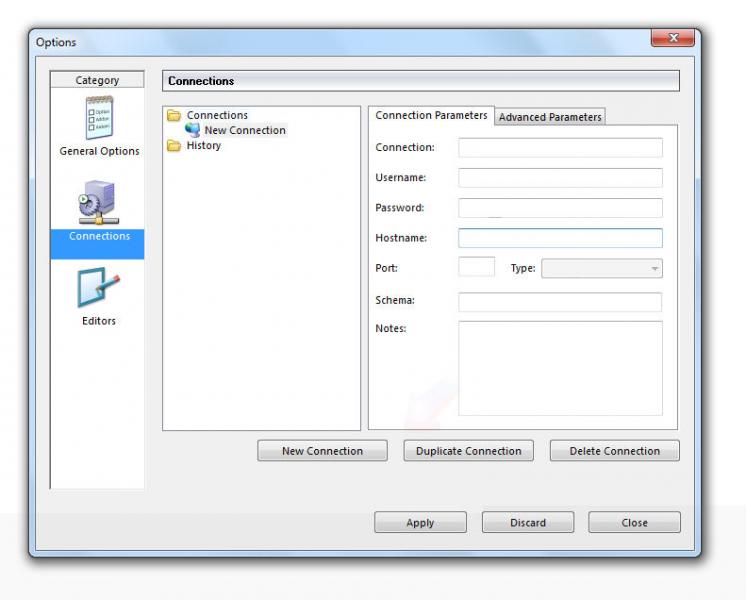
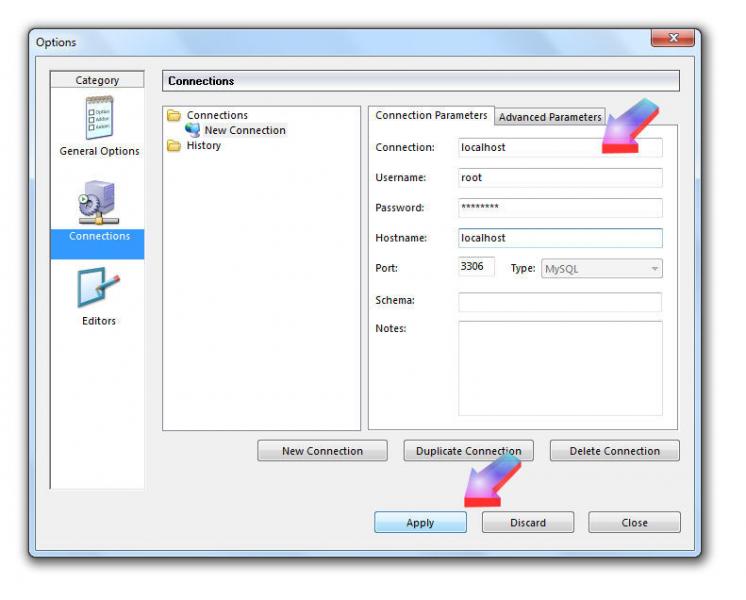
Click on New Connection:
Change New Connection to localhost then fill in the fields (root, openvpms, localhost) as per image below and click Apply | Close:
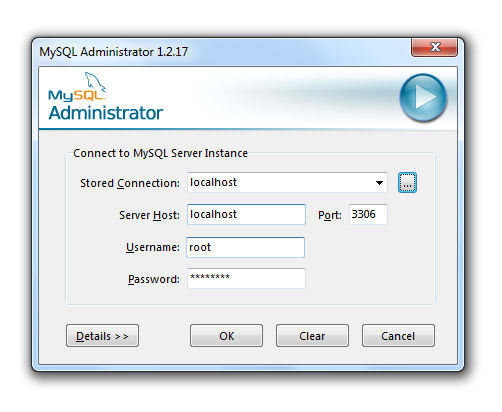
You should now be back at the opening screen: select localhost from the drop-down box and click OK
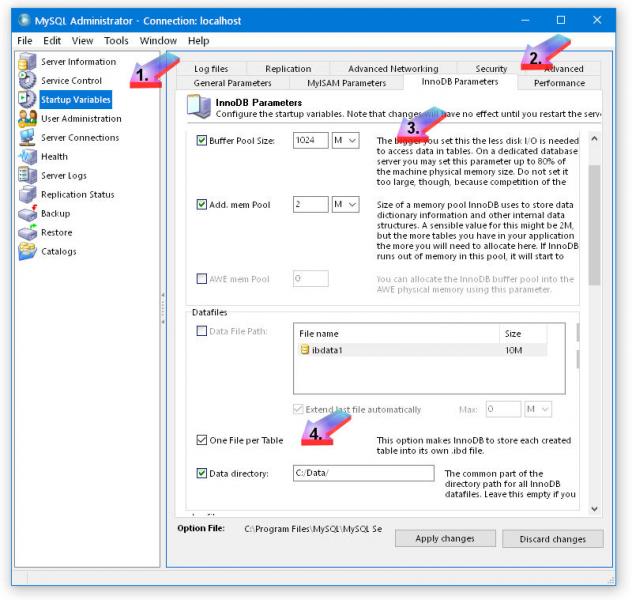
On the left-hand pane, click Startup Variables (1), then click on the InnoDB Parameters (2) tab.
Scroll down to, and check Buffer Pool Size (3) and type in 1024 (recommended for OpenVPMS with minimum of 4GB RAM).
Scroll down to, and check One File Per Table (4).
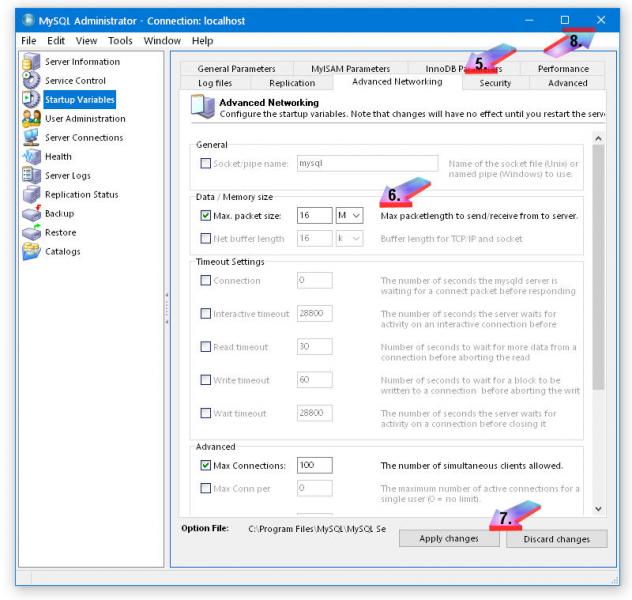
Click on Advanced Networking tab (5), enable Max. packet size and set to 16 M (6), then click Apply Changes (7) and close the window (8).
7. Apache Installation
Double-click on the "apache-tomcat-9.0.nn.exe" file you have downloaded to commence installation (app hasn't changed in appearance from 7->8->9); click Next;
Click Next;
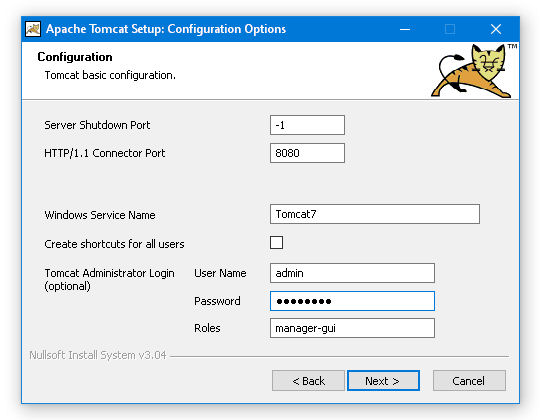
Fill in User Name as admin and password as openvpms click Next;
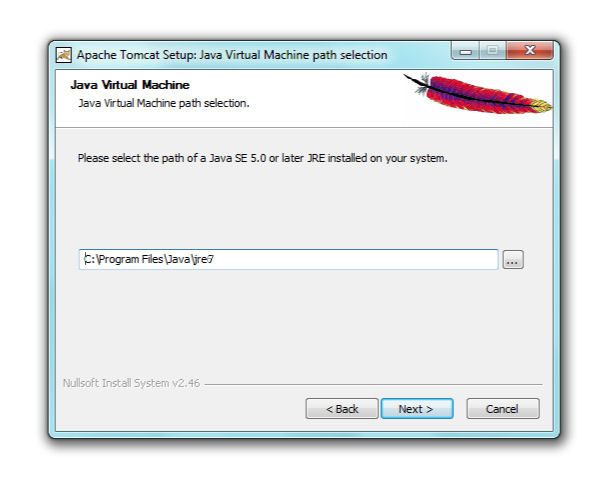
Installer should find your Java installation without any intervention by you; if you have more than one, pick highest build number, then click Next
Accept default installation folder and click Install;
8. Configure Apache Tomcat
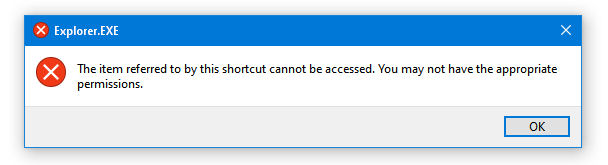
At this point you would normally click Start, right-click on Configure Tomcat and select Run As Administrator:
But unfortunately you would be presented with this error message:
You need to take two additional steps:
1. disable UAC. Click Start | Control Panel | System and Security | Change User Account Control Settings and set UAC to "Never Notify:
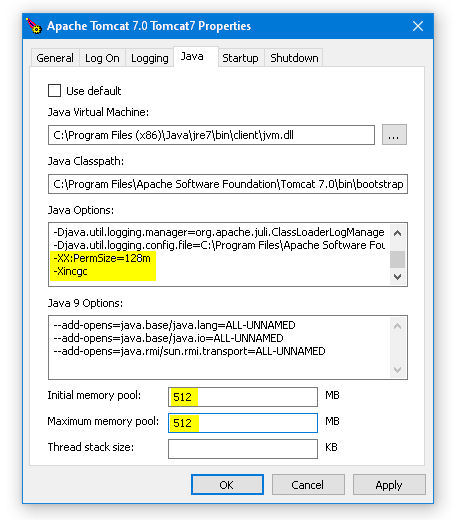
2. Browse to Tomcat 9.0\bin folder, right-click on Tomcat9w.exe and select Run As Administrator:
Click on Java tab. In Java Options, scroll down to the bottom and add the following two lines:
-XX:PermSize=128m
-XincgcSet Initial Memory Pool and Maximum Memory Pool to the same value, depending on the number of users; say 512 at a minimum. Try 1024 for 4GB memory or higher.
Changes required are highlighted in yellow in image below:
Click OK and close.9. OpenOffice Installation
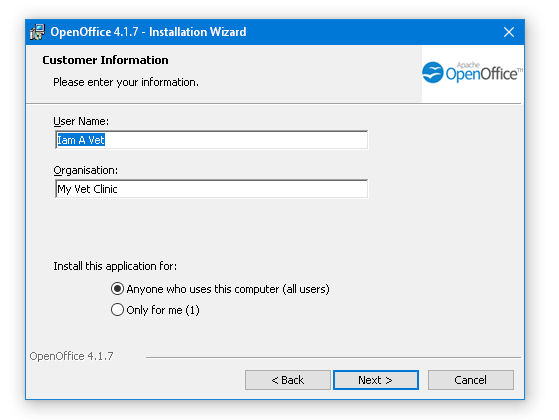
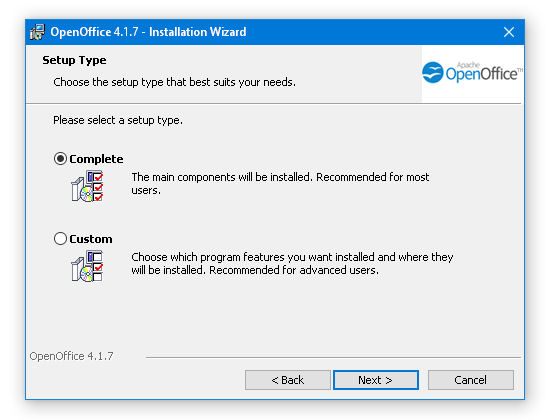
Double-click on the "Apache_OpenOffice_4.n.n_Win_x86_install_en-GB.exe" file you have downloaded to commence installation; accept all default values as per the following images:
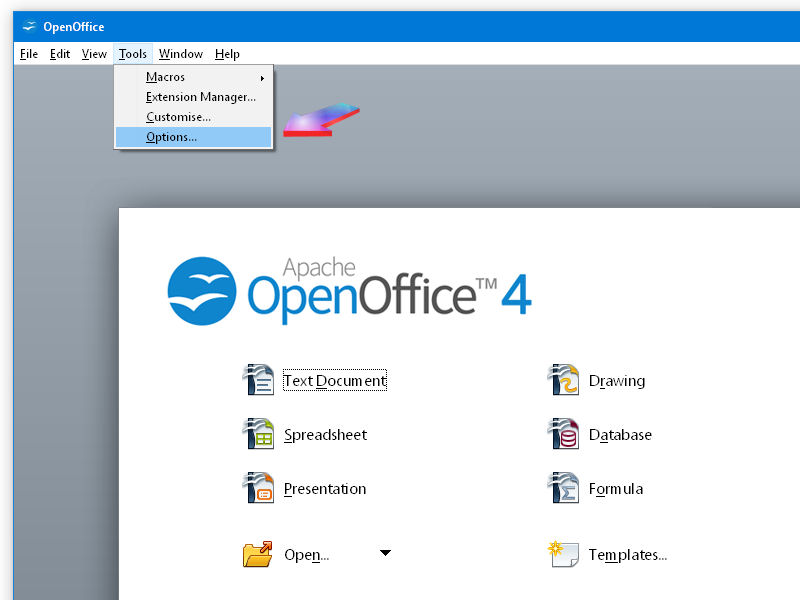
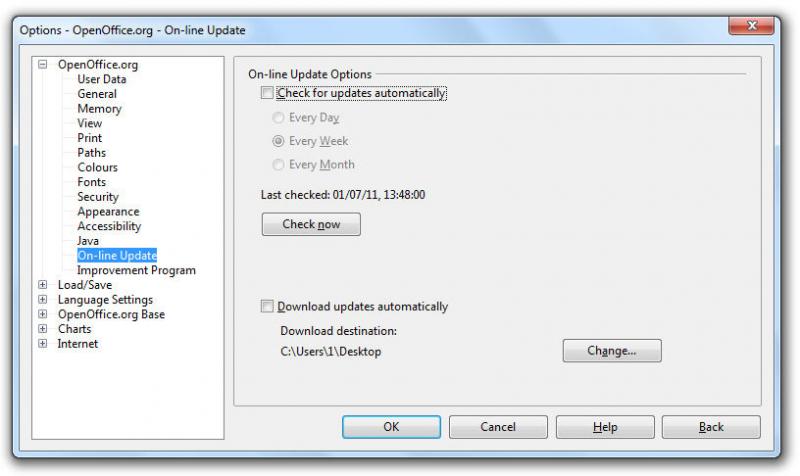
Once installed, start OpenOffice, fill in details and from the main menu select Tools | Options:
Click on On-line Update and un-check Check for updates automatically;
Click OK to close options.
Close OpenOffice.
10. Configure OpenOffice Path
Right-Click on Computer icon on desktop, then click "Properties".
Click on Advanced System Settings (1), Advanced (2) and then Environment Variables (3):
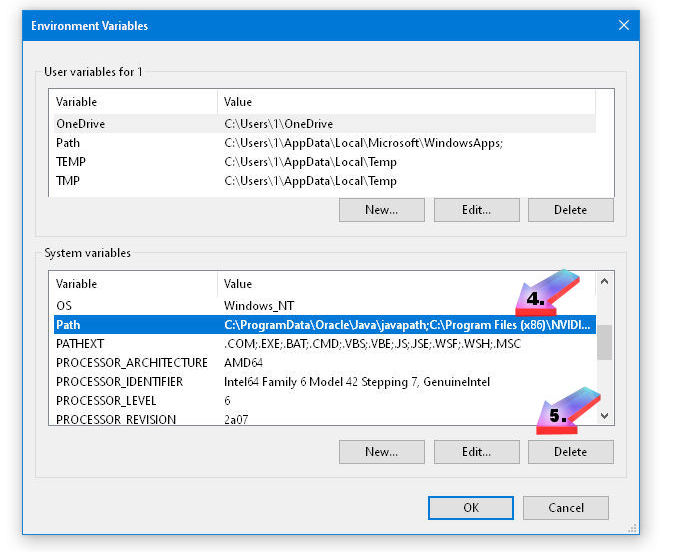
Under System Variables (lower box ), click on Path (4), then click Edit (5);
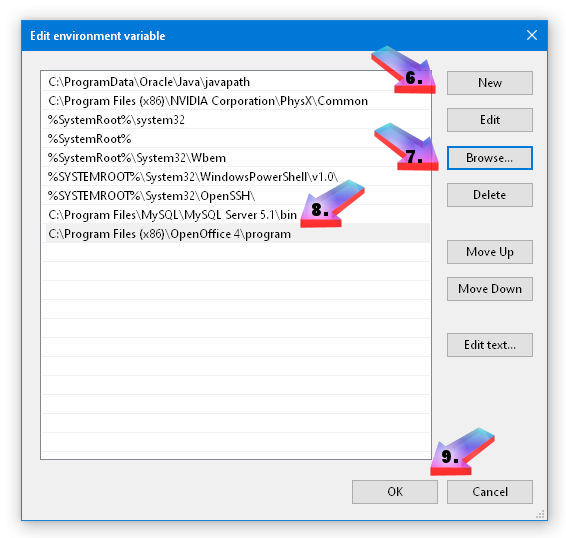
Press New (6), then Browse (7) and select c:\Program Files (x86)\OpenOffice4\program (8) and press Ok (9):
Click OK, then close the remaining window.Test your OpenOffice path configuration.
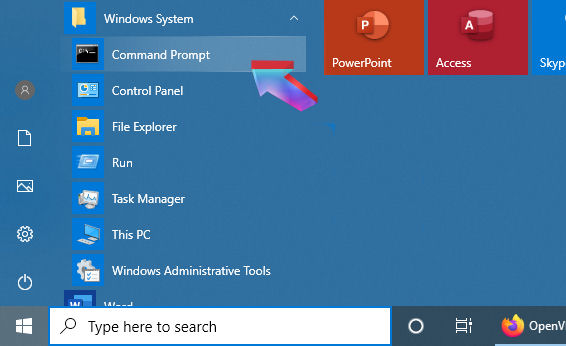
Click Start | Windows System | Command Prompt:
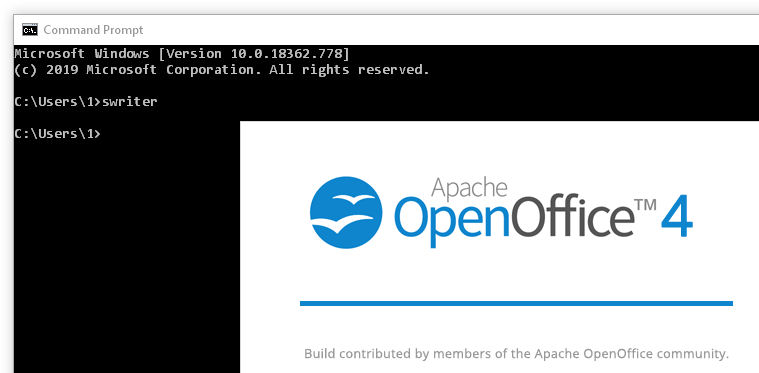
Type in swriter and press Enter. OpenOffice/Writer should start. Two reasons for doing this:
- If it does start, you've set the path correctly.
- OpenVPMS starts OpenOffice in the background; if OpenOffice is waiting for questions on registration and checking for updates to be answered, letter merging etc. won't work.
Reopening OO makes sure it is not asking for you to participate in surveys etc.
If all's well, close OpenOffice.11. MySQL Database Driver Setup
- Open the downloaded mysql-connector-java-8.0.nn.zip.
- Extract connector file mysql-connector-java-8.0.nn.jar to Tomcat library folder i.e C:\Program Files\Apache Software Foundation\Tomcat 9.0\lib.
- Extract the same connector to c:\OpenVPMS\lib folder.
So far so good, it should only have taken you eight minutes (or less) on an average >2018 PC to get to this point.
12. OpenVPMS Database Setup
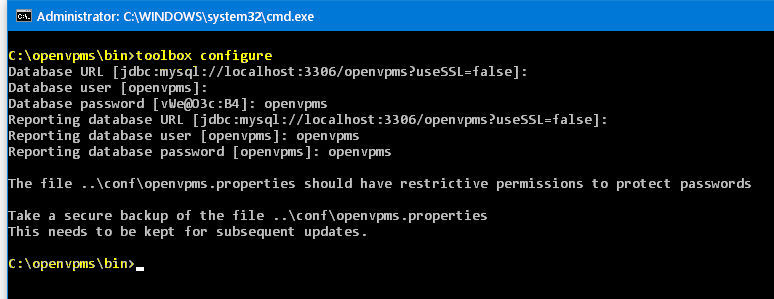
Click Start | Windows System | Command Prompt, navigate to C:\OpenVPMS\bin.
Type in toolbox configure and press Enter.
{Note: if using Powershell instead of Command Prompt,you Right-Click-Start | WindowsPowerShell, navigate to C:\OpenVPMS\bin, you will need to type in ./toolbox configure and press Enter .}
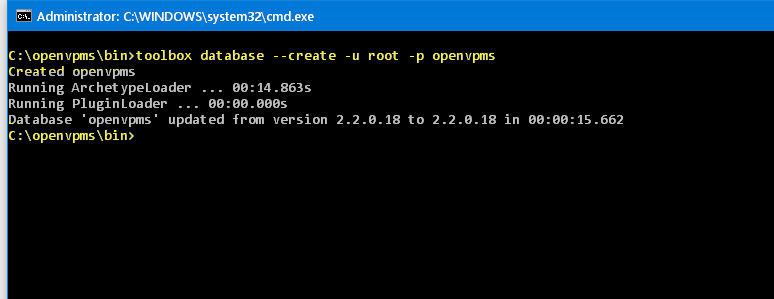
Type in toolbox database --create -u root -p openvpms and press Enter.
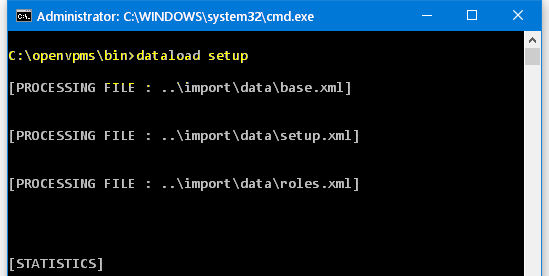
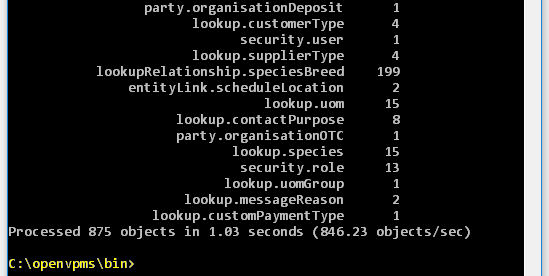
Type in dataload setup and press Enter. Lots of messages will scroll down the creen - first and last few shown here.
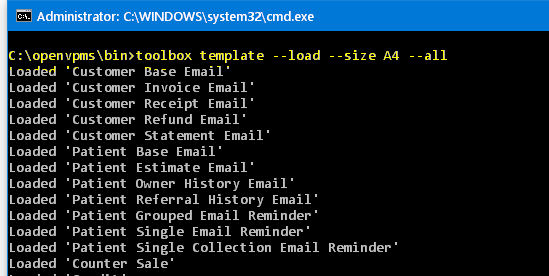
Type in toolbox template --load --size A4 --all and press Enter (type A5 if using that size of paper). Again lots of messages will scroll down the screen.
14. OpenVPMS Web Application Setup
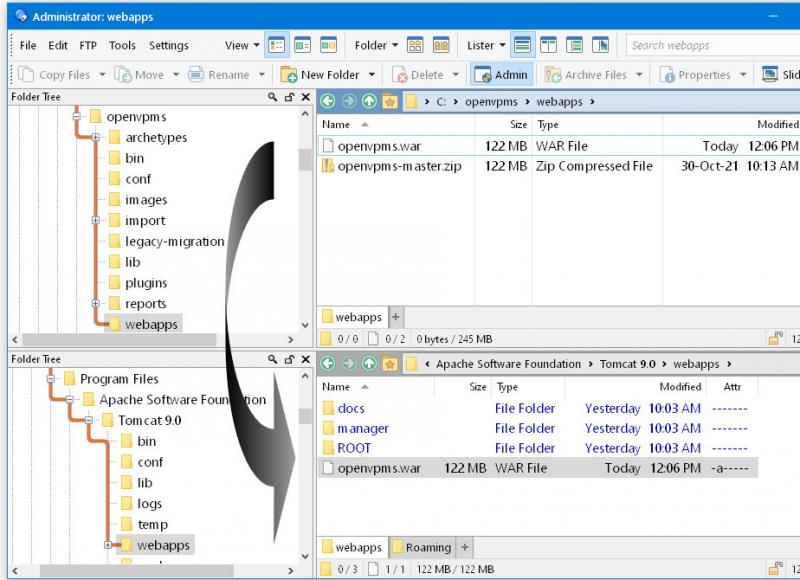
Still at the Command prompt window at c:\openvpms\bin type toolbox war and press Enter.
Copy openvpms.war from c:\openvpms\webapps to c:\Program Files\Apache Software Foundation\Tomcat 9.0\webapps.
Copy the openvpms.war file from c:\openvpms\webapps
to Tomcat Webapps folder at C:\Program Files\Apache Software Foundation\Tomcat 6.0\webapps.
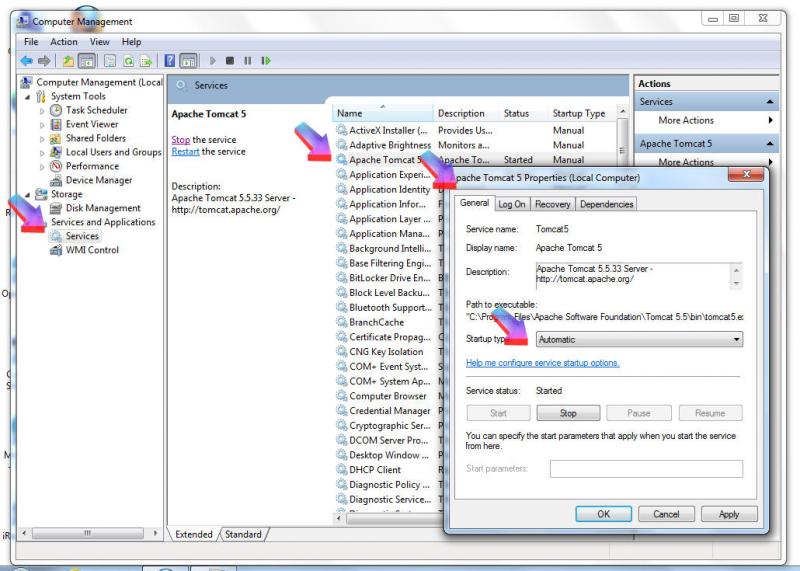
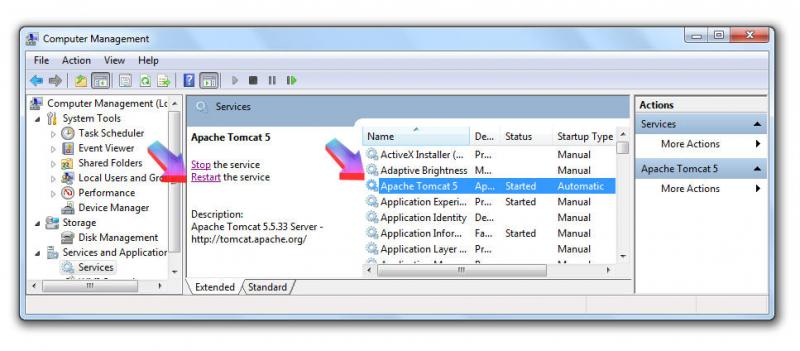
16. Apache Tomcat Service Setup
On the desktop, right-click on Computer icon and select Manage.
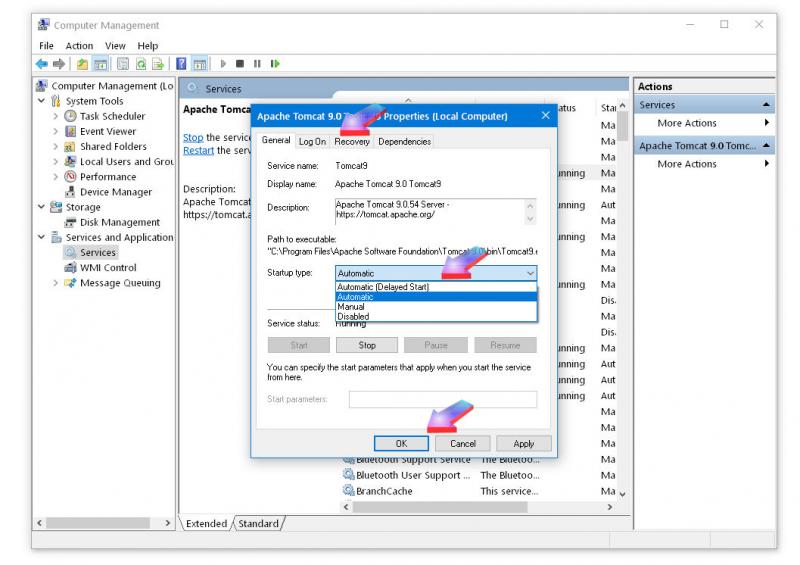
In Services and Applications, click on Services, right-click on Apache Tomcat 9 and select Properties. Click on General tab and change Startup type to Automatic.
Click OK to close.Click on Apache Tomcat 9, then click on Restart the service.
One last thing: right-click on Properties again, select General and check Startup Type: make sure it's set to Automatic, then click Ok, then Stop and then Restart the service. (Aggravatingly, after all this setup had been completed, I got a "refused connection" at Step 17 below. I went back to Tomcat Properties and found that the StartupType had reset itself(?) to Manual.)
17. OpenVPMS Application Test/Run
Open up your internet browser this address: http://localhost:8080/openvpms/app
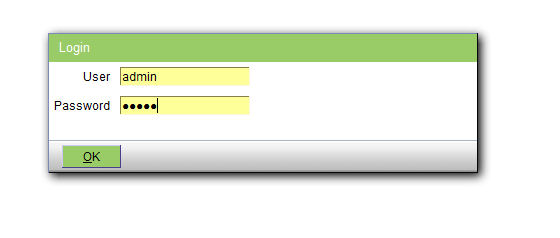
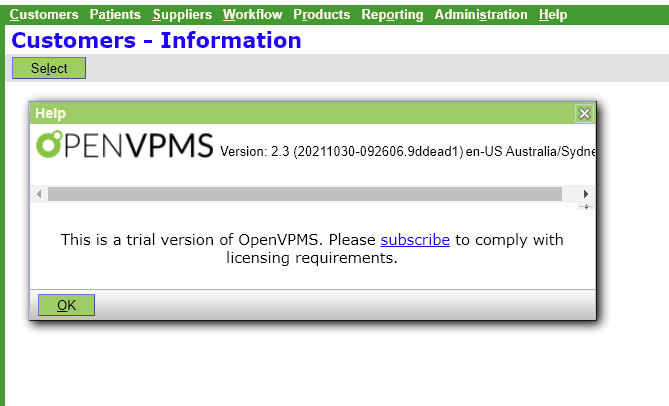
Login to OpenVPMS using user 'admin' and password 'admin'
Eureka! It works!
18. OpenVPMS Application From Other PCs on Network
First, you need to establish the IPv4 address of your server (the PC that your OpenVPMS installation resides on):
Open a Command Prompt (Start | Windows System | Command Prompt) and type ipconfig and press Enter.
Look for the line IPv4 address: in the screenshot below, it's 192.168.1.101:
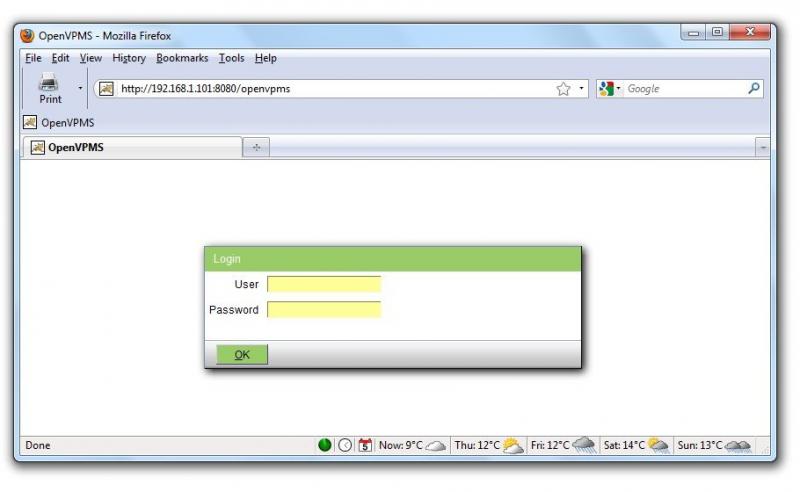
To start OpenVPMS on another PC on the network, you will need to type in http://IPv4_address:8080/openvpms; in example below, http://192.168.1.101:8080/openvpms:
However, there's a distinct possibility that you are told you can't connect to OpenVPMS.
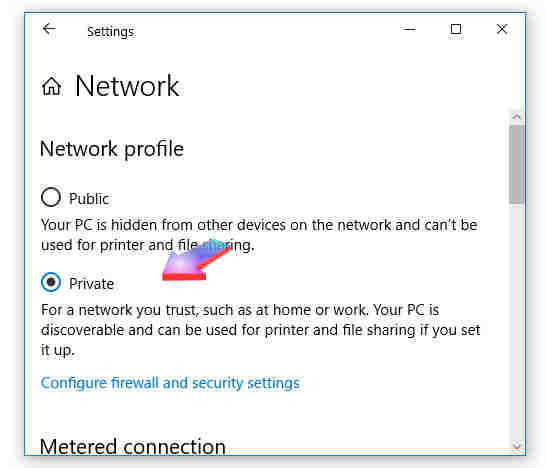
Windows 10 now throws up another gotcha just when you thought you were home free! By default Windows sets networks as public, so when you try to log in to OpenVPMS from another PC on the network, you are denied access.
You need to set the network to Private on the PC containing OpenVPMS.
Follow these steps.
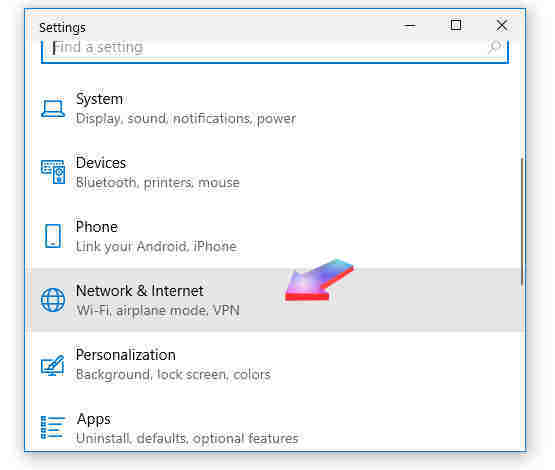
Click Settings (gear wheel) | Network & Internet:
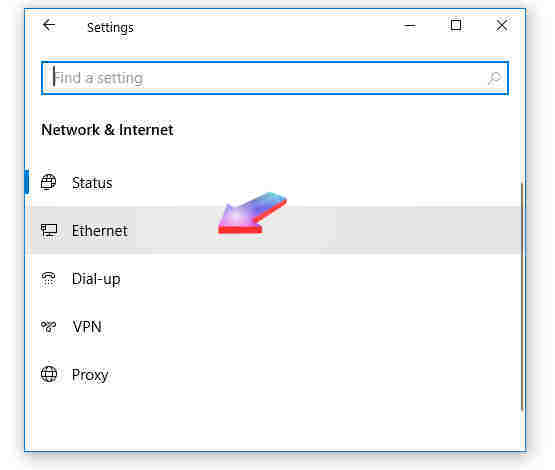
Click Ethernet (or whatever your network is called):
Click Network:
Select Private as your Network profile and close. OpenVPMS should now load from your workstation machine.
Click here to move on to setting up OpenVPMS for use.
This resource is an openVPMS enduser-created tutorial. Constructive criticism and corrections welcome.


Setting up Win 7 tutorial
Awesome tutorial!
A couple notes on update.
1) If you use MySQL full install (aka all bells and whistles) as I needed it for other applications, the new *.msi ver 5.5 is broken. To fix change the data path to something else, c:\openvpms\data will work nicely:) Older versions the *.msi works I am told but I wanted the new version as of 11/12.
2) Difficult to run the mysql.exe file from the command prompt for the db imports on windows 7. I would suggest copying the mysql.exe file from c:\program files\mysql\bin to your Openvpms db directory. Then opening command prompt from accessories. Then change directory to your bin directory and then you can run mysql as the tutorial suggests. Perhaps with MySQL ver 5.5 that option as described in the tutorial has been removed??? Anyway that works well.
Other notes:
Anyways, did a little research and found "Jasper Studio" which is made by Jasper iReports and is very user friendly unlike simply iReports. It is made by the same company and open source. It actually will do the little boxes etc lol so more of my cup of tea since I paint as well and am well versed in Corel products. I would highly recommend it for anyone installing or tweaking their reports. I'll post a sticky in the Implementation documentation. I know, I know, another program to download, but well worth it.
Another issue was that the reports were read / write only thanks to Windows 7 security setting (why the primary user doesn't get admin rights seems rather strange, but I suppose if cell phones worked here etc and mobility then it might be useful to prevent tampering.... although I could think of better things to do but c'est la vie. So something to check if you are having problems.
Thanks again,
Don
cc:// implementation documentation
OpenVPMS Installation (Windows)
Important Note- when installing OpenVPMS you should be logged in on an account that has administrator privileges!
Download OpenVPMS Installation Files
- Download the latest OpenVPMS Installation files . The following assumes OpenVPMS 1.5.1 is being installed.
- Create a folder to unzip the release in. The following assumes a folder named C:\OpenVPMS
- Unzip the Installation Pack to the C:\OpenVPMS folder. This should create a C:\OpenVPMS\openvpms-release-1.5.1 folder with the necessary files to install OpenVPMS.
- Create a folder called C:\OpenVPMS\Installation
Open Office and JDK Installation
- Download Open Office from openoffice.org and save in C:\OpenVPMS\Installation folder.
- Double Click on the installation file in C:\OpenVPMS\Installation folder.
- Unpack to the default location (Desktop)
- Select Complete Installation
- Select File Types Open Office will be default application for. This is your choice !
- Remove Installation Files from Desktop.
- Start Open Office and set options as required.
Open Office Path Configuration
- In My Computer->Properties->Advanced->Environmental Variables double click on System Path variable and add path to OpenOffice program folder to end.
- Click OK to save settings.
JDK Configuration
In order for other applications to be able to find the java installation we need to set an environmental variable on the system.
- Using Windows explorer navigate the the location of the installed java installation.
- Highlight the address bar and copy using Control-C
- Right Click on My Computer and select Properties
- Click on the Advanced tab and then click on Environmental Variable button
- In the System variables section click New
- In Variable Name type JAVA_HOME
- In Variable value hit Control-V. This should enter the path name we copied before.
- Click OK on all open Dialogues.
MySQL Installation
- Download the Windows MySQL installation file from the MySQL site.
- Select Windows Essentials (x86) and download into C:\OpenVPMS\Installation
- Double click mysql-essential-5.0.45-win32.msi in c:\OpenVPMS\installation folder.
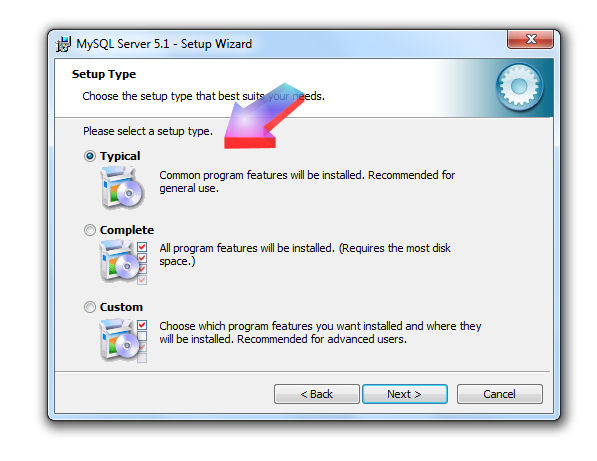
- Select Typical Installation
- Skip Sign Up
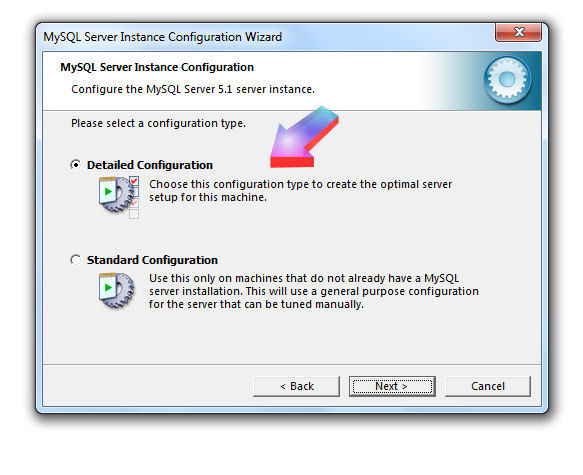
- Select Configure MySQL Server Now
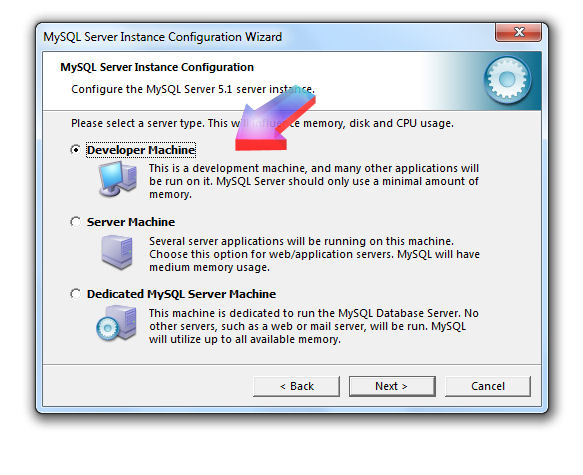
- Select Developer Machine (Typically on server would select Server machine)
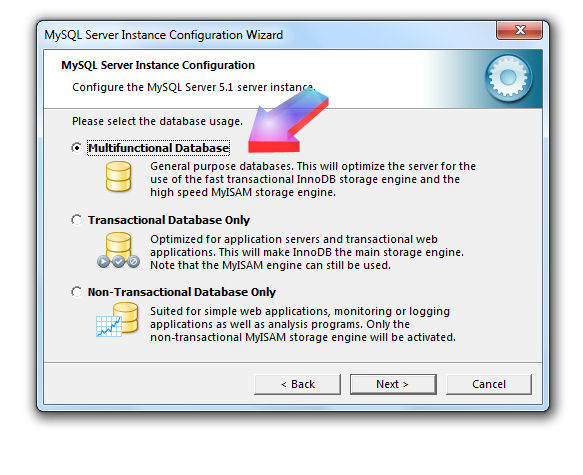
- Select Multifunctional Database
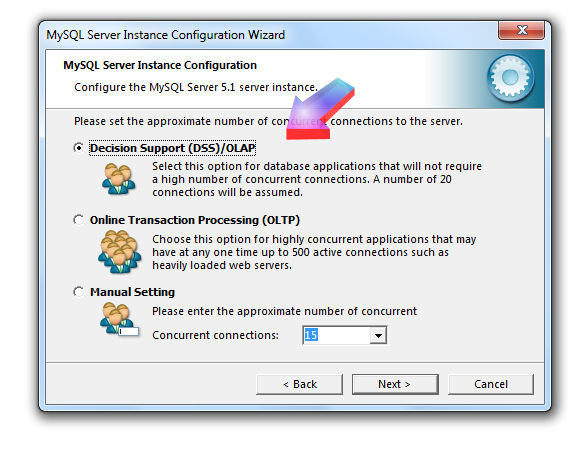
- Select Decision Support option (Larger installs would utilise manual connections settings. OpenVPMS application does connection pooling)
- Select Enable TCP/IP Networking
- Select Enable Strict Mode
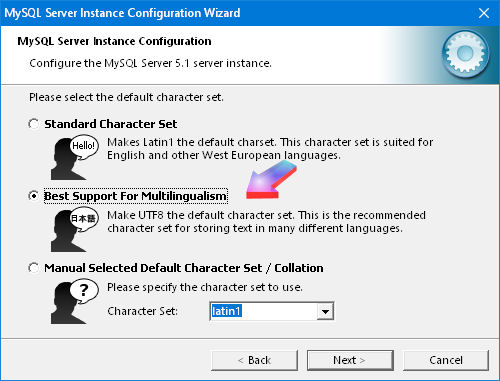
- Select Standard Character Set
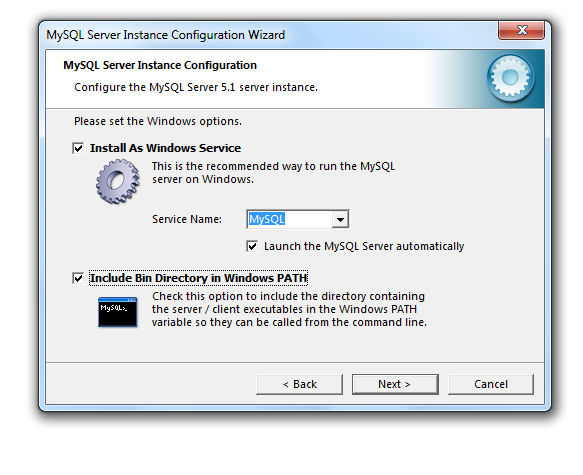
- Select Install as Windows Service
- Select Include Bin Directory in Path
- Enter the root password as openvpms twice
- Select Enable root access from remote machine
- De-select Anonymous User
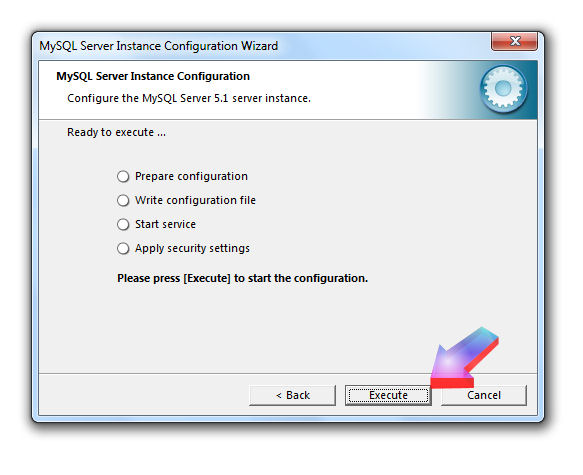
- Click Execute
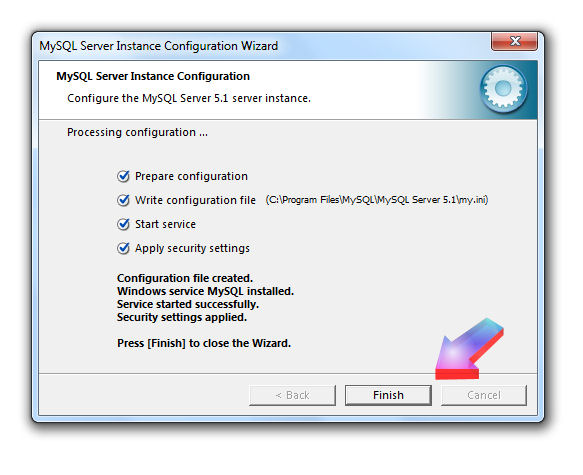
- Sometimes will fail on setting security and give option to Retry. Click Retry and should succeed.
MySQL Configuration
- Stop the MySQL database server. My Computer->Manage->Services->MySQL. Right Click and Stop.
- Navigate to MySQL application folder C:\Program Files\MySQL\MySQL Server 5.0
- Save copy of my.ini file
-
Double click on my.ini file at the bottom of the file add the lines
max_allowed_packet=16M
innodb_file_per_table - save the file
- Restart the MySQL server
MySQL GUI Tools Installation
- Download the MYSQL GUI Tools the MySQL site
- Select the Windows X86 option and save into C:\OpenVPMS\Installation folder.
- Double click on mysql-gui-tools-5.0-r12-win32.msi file in C:\OpenVPMS\Installation folder.
- Accept License
- Select default location
- Select Complete install
- Create shortcut to to MYSQL Administrator on desktop
MySQL Administrator Configuration
- Double Click MySQL Administrator icon
- Click Elipses next to Stored Connections
- Click New Connection Enter localhost, root, openvpms and localhost into fields.
- Click Apply and then Close Select stored connection and enter root password (openvpms) and click OK.
Apache Tomcat Installation
- Download Apache Tomcat and save in C:\OpenVPMS\Installation folder
- Double click on apache-tomcat-5.5.28.exe file in C:\OpenVPMS\installation folder.
- Select webapps in the available components
- Select default location.
- Set the admin password to openvpms
- Select the default JRE location. (If you happen to have mutliple JRE locations select the one installed during the Java SDK installation - Must at least be a 1.5XXX version)
- De-Select ReadMe and Run Apache Tomcat
Apache Tomcat Configuration
- Run Configure Tomcat from Apache Tomcat program menu.
- On Java tab in Java Options section add
-XX:PermSize=128m
-Xincgc
- Set Initial Memory Pool and Maximum Memory Pool to same value dependent on number of users. Suggest 512M.
- Clikc OK
IReport Installation
- Download IReport 3.0.0 from sourceforge and save to C:\OpenVPMS\Installation folder.
- Double click on the iReport installation file in the C:\OpenPMS\Installation folder.
- De-select sources
- Select default location
MySQL Database Driver Setup
- Download MySQL connector from MySQL and save to C:\OpenVPMS\Installation folder
- Copy the connector file mysql-connector-java-5.1.6-bin.jar found in the downloaded zip file to c:\OpenVPMS\openvpms-release-1.5.1\lib folder.
- Copy the same connector to Tomcat shared library folder i.e C:\Program Files\Apache Software Foundation\Tomcat 5.5\shared\lib
OpenVPMS Database Setup
- Open a command prompt.
- Navigate to C:\OpenVPMS\openvpms-release-1.5.1\db
-
Start the mysql command line client and enter the following commands
mysql -u root -p
mysql> source createdb.sql;
mysql> use openvpms;
mysql> source db.sql;
mysql> quit; - Navigate to C:\OpenVPMS\openvpms-release-1.5.1\bin
- To load the database with data suitable for a site converting from an existing system next enter dataload base
- To load the database with data suitable for a new site enter dataload setup
OpenVPMS Service User setup
- In My Computer -> Manage select Local Users and Computers -> Users
- Right click in User Pane and select New User...
- Enter user name and password as openvpms (you may use a different password for security but remember for later Apache Tomcat step)
- De-select change password at next login.
- Click Create.
- Double click new user in list and add to Administrators group.
- Logout and login as new openvpms user.
- Run open office and check no startup prompts.
- Logout and login as your local administrator.
OpenVPMS Application Install
- Copy openvpms.war file from c:\OpenVPMS\openvpms-release-1.5.1\webapps to Tomcat Webapps folder at C:\Program Files\Apache Software Foundation\Tomcat 5.5\webapps
Apache Tomcat Service setup
- In My Computer ->Manage ->Services right click the Apache Tomcat service and select properties
- On General tab select a Startup type of Automatic
- On Logon tab enter openvpms and your openvpms user account password setup above.
- Click on OK
- Start the service by right clicking and selecting Start
OpenVPMS Test
- Open up your Internet Browser and in the address enter http://localhost:8080/openvpms/app
- Login to OpenVPMS using user 'admin' and password 'admin'
OpenVPMS (1.2) Installation on Vista (FR)
Based on OpenVPMS Installation (Windows), here is the tasks list with plenty of screen shots I 've made while I installed OpenVPMS on the new computer with Vista (french version).
Linux
install problem
Tony, I'm trying to do a fresh build, and I'm failing at the step To build the archetypes: > cd openvpms-archetypes > maven -Dmaven.test.skip jar:install Based on the error (shown below) and poking around the ibibio site, it looks like at least one of the directories that it's looking for do not exist. Where would I fix this? Thanks Lee Error text: __ __ | \/ |__ _Apache__ ___ | |\/| / _` \ V / -_) ' \ ~ intelligent projects ~ |_| |_\__,_|\_/\___|_||_| v. 1.0.2 Attempting to download spring-aop-1.2.5.jar. Error retrieving artifact from [http://www.ibiblio.org/maven/springframework/jar s/spring-aop-1.2.5.jar]: java.io.IOException: Unknown error downloading; status code was: 301 WARNING: Failed to download spring-aop-1.2.5.jar. Attempting to download aopalliance-1.0.jar. Error retrieving artifact from [http://www.ibiblio.org/maven/aopalliance/jars/ao palliance-1.0.jar]: java.io.IOException: Unknown error downloading; status code was: 301 WARNING: Failed to download aopalliance-1.0.jar. Attempting to download drools-all-jdk5-2.1.jar. Error retrieving artifact from [http://www.ibiblio.org/maven/drools/jars/drools- all-jdk5-2.1.jar]: java.io.IOException: Unknown error downloading; status code w as: 301 WARNING: Failed to download drools-all-jdk5-2.1.jar. Attempting to download janino-2.3.8.jar. Error retrieving artifact from [http://www.ibiblio.org/maven/janino/jars/janino- 2.3.8.jar]: java.io.IOException: Unknown error downloading; status code was: 301 WARNING: Failed to download janino-2.3.8.jar. Attempting to download commons-beanutils-core-1.7.0.jar. Error retrieving artifact from [http://www.ibiblio.org/maven/commons-beanutils/j ars/commons-beanutils-core-1.7.0.jar]: java.io.IOException: Unknown error downlo ading; status code was: 301 WARNING: Failed to download commons-beanutils-core-1.7.0.jar. Attempting to download oro-2.0.8.jar. Error retrieving artifact from [http://www.ibiblio.org/maven/oro/jars/oro-2.0.8. jar]: java.io.IOException: Unknown error downloading; status code was: 301 WARNING: Failed to download oro-2.0.8.jar. The build cannot continue because of the following unsatisfied dependencies: spring-aop-1.2.5.jar (try downloading from http://www.springframework.org/) aopalliance-1.0.jar (try downloading from http://www.aopalliance.org/) drools-all-jdk5-2.1.jar (try downloading from http://drools.codehaus.org/) janino-2.3.8.jar (try downloading from http://www.janino.net/) commons-beanutils-core-1.7.0.jar (try downloading from http://jakarta.apache.org /commons/jxpath/) oro-2.0.8.jar (try downloading from http://jakarta.apache.org) Total time: 9 seconds Finished at: Sun Jan 14 23:10:54 EST 2007 C:\openvpms\openvpms-archetypes>Installing on FreeBSD...
Hi:
Just wondering if anyone has tried installing this on FreeBSD 7.0 RELEASE?
We have Tomcat5.5, Mysql 5.0.33, Sun JDK 1.5.0_13 running on a FreeBSD Machine and I can't seem to figure out how to get the database loaded.
If anyone has any experience or installation instructions, I would appreciate your help....
Regards,
Fred Schnittke
How to Setup Ubuntu Server ready to Install OpenVPMS
Install the Operating System
Install the appropriate Ubuntu Server operating system. If want a GUI you can do this with ubuntu desktop and then install all the dependencies as described. This setup has been tested on Ubuntu 9.10 but should work at least on 8.10 or more recent. If you are installing the server edition install mysql, tomcat6, LAMP stack and printer server when prompted during the installation process.
Install Required Software
From a command prompt install the following packages and their dependancies if they are not already installed:
sudo apt-get install mysql-server phpmyadmin tomcat6 tomcat6-admin libmysql-java
Make Required Configuration Changes
Increase Memory Limit of PHP
sudo nano /etc/php5/apache2/php.ini
Increase upload_max_filesize from 2M to 20M
This will allow you to import the database using phpmyadmin
Create a symbolic link for the mysql-java connector in tomcat
sudo ln -s /usr/share/java/mysql-connector* /usr/share/tomcat6/lib/
Change the ubuntu default settings in tomcat6
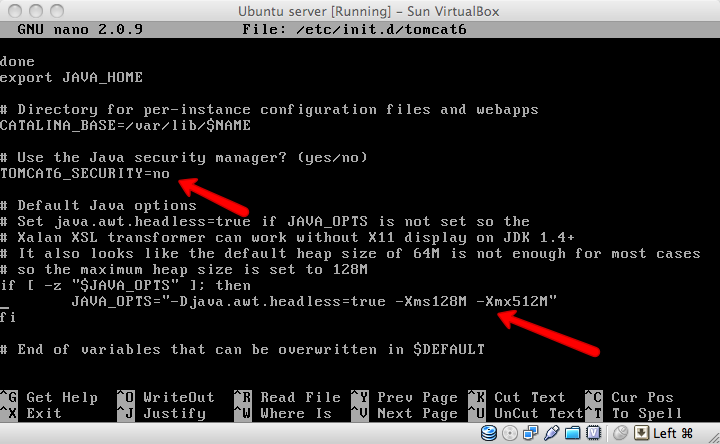
sudo nano /etc/default/tomcat6
- Increase tomcat memory by adding the following to the JAVA_OPTS line: -Xms128M -Xmx512M (This amount of memory seems to work well for me.)
- Disable the tomcat6 java security manager by changing the following line from the default '=yes' to: TOMCAT6_SECURITY=no. I'm no java security expert but from my reading this default setting is probably overkill and the webapp won't run with it turned on. Please correct me if there's a better way.
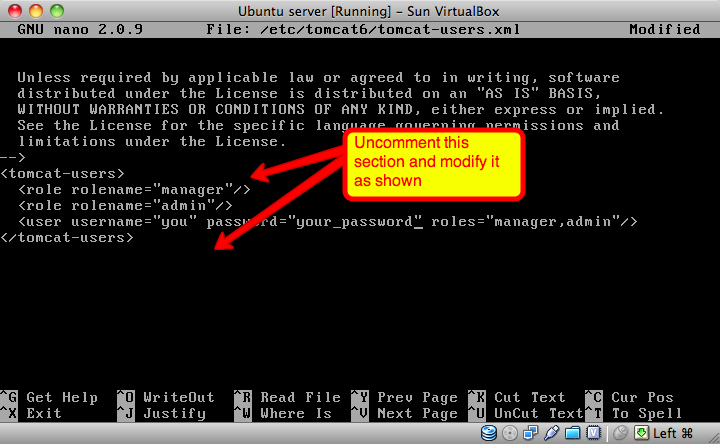
- Add a user to tomcat with admin and manager roles so you can access the web-manager
sudo nano /etc/tomcat6/tomcat-users.xml
Restart the services:
- Restart apache
sudo /etc/init.d/apache2 restart
- Restart tomcat
sudo /etc/init.d/tomcat6 restart
Note: if you get the message "Could not reliably determine the server’s fully qualified domain name, using 127.0.1.1 for ServerName" starting Apache, then you need to edit /etc/apache2/httpd.conf (which will initially be empty) to contain the one line
ServerName localhost
Then restart apache and the error should not appear.
Now we are ready to install OpenVPMS
Firstly, need to get the IP address of your server? Use the ifconfig command.
OpenVPMS installation instructions to follow
Enable OpenVPMS Logging in Ubuntu
Ubuntu mucks up the path for the log files to be written so by default it is trying to right them in the root directory and gets permission denied so you don't get any output.
To fix it correct the path in the log4.properties file in your OpenVPMS install:
sudo nano /var/lib/tomcat6/webapps/openvpms/WEB-INF/classes/log4j.properties
Change log4j.appender.fileout.File=openvpms.log to log4j.appender.fileout.File=/var/lib/tomcat6/webapps/openvpms.log
and
Change log4j.appender.fullout.File=openvpms-full.log to log4j.appender.fullout.File=/var/lib/tomcat6/webapps/openvpms-full.log
Now save your changes and restart tomcat and your log files should now be there.
Install Openoffice headless as a service in Ubuntu
It's taken me forever to figure out to get this going so now that I've found it out here's the solution (thanks to this post: http://code.google.com/p/openmeetings/wiki/OpenOfficeConverter#Starting_OO_in_headless_with_Version_OpenOffice_3.0_++)
First of all install the headless openoffice from the repositories:
sudo apt-get install openoffice.org-headless openoffice.org-writer openoffice.org-draw
The 2 latter packages are required or you will get an error message: This url is not supported
Now you need to create a script to start it as a service:
sudo nano /etc/init.d/openoffice.sh
Paste the following code into that file:
#!/bin/bash
# openoffice.org headless server script
#
# chkconfig: 2345 80 30
# description: headless openoffice server script
# processname: openoffice
#
# Author: Vic Vijayakumar
# Modified by Federico Ch. Tomasczik
#
OOo_HOME=/usr/bin
SOFFICE_PATH=$OOo_HOME/soffice
PIDFILE=/var/run/openoffice-server.pidset -e
case "$1" in
start)
if [ -f $PIDFILE ]; then
echo "OpenOffice headless server has already started."
sleep 5
exit
fi
echo "Starting OpenOffice headless server"
$SOFFICE_PATH -headless -nologo -nofirststartwizard -accept="socket,host=127.0.0.1,port=8100;urp" & > /dev/null 2>&1
touch $PIDFILE
;;
stop)
if [ -f $PIDFILE ]; then
echo "Stopping OpenOffice headless server."
killall -9 soffice && killall -9 soffice.bin
rm -f $PIDFILE
exit
fi
echo "Openoffice headless server is not running."
exit
;;
*)
echo "Usage: $0 {start|stop}"
exit 1
esac
exit 0
Exit the nano text editor saving the file as you do.
Now make the script executable:
sudo chmod 0755 /etc/init.d/openoffice.sh
Make it start automatically on reboot by executing this command:
sudo update-rc.d openoffice.sh defaults
Now start the service by running
sudo /etc/init.d/openoffice.sh start
Now all should be good!
Linux Install Guide
Introduction
This guide describes how to install OpenVPMS on your veterinary clinic.
The guide is intentionally brief and describes the most typical installation for OpenVPMS. After completing the installation, you will be ready to start using OpenVPMS for your veterinary clinic.
Installation checklist
OpenVPMS will run on most standard Sun JavaEE environments with an additional component of OpenOffice (used for document generation). You will need to make sure your einvornment includes:
- Java Development Kit
- Java Application Server
- Relational database with a type 4 database driver
- OpenOffice (headless version)
We have tested the following Sun JavaEE environments
- Apache Tomcat with mySQL
- IBM WebSphere Application Server Community Edition with mySQL and mySQL Connector/J
Note: Sun JavaEE applications like OpenVPMS can run on many different type of operating systems like Microsoft Windows, Mac OS X, Linux and more!
If you need help installing the prerequiste software, please see the Install Guide for those products.
Download and Install OpenVPMS
To perform the installation you will need to download and unpack the OpenVPMS installation files.
Download the latest installation archive from: http://www.openvpms.org/download
After downloading, unpack the ZIP file in a directory - <openvpms_tmp>.
Install the OpenVPMS database schema
Configures the database to store data using UTF8 (to support english and double-byte characters like Chinese). By default, mysql uses latin1 instead of UTF8 to store data. You need to add a configuration setting into your database so that the server and client does everything by UTF8.
MySQL Configuration - Linux (my.cnf) or Windows (my.ini):
[mysqld]
character-set-server=utf8
default-collation=utf8_unicode_ci

[client]
default-character-set=utf8
This populates the database with the database structure.
	Linux/Windows:
cd <openvpms_tmp>
cd db
mysql -u root -p
mysql> drop database openvpms;
mysql> source createdb.sql;
mysql> use openvpms;
mysql> source db.sql;
mysql> quit;
Note: This will create a database "openvpms" with username of "openvpms" and password of "openvpms".
Load default OpenVPMS data
This will load the database with the initial data needed for the application. It will setup a one vet veterinary clinic in Australia.
	Linux:
cd <openvpms_tmp>
cd bin
./dataload.sh setup

Windows:
cd <openvpms_tmp>
cd bin
dataload.sh setup
Note: This will create an administrator user account with username of "admin" and password of "admin". Retain this information for later when we first login to the system.
Configure the Java Application Server to support JasperSoft Reporting
JasperSoft needs to be configured to run in a headless mode for it to generate reports like invoices.
	Linux with IBM WebSphere Application Server Community Edition:
export GERONIMO_OPTS=-Djava.awt.headless=true

Linux with Apache Tomcat:
export CATALINA_OPTS=-Djava.awt.headless=true
Note: Suggested to put environmental settings in your shell startup so that you do not need to execute the command at each time before Java Application Server startup.
Start the OpenOffice daemon
OpenVPMS uses OpenOffice for form generation. As a result, we have to run OpenOffice in a headless mode so that when we generate form slike vaccinations certificates.
	Linux:
soffice.bin -headless -nofirststartwizard -accept="socket,port=8100;urp;" &
Note for Linux: It may help that you add soffice.bin in your path and make the OpenOffice daemon a startup service.
Start the OpenVPMS Document Import daemon
OpenVPMS has the ability to automatically import customer and patient records and patient investigations into the system. This daemon uses the automatic scheduling utility ("at" in Microsoft Windows or "cron" in Linux) provided by the operating system.
	Linux/Windows:
mkdir <openvpms-tmp>/docimport <openvpms-tmp>/docarchive
Within your automatic scheduling utility, set the OpenVPMS document import daemon to run.
	Linux:
echo "cd <openvpms-tmp>/bin/" > /etc/cron.hourly/openvpms-docimport.sh
echo "./docload.sh --byid --source <openvpms-tmp>/docimport --dest <openvpms-tmp>/docarchive --verbose" >> /etc/cron.hourly/openvpms-docimport.sh
chmod 755 /etc/cron.hourly/openvpms-docimport.sh
Install the Database type 4 driver
A database type 4 driver is used to connect the Java Application Server to the database.
Download and copy the mySQL connector/j jar file to <java_home>/jre/lib/ext. This will allow you to skip manually modifying your Java classpath.
Start the Java Application Server daemon
Follow the startup instructions in your Java Application Server.
Install the OpenVPMS Sun JavaEE Web Application Archive (WAR)
Follow the instructions in your Java Application Server to install WARs.
Start the OpenVPMS Sun JavaEE application
Follow the instructions in your Java Application Server to start WARs.
Configure the OpenVPMS
You're almost done. You'll need to setup Scheduling and Work List and once you're done, you'll have a fully working veterinary practice management software system.
Logging in for the first time
By default, the application would be available at http://localhost:8080/openvpms/. Use the username of "admin" and password of "admin" to first login to the system.
Setting up Scheduling
Navigate to "Administration" -> "Organization". Modify the "Main Appointment Schedule" and "Main Surgery Schedule" with start and end hours. Create a new "Schedule View" called "Schedule View". Add the "Main Appointment Schedule" and "Main Surgery Schedule". Click "Ok". Navigate back to "Administration" -> "Organization" and find "Main Clinic". Edit the "Main Clinic" and in the "Scheduling Views", add the "Schedule View" you just created. Save, logout and then re-login and you should be able to navigate to "Scheduling" and be able to add, modify and remove appointments.
Setting up Work List
Navigate to "Administration" -> "Organization". Create a new "Work List View" called "Work List View". Add the "Main Hospital List" and "Main WaitingList". Click "Ok". Navigate back to "Administration" -> "Organization" and find "Main Clinic". Edit the "Main Clinic" and in the "Work List Views", add the "Work List View" you just created. Save, logout and then re-login and you should be able to navigate to "Work List" and be able to add, modify and remove customers/clients on and off lists.
Note: Stock/Inventory Management module is not enabled by default.
Congratuations!
Your veterinary practice management software is now installed!
From this point, here are some other things you might need to customize before "production" use.
- Load customers
- Load patients
- Load products
- Documents templates
- And more!
Mac (OSX)
Quick guide to using openVPMS in OSX with mamp
Requirements:
- openvpms installation files
- MAMP (for mysql database)
- apache tomcat6
- Connector/J
- libreoffice
Download OpenVPMS Installation Files
Download the latest OpenVPMS Installation files. Create a folder within your home folder to unzip the release into.
The following assumes a user named user: Move the package to ~/user/openvpms and unzip the Installation Pack. This should create a ~/user/openvpmsopenvpms-release-x.x.x folder with the necessary files to install OpenVPMS.
Download and install MAMP
Installing MAMP provides a really easy way to configure and run MySQL. Download from http://www.mamp.info/en/downloads/
The free MAMP is fine, you don't need the paid pro version.
Download tomcat6
Download tar.gz core binary distribution of Apache Tomcat version 6 from http://tomcat.apache.org/download-60.cgi
Unpack it and then move it to your home directory so it will be in ~/user/apache-tomcat-6.x.x/lib/
Connector/J
Download the connector/J which is needed to connect openvpms to the database. You then extract it and copy the mysql-connector-java-x.x.x-bin.jar to:
- ~/user/openvpmsopenvpms-release-x.x.x/lib/
- ~/user/apache-tomcat-6.x.x/lib/
Libreoffice
Download libreoffice and install it
Setting the variables and paths
open a terminal window and edit your .profile file eg. type:
nano .profile
add the following to your .profile file
 export JAVA_HOME=/Library/Java/Home

export CATALINA_HOME=/users/user/apache-tomcat-6.0.35

export PATH=/Applications/LibreOffice.app/Contents/MacOS:$PATH
Installing a fresh installation
Start the mysql database using mamp. Using phpmyadmin (installed with mamp) go the import tab and navigate to ~/user/openvpmsopenvpms-release-x.x.x/db/createdb.sql
Import it and then navigate to ~/user/openvpmsopenvpms-release-x.x.x/db/db.sql and import it as well.
Now in a terminal window cd to ~/user/openvpmsopenvpms-release-x.x.x/bin
run the setup by typing
./dataload.sh setup
Copy the openvpms.war from ~/user/openvpmsopenvpms-release-x.x.x/webapps/ to ~/user/apache-tomcat-6.x.x/webapps/
Starting and stopping tomcat
Hopefully now you are ready to go. I installed this a long time ago so to the best of my knowledge I haven't missed any necessary configuration. To start and stop tomcat cd to ~/user/apache-tomcat-6.x.x/bin and then run
./startup.sh
or
./shutdown.sh
using the terminal
Once it starts up you should be able to access openvpms at http://localhost:8080/openvpms/app